2012 Ford F250 Grill Removal
& Headlight & Turn Signal & Fog Light Bulb Replacement
By Rob Robinette
The front grill must be removed to replace headlight and turn signal bulbs on the 2012 F250. The Owner's Manual incorrectly describes how to remove the grill. You cannot release the lower spring clips by inserting a screwdriver between the bumper and grill (as you could on older model F250s). You must insert a long screwdriver from the top or side of the grill to access the grill's spring clip release holes (shown below).
Note: It may be possible to replace the headlight bulbs without pulling the grill. This was posted on the ford-trucks.com forum:
"On my 2011 F250, I replaced the headlight bulbs without removing the grill, the right side was pretty easy to get to, the left side was a bit trickier but I easily removed the air box/coolant reservoir out of the way and I was able to get my hand down there and replace the bulb. I had the whole job done in ten minutes."
There's no way I can access my headlight bulbs in that manner. On my 2012 F250 diesel with dual batteries I had to remove the headlight housings.
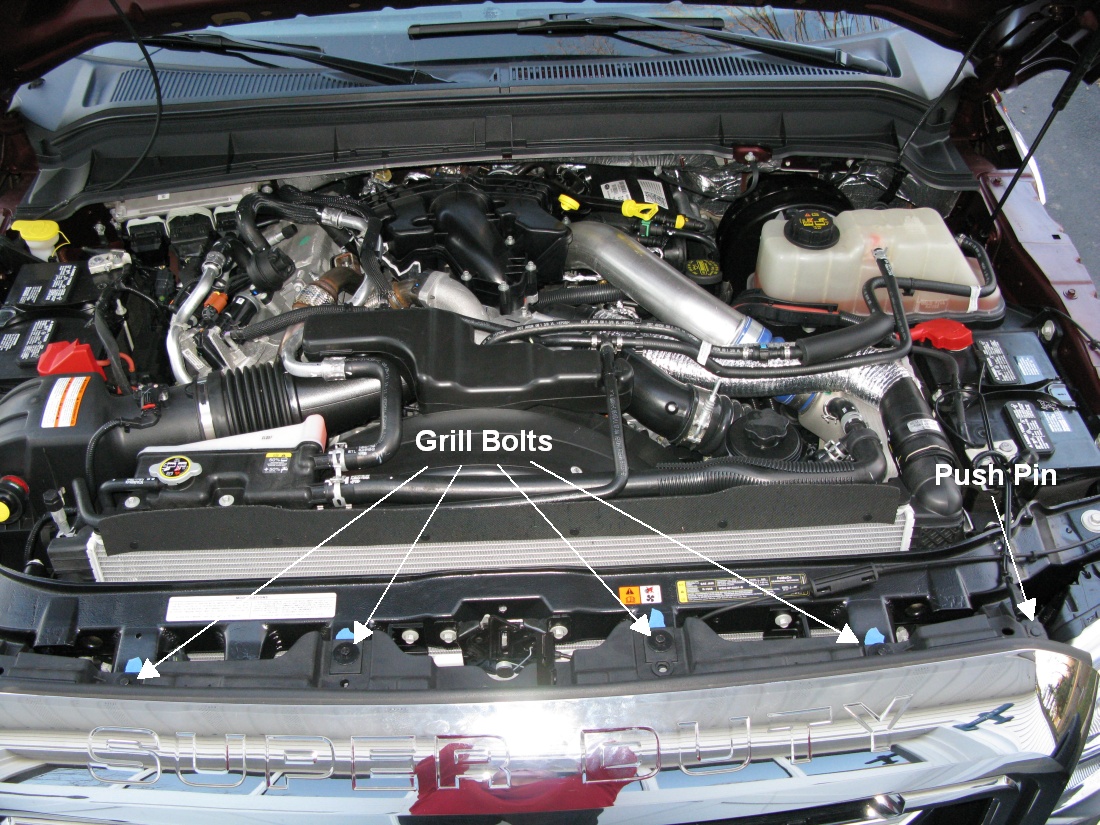
Grill Bolts & Driver Side Push Pin
Note blue painter's tape marking grill alignment.
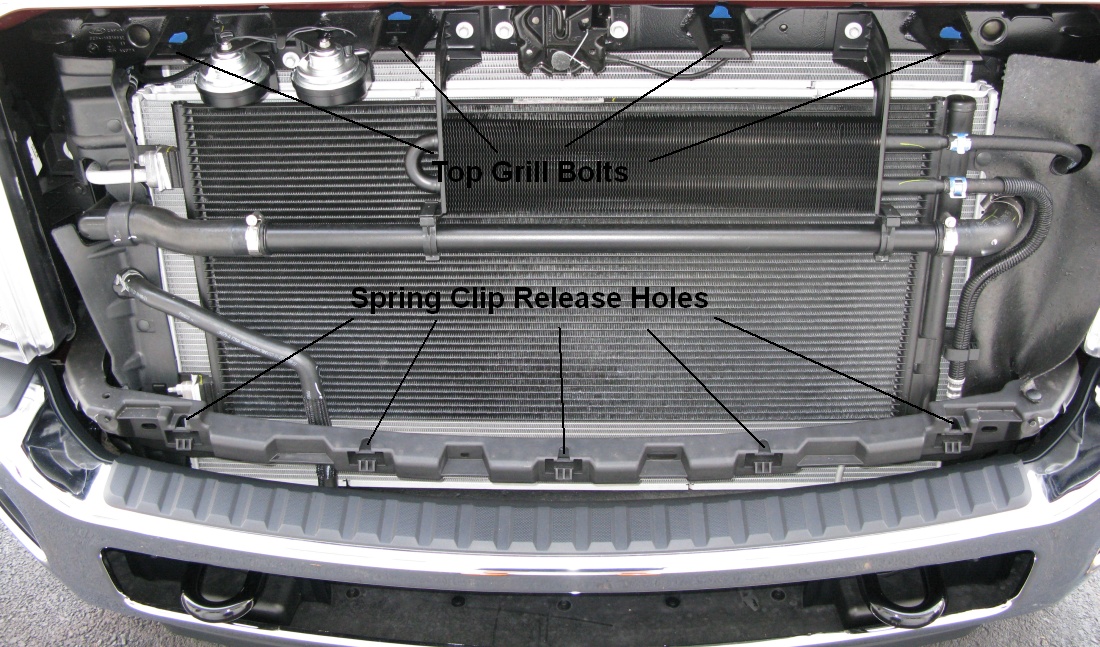
Grill Bolts with Blue Alignment Tape & Spring Clip Release Holes
Start by opening the hood and marking the grill alignment with tape at the 4 top grill bolts. This will allow you to align the grill exactly as it was at the factory so you'll have an even grill to hood gap. You can see my blue alignment tape near the top grill bolts in the picture above.

Driver Side Push Pin
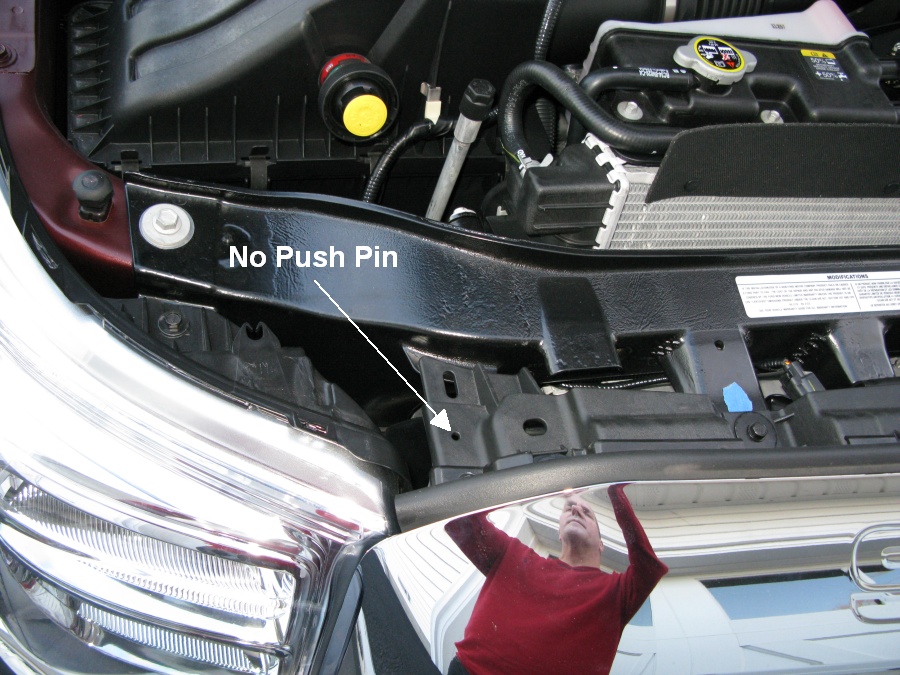
Passenger Side Push Pin Location
(not present on my 2012 F250 diesel)
Next pop the driver side rubber radiator flap push pin. It connects the rubber radiator flap to the top of the grill. It's located on the grill next to the top of the driver side headlight. Remove the passenger side push pin if installed (not installed on my 2012 F250 diesel)
Next remove the 4 bolts that hold the top of the grill in place--see pictures above. Remember to mark the grill alignment with tape.
A 10mm socket will work with all of the grill and headlight bolts.
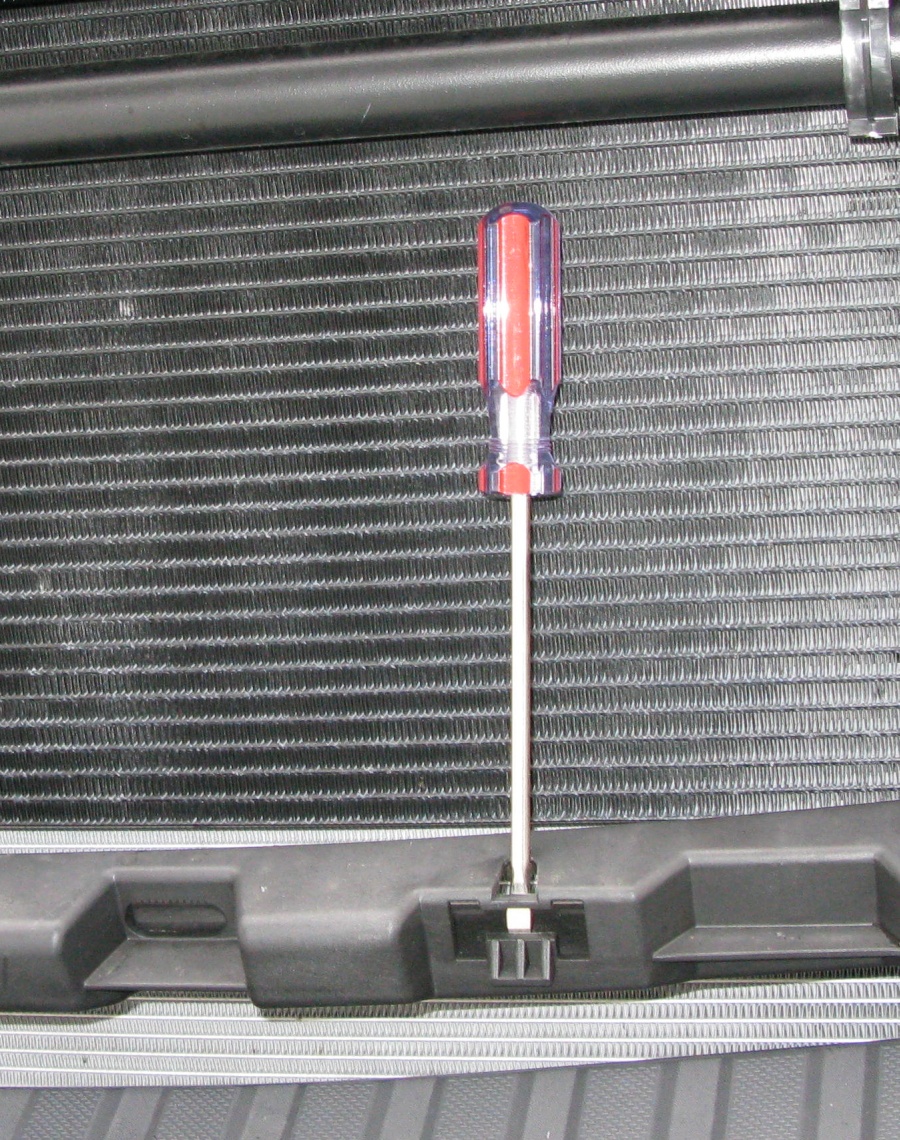
Release Spring Clip by Pushing Down Through Hole with Long Screwdriver
To remove the bottom grill spring clips gently pull the top of the grill outward just enough to reach down between the grill and radiator from the side or top of the grill. With a long standard screwdriver release the spring clips by pushing down on the metal clip through the holes shown above. Start by coming in from the driver's side of the grill and moving toward the passenger side. When the last of the 5 clips release remove the grill. It's made of plastic but it is surprisingly heavy so be careful.
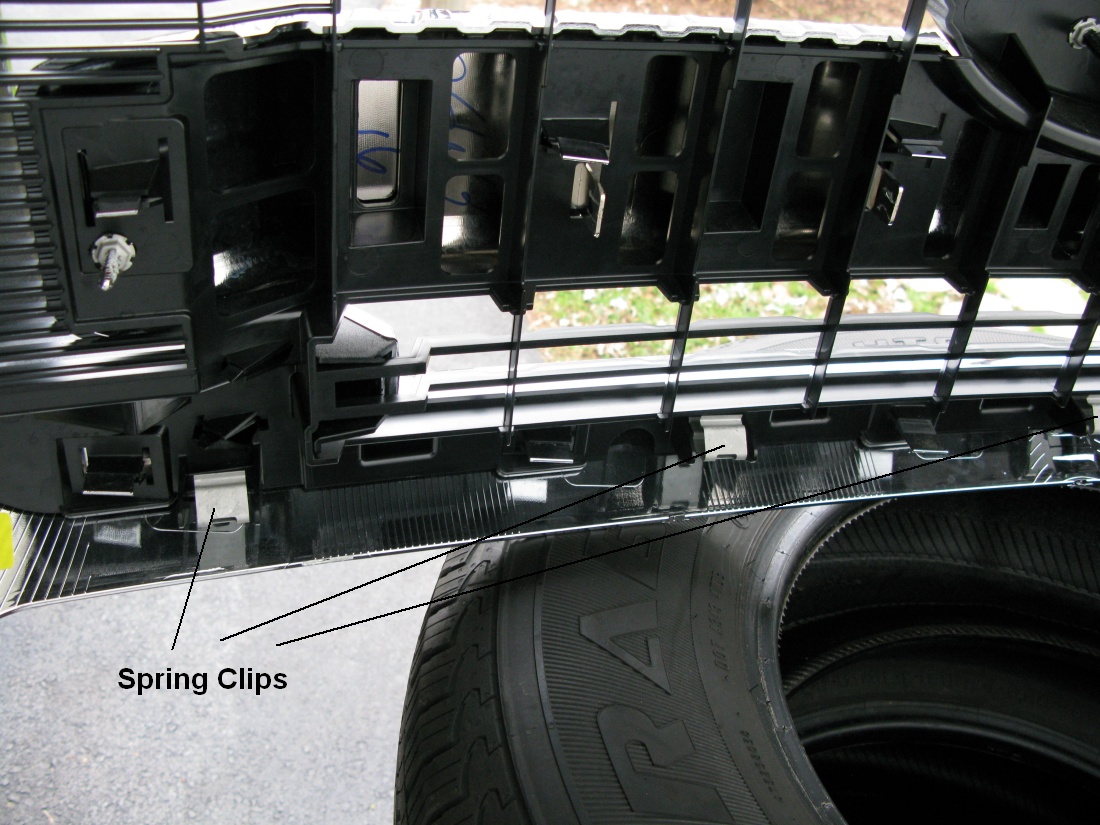
Back Side of Grill Showing 3 of the 5 Metal Spring Clips
Replacing Headlight and Turn Signal Bulbs
The headlight bulbs are H13 type 55/65w low/high beam bulbs. These bulbs are also called 9008 bulbs. If you plan to run higher wattage bulbs it would be best to install a relay harness to preserve the life of your headlight and high/low beam switches.
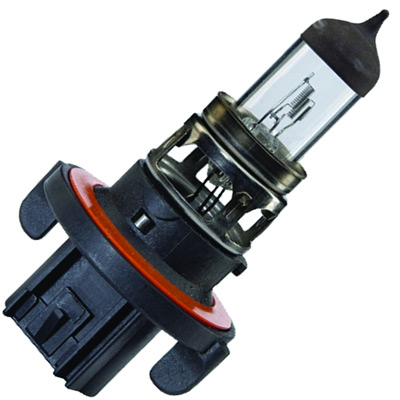
H13 (or 9008) Headlight Bulb
Remember not to touch a headlight or fog light bulb with your bare fingers. The oils on your fingers will cause the bulb to overheat and fail. It's best to wear gloves when replacing bulbs.
The headlight & turn signal housings are held in by 4 bolts: 1 at the top, two on the inside side and one on the bottom. There is also a spike and rubber grommet on the outside side of the headlight housing. The lower bolt is a little difficult to access but using a socket and extension I was able to get the socket between the bumper and the headlight by inserting it at the inside lower corner then sliding it over to the bolt. Once all 4 bolts are out just pull the headlight housing straight out to release the spike and rubber grommet.
The bulb sockets are released from the housing by turning them left (counterclockwise) about 1/3 of a turn and pulling them out. The electrical socket will release by pushing on the socket tab while pulling the bulb housing from the bulb socket.
Install the new bulb into the bulb socket and make sure the locking tab clicks into place, then insert the socket into the headlight housing and turn about 1/3 clockwise to lock them in place.
The turn signal bulbs are 3157NA bulbs. They are replaced in the same manner as the headlight bulbs.
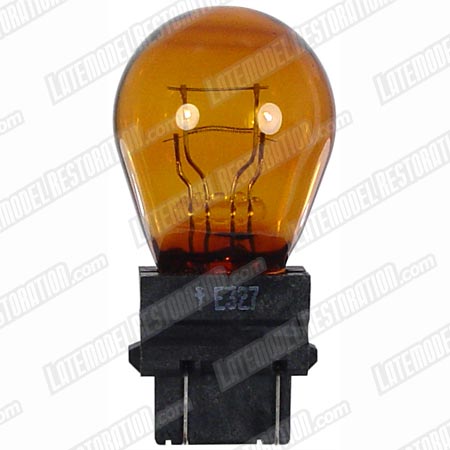
3157NA Turn Signal Bulb
Reinstall the Grill
Test your lights before re-installing the grill.
Insert the spring clips into their holes along the bottom of the grill. Push the bottom of the grill until all 5 spring clips snap into place. Pull gently on the bottom of the grill to verify it's secure.
Install the 5 top bolts and align the grill with the alignment tape and tighten the 5 bolts.
Ensure the radiator flap is positioned correctly and replace the driver side rubber radiator flap push pin in its hole in the top of the grill.
Replacing Fog Light Bulbs
The grill does not need to come off to replace the stock fog light bulbs. The fog lights located in the bumper are H10 type 42 watt bulbs. These bulbs are also called 9145 bulbs. To change them simply reach through the fender well, under the metal fog light guard, grasp the bulb connector and turn it 1/3 of a turn counterclockwise to release it. There's enough harness to pull the bulb downward so you can see the connector and bulb. Push the release on the connector and remove the bulb from the bulb socket.
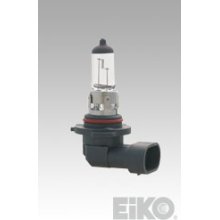
H10 (or 9145) Fog Light Bulb
Take a step back and enjoy your handiwork.