How to Install Offset Ball Joints for Added Camber
or Install Front Roll Center Adjusters
By Rob Robinette
Installing offset ball joints to increase negative camber is identical to this installation, just make sure you get the offset in the right direction--you want the ball joint pin offset inward, toward the center of the car to lean the bottom of the wheel outward which adds negative camber.
The Megan Racing Front Roll Center Adjusters replace the stock lower control arms' ball joints. They move the lower control arm's outboard attachment point 3/4 of an inch lower--which changes the control arm's angle--which raises the roll center--which reduces the roll moment arm--which reduces body roll. The stock 16 inch AP1 wheels will fit with these adjusters installed.
More information on the S2000s roll centers can be found here: Roll Centers
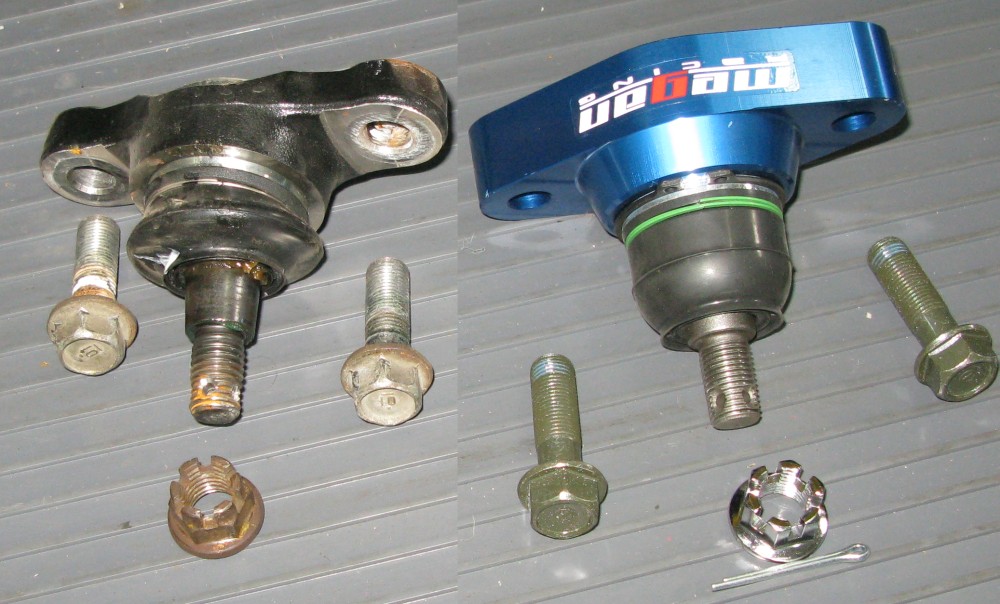
Stock and Megan Racing Ball Joints
Special Tools Needed
Ball Joint Separator to pop the lower control arms' ball joints. I got mine from Harbor Freight. This is a good quality set of tools.
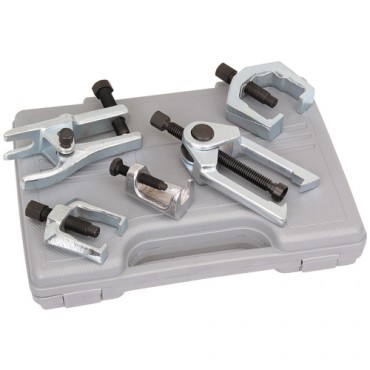
HarborFreight.com Front End Service Tool Set $70
Remove the Stock Lower Control Arm Ball Joints
Slightly loosen both front wheels' lug nuts
Chock a rear tire and jack the front of the car and support it with jack stands
Remove the front wheels
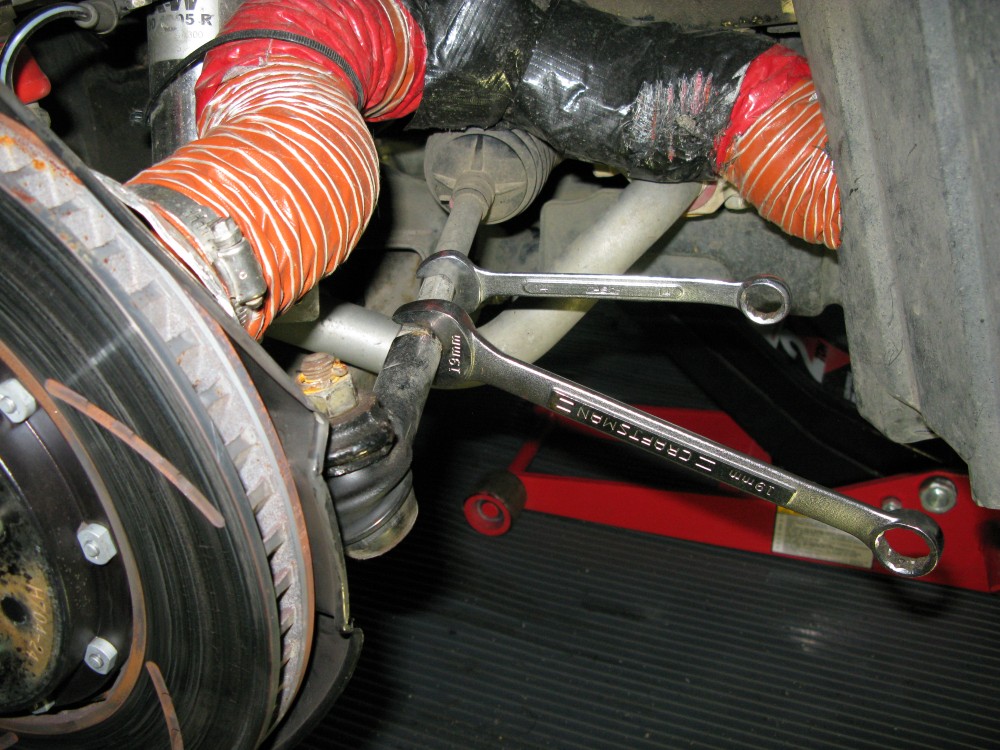
Remove the lower control arm ball joint's cotter pin. A pair of needle nose pliers makes it easy.
Remove the ball joint's 19mm castle nut. I recommend using an impact wrench but it isn't necessary.
Re-install the castle nut upside down until its bottom is flush with the ball joint's pin. This will protect the ball joint pin from being damaged by the ball joint removal tool. This assumes you don't want to damage the ball joints so you can reuse them or sell them. Be sure and put some grease on the ball joint tool's threads and the part that slides under the ball joint rubber boot (see diagram below). it takes a lot of force to pop the ball joint and it makes a very loud pop when it goes so be ready for it. I almost pissed myself the first time I did it :D
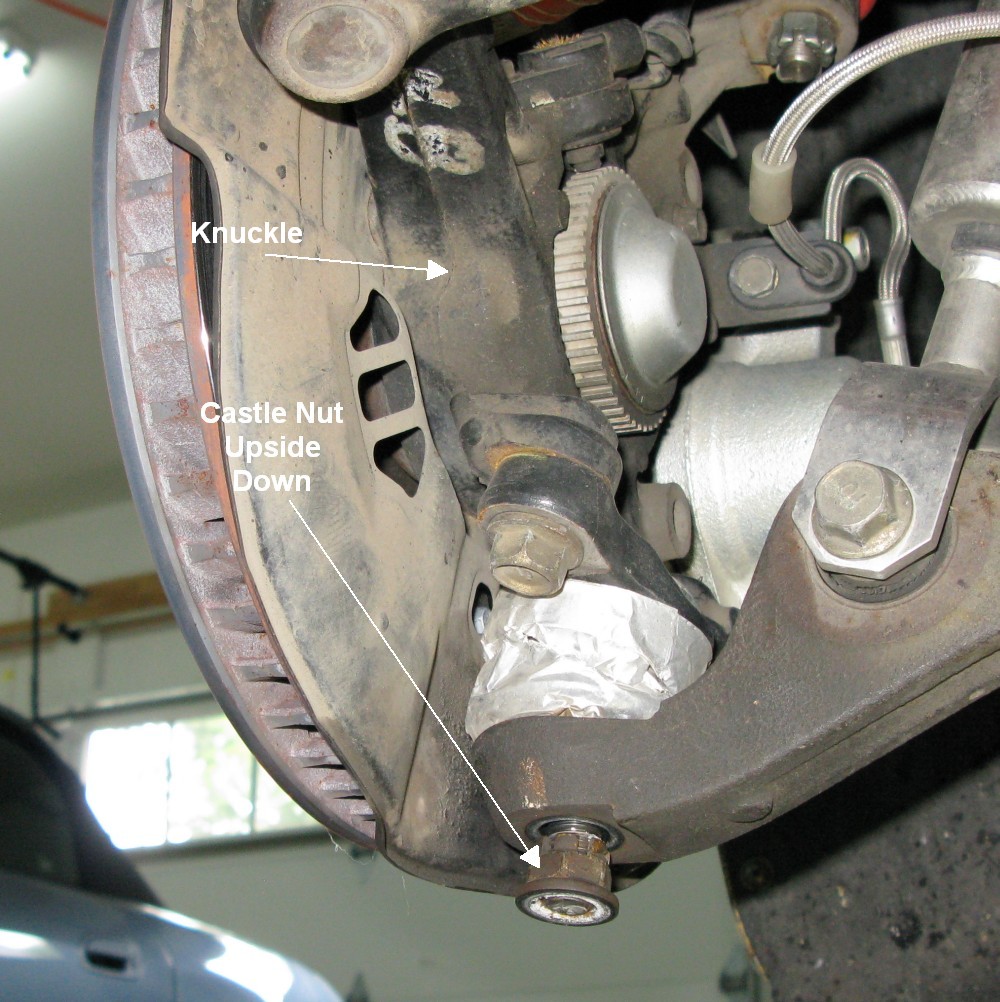
Castle Nut Upside Down and Flush with Pin, Ready For Ball Joint Tool
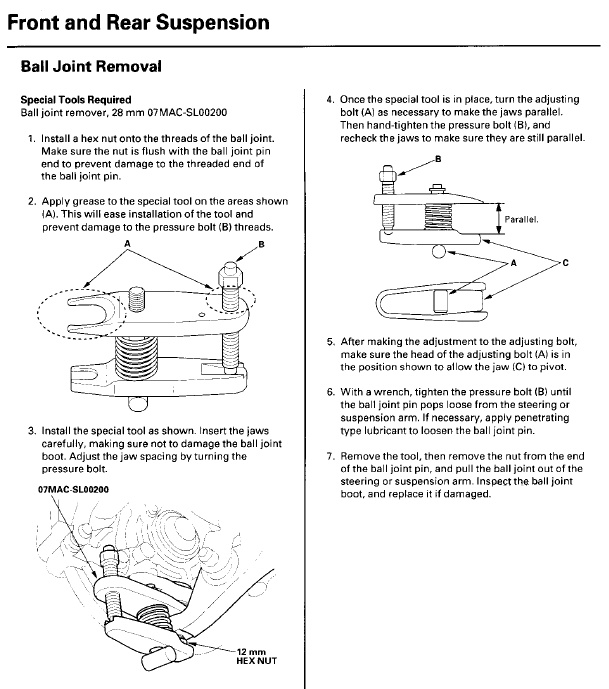
The S2000 Shop Manual on Ball Joint Removal
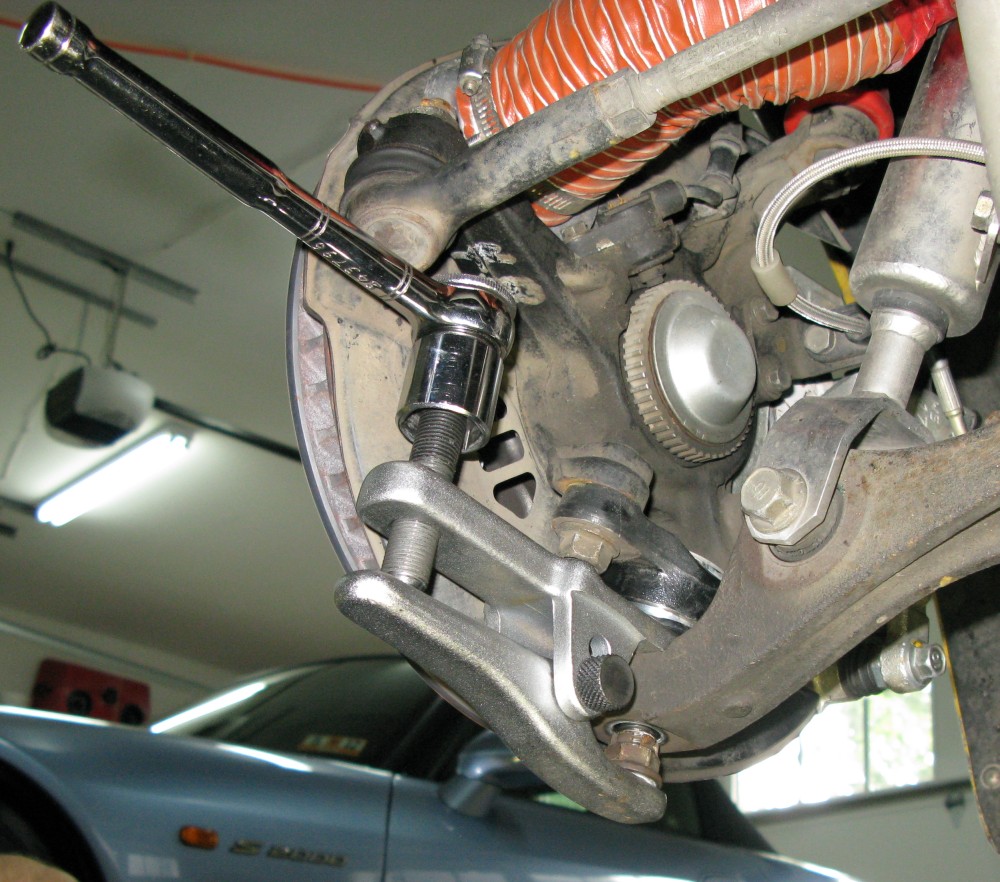
Ball Joint Tool Ready To Pop it Loose
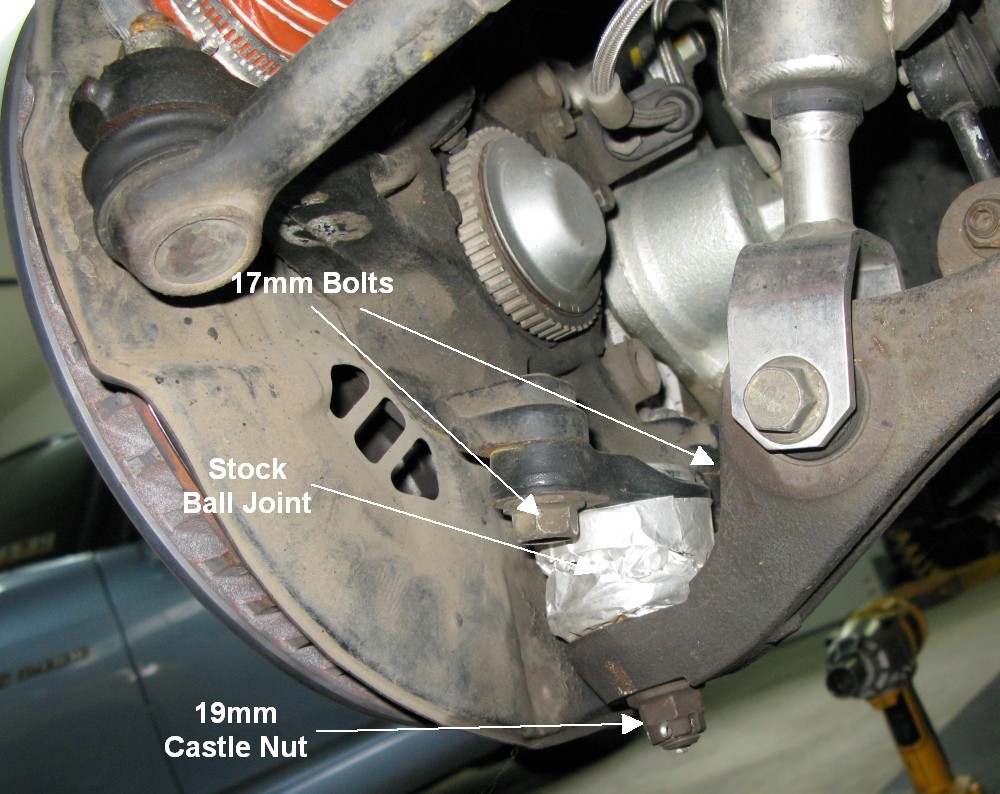
Remove the two 17mm bolts that hold the ball joint to the wheel knuckle, again an impact wrench is your friend here
Lift the knuckle up enough to get the ball joint pin out of the knuckle and remove the old ball joint
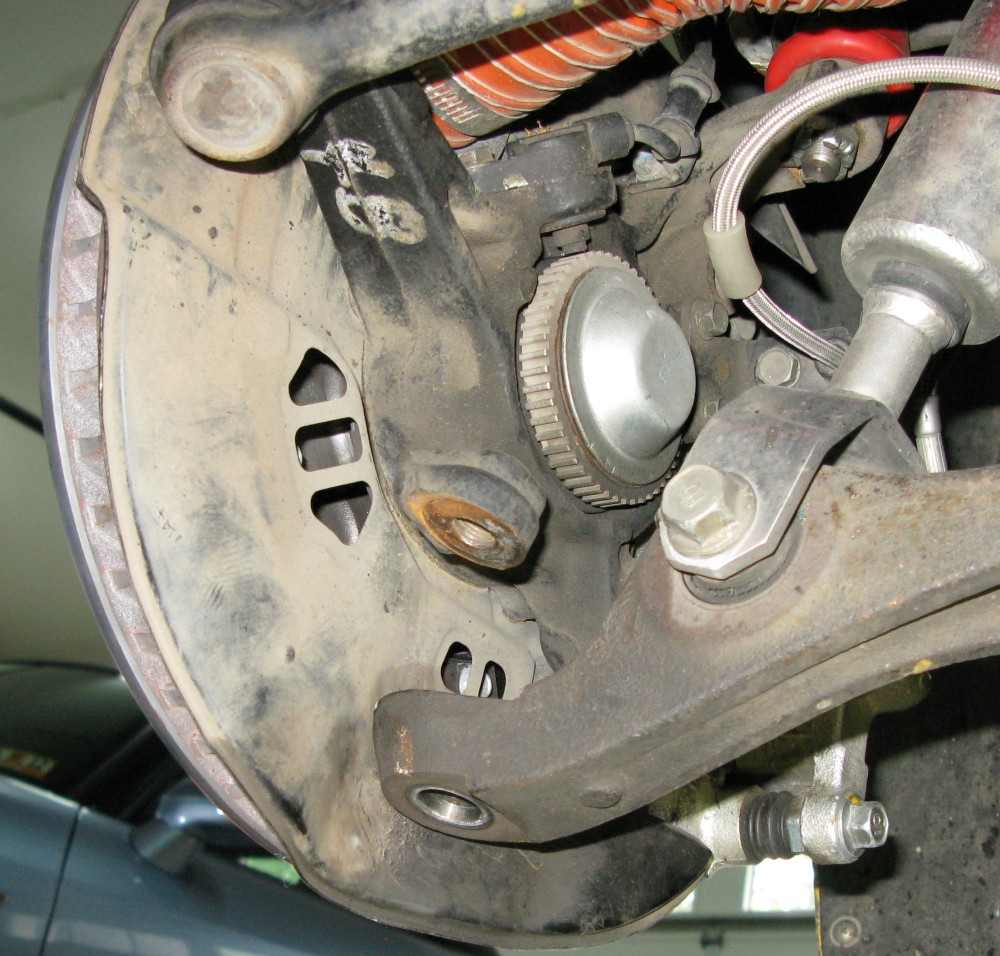
Stock Ball Joint Removed
Install the Offset Ball Joints or Roll Center Adjusters
For offset ball joints make sure you get the offset in the right direction--you want the ball joint pin offset inward, toward the center of the car to lean the bottom of the wheel outward which adds negative camber.
The Megan Racing Roll Center Adjusters are symmetric so it doesn't really matter which way you install them but I assume they want the logo decal on the outside, facing the wheel.
Put a little high temperature grease on the tapered part of the ball joint pin, don't put any on the threads.
Attach the new ball joints using the supplied longer 17mm bolts. Snug them down but don't try to tighten them until you get the castle nut on the ball joint pin snugged down.
Lift the knuckle enough to allow the ball joint pin to fit into the lower control arm hole. You may have to "wiggle" the knuckle to get the pin to completely insert into its hole.
Screw the new 19mm castle nut on the pin and snug it down.
Torque the 17mm ball joint bolts to 47 lb-ft
Torque the 19mm castle nut to 43-51 lb-ft. This means torque it to 43 lb-ft and see if the cotter pin holes line up. If they don't turn the castle nut a little more until you can get the cotter pin through the nut and pin hole. You shouldn't have to go over 51 lb-ft to align the cotter pin holes.
I like to put Aluminum tape around the rubber ball joint boots to protect them from the brake rotor heat. You must do this if you remove your brake dust shields or you will melt the boots when you track your car.
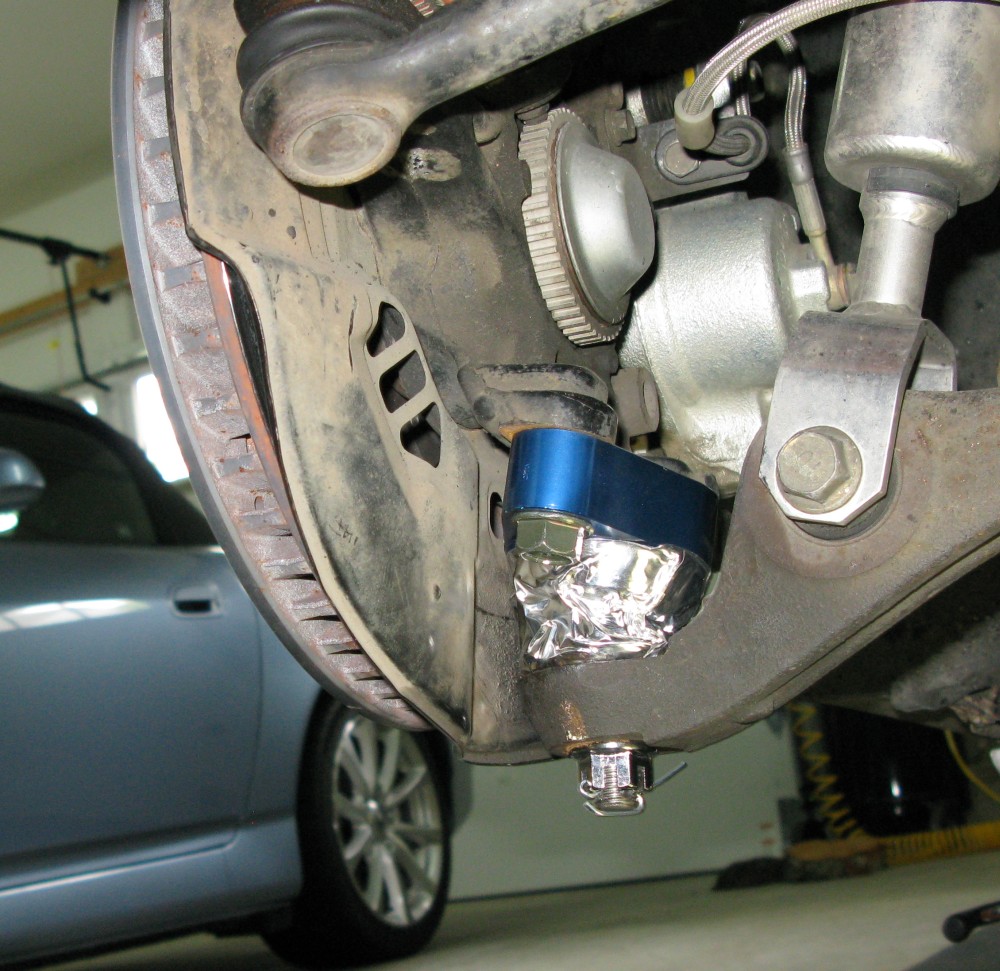
Roll Center Adjusters Installed and Taped
Install the wheels and torque the lug nuts to 80 lb-ft.
After installing the Megan Racing front roll center adjusters I had to raise my front spring perches 0.15 inches to get back to the ride height I had before the install. With KWV3s this was 3 turns up (more shock extension). After I drive the car some to let the suspension settle I'll verify the ride heights.
Installing these roll center adjusters will add some toe-out so the car will probably need a front end alignment. I used a Longacre toe-in gauge to set the front toe back to 0. It was at about 0.4 inch total toe-out after adding both a Megan Racing front bump steer kit (steering rack shim) and these roll center adjusters. Most of the toe-out came from the bump steer kit. I needed 1 1/4 turns of toe-in at the toe adjusters to get back to 0 toe. See the Alignment How-To for more info.
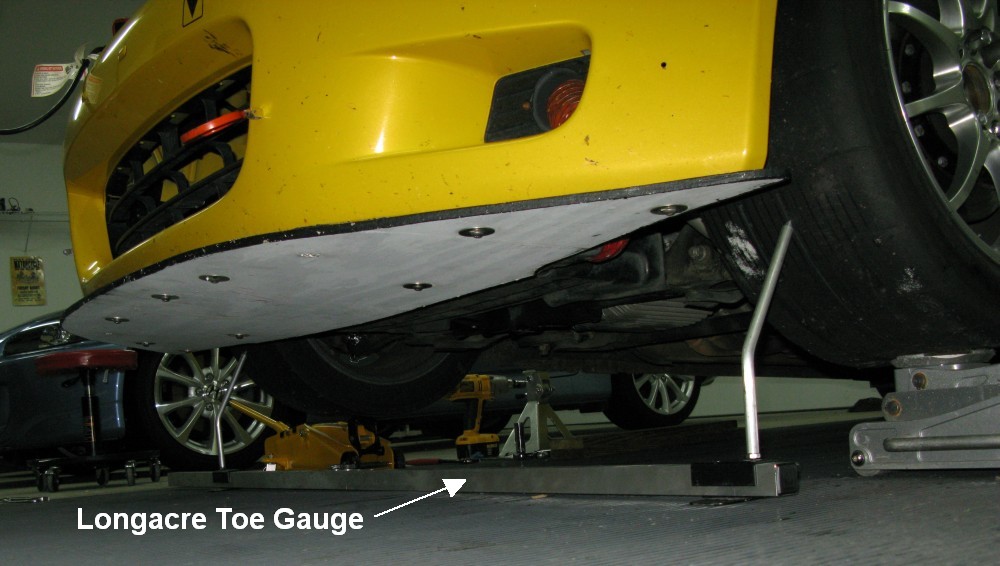
Using Longacre Toe Gauge to Measure and Set 0 Toe