S2000 Radiator Replacement
By Rob Robinette
After losing an engine to oil heat I decided to install an oil cooler and a new radiator. I went with a Champion Cooling Systems 3 core all aluminum radiator. I called Champion direct and talked to them about the radiator and they recommended I purchase the S2000 radiator from one of their dealers on ebay. I followed their advice and had one in a couple of days for $179 delivered. That's a fantastic price for an all aluminum 3 core radiator with all the mounting points, fan mount bungs, 16psi radiator cap (1.1 bar same as stock) and water temperature probe hole required to make an easy installation. The Champion radiator is thicker than the stock unit so I had to adjust the mounting points of my K&N intake. I was told by another Champion radiator user the radiator will fit fine with the stock air box but you might have to trim the bottom of the air box's intake horn. It's made of thin plastic so it will be easy to trim.
The radiator swap is pretty straight forward. Caution: make sure the engine is cool before draining the coolant.
Start by removing the radiator cap. If the car isn't cold put a rag over the cap and open it slowly.
Next remove the stock air box. I have a K&N cold air intake so I just unbolted the filter end, loosened the clamp on the engine end and was able to swing it up and out of the way to swap the radiators.
With the air box out of the way it is easy to access the white plastic drain cock located on the engine side of the radiator at the bottom center. Put a pan under the drain cock to catch the coolant and open the drain cock. You should be able to do it by hand but pliers can help. Keep in mind coolant smells and tastes sweet and it can kill your pets. If you want to completely drain your coolant you'll need to remove an engine block plug--see the shop manual page below for details.
There are three electrical plugs to pull
The fan switch probe at the bottom, driver side of the radiator. Push on the release tab and wiggle the connector off
The primary fan plug on the top, passenger side.
The A/C fan plug on the top, driver side.
Move the main coolant line clamps (in and out) about 3 inches up the hoses. A large pair of pliers can be used to decompress the clamps.
Squeeze & twist the hoses to slide them off the mounts. This was surprisingly easy to do by hand. If your new radiator came with large hose caps over the hose openings move them to the old radiator to keep from spilling coolant as you remove it.
Remove the two 10mm bolts & brackets holding the top of the radiator in place. There are no bolts on the bottom of the radiator.
You're now ready to lift the radiator up and out of the engine bay.
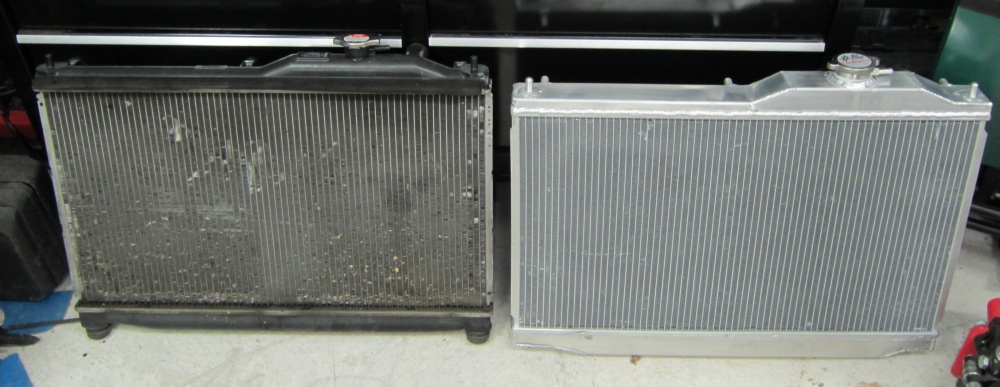
12 Year Old Stock Radiator on Left, Champion Cooling Systems All Aluminum on Right
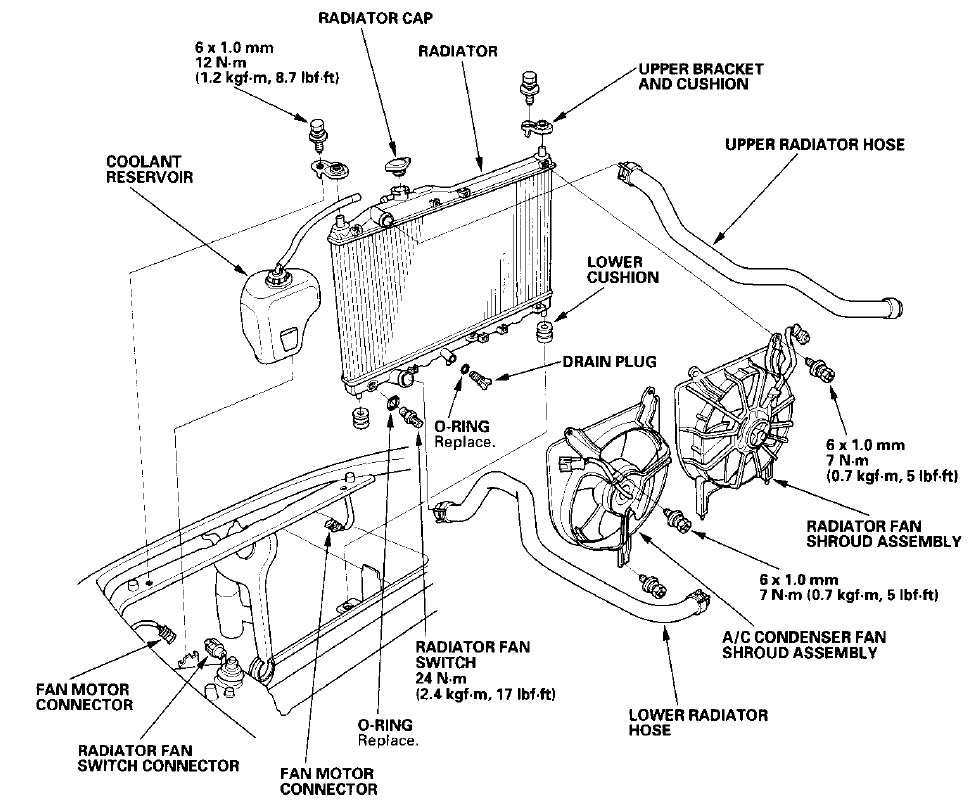
Shop Manual
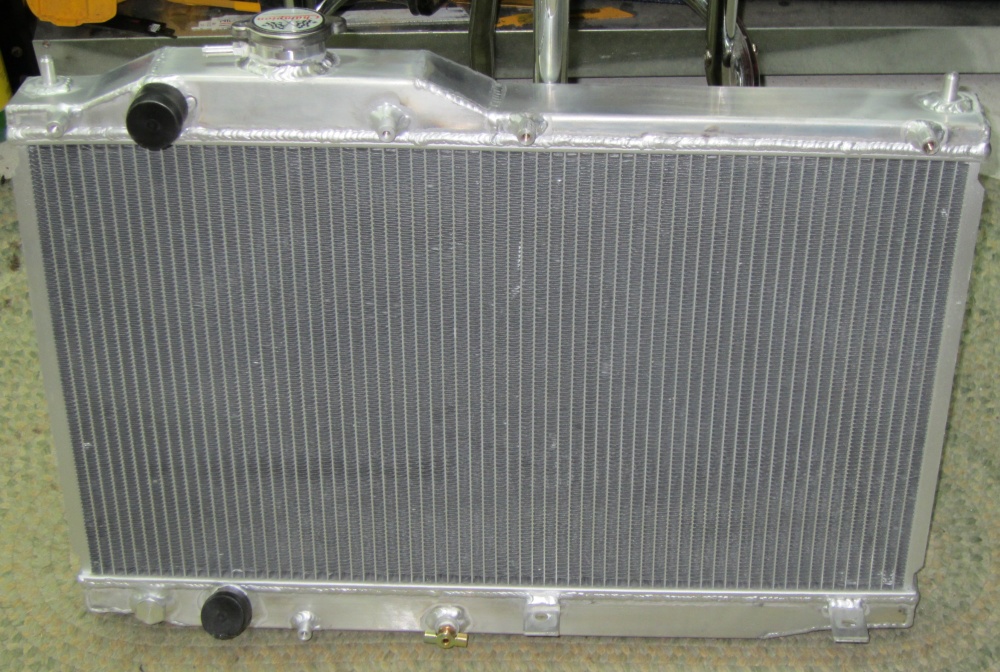
The New Radiator Fresh Out of the Box
With the old radiator out you can move the fans, rubber lower cushions (don't forget these--they simply twist off) & fan switch probe over to the new radiator. I put a thin piece of Teflon tape on the threads of the fan switch probe, but don't over do it. The probe does have a rubber o-ring to promote a good seal. I used a large Crescent wrench to get the probe out and it was pretty tight after all these years.
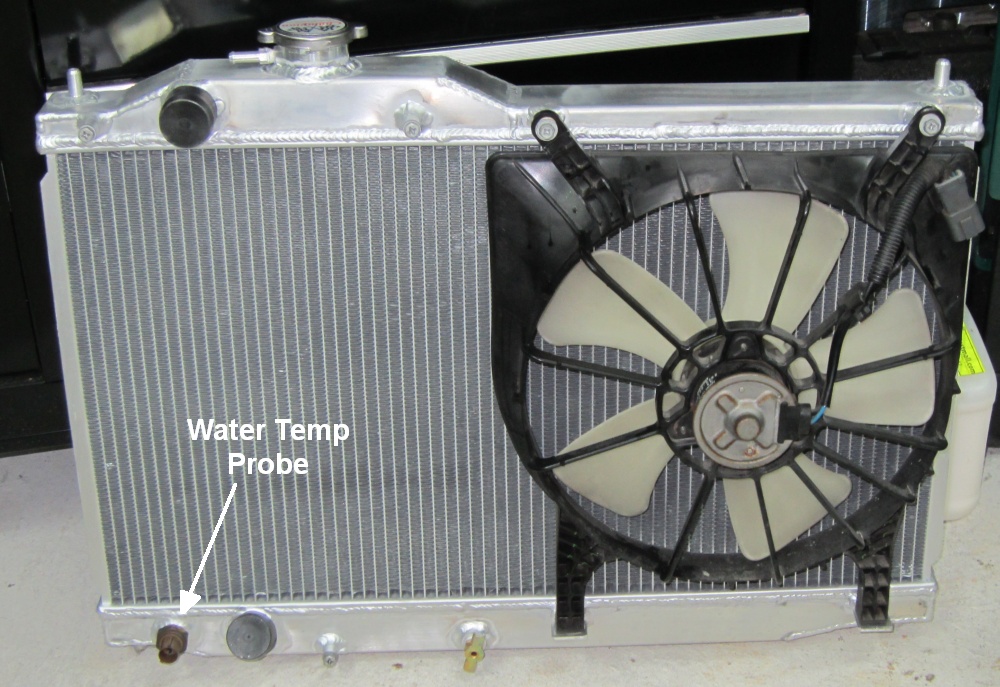
Main Fan & Fan Switch Probe Mounted
(My air conditioning is removed so I don't run the A/C fan but the mounts are on the radiator to make the installation easy)
I installed some grill wire on the inside of the nose intake to protect the new radiator. When running nose to tail on the track all kinds of crap is thrown up by those sticky R compound tires. It's easy to do the install with the radiator out. I just cut the grill to size using tin-snips and zip-tied it in place.
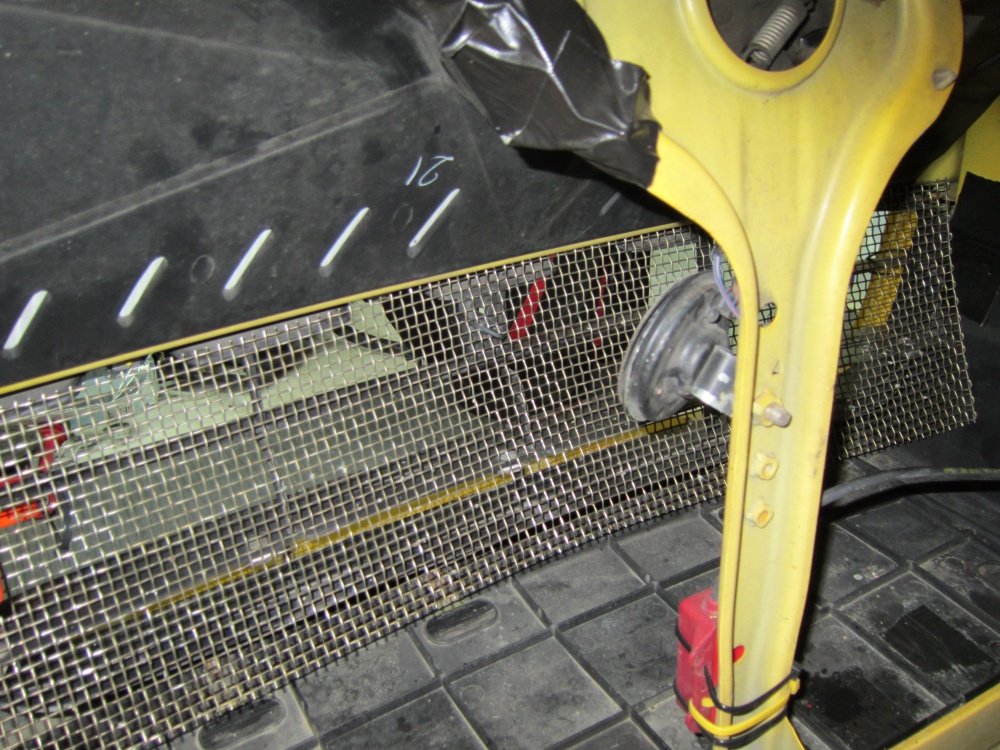
Grill Wire Added Inside the Nose of the Car to Protect the Radiator
Installation is what you'd think, simply reverse the removal instructions. Drop the new radiator in place and make sure the bottom rubber cushions fall into their receptacles, put the top holding brackets & 10mm bolts on to secure it, click the 3 electrical connectors on, slide the coolant pipes on, move the hose clamps back into position, slide the overflow tank line on and install the stock air box.
I did add some 1/4 inch foam insulation tape to the top of the radiator to help close the air gap and force more air through the radiator. Since the Champion radiator is thicker than the stock unit I had to adjust the mounting points for my K&N cold air intake to move it away from the radiator. The stock air box fits with no adjustments necessary.
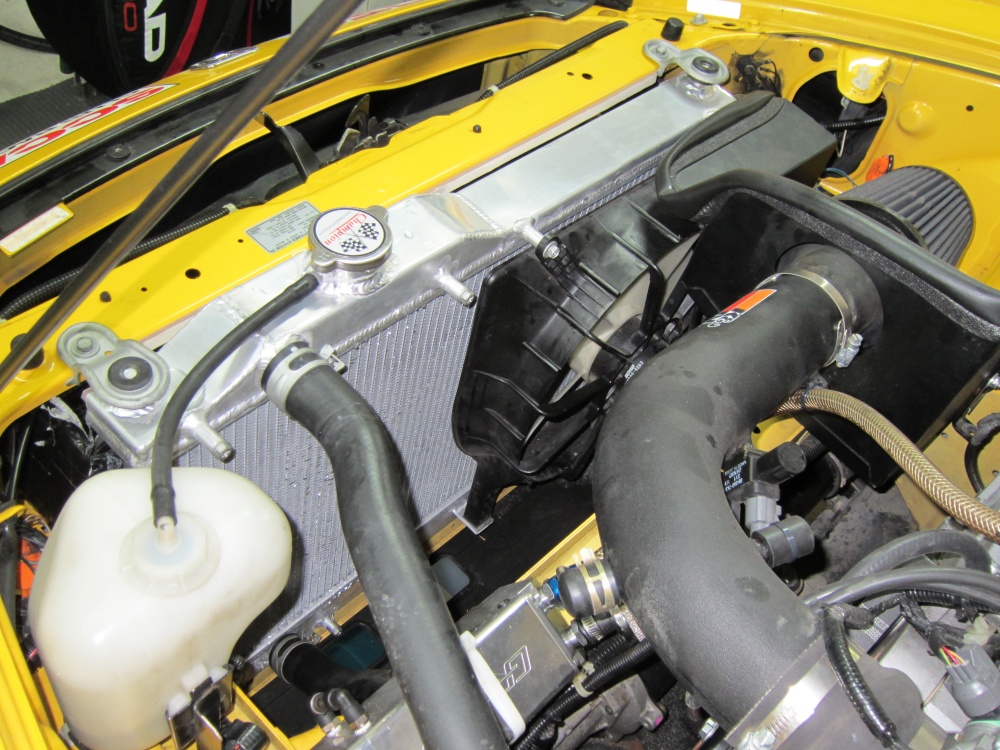
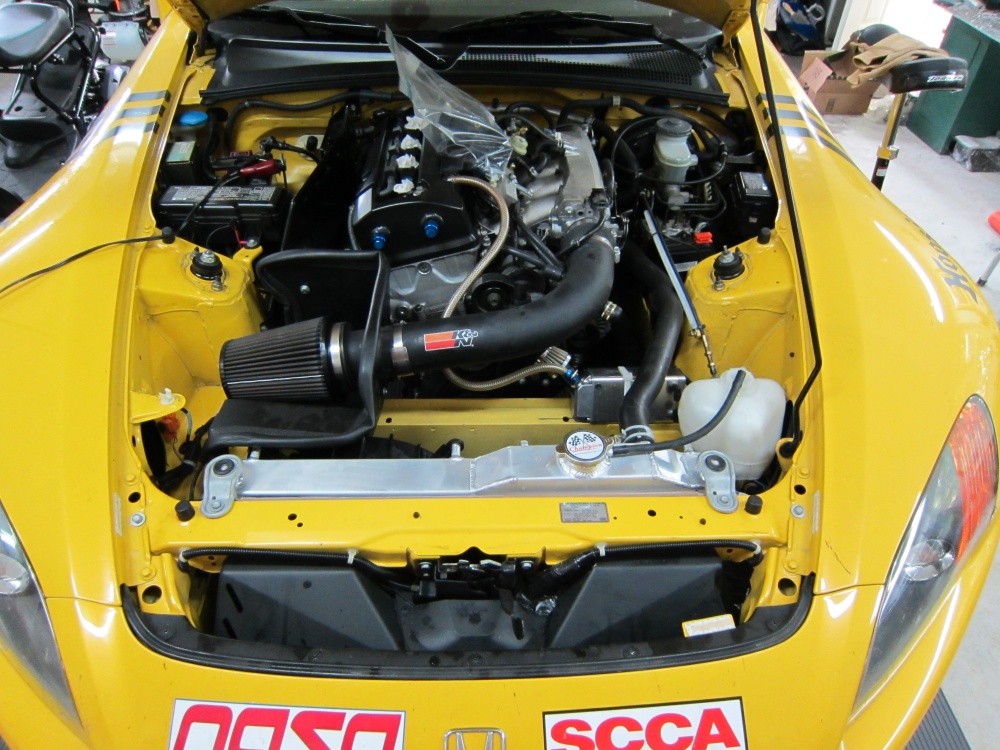
Installed and Ready to Go
Don't forget to fill it with distilled water (from the grocery store, don't use mineral water!) and anti-freeze. You only need one gallon of each for a 50/50 mix. Of course race cars usually run distilled water and Water Wetter. Follow steps 8 to 13 below to properly burp the cooling system.
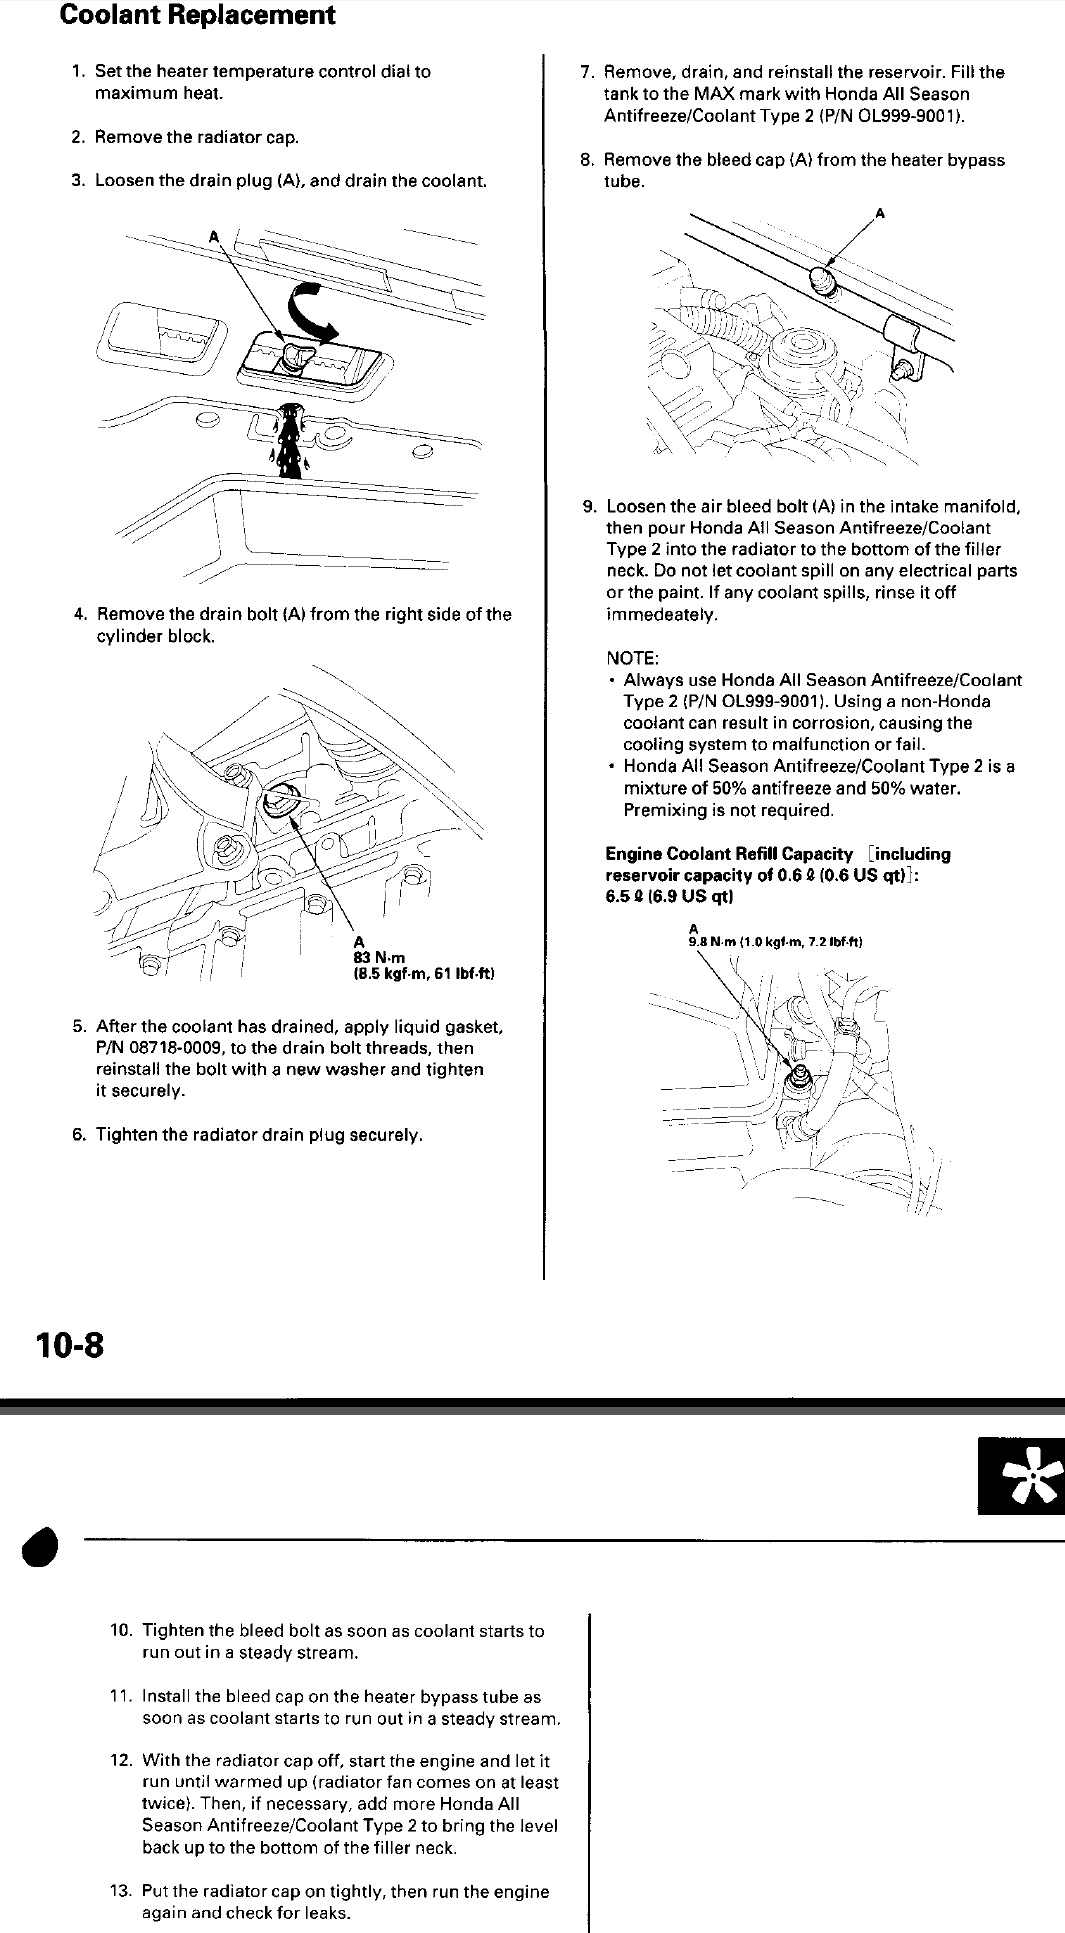
Follow Steps 8 to 13 to Refill and Burp the Cooling System
Go out and test drive your new, cooler running S2000.