S2000 Oil Cooler Install
By Matt Briddell
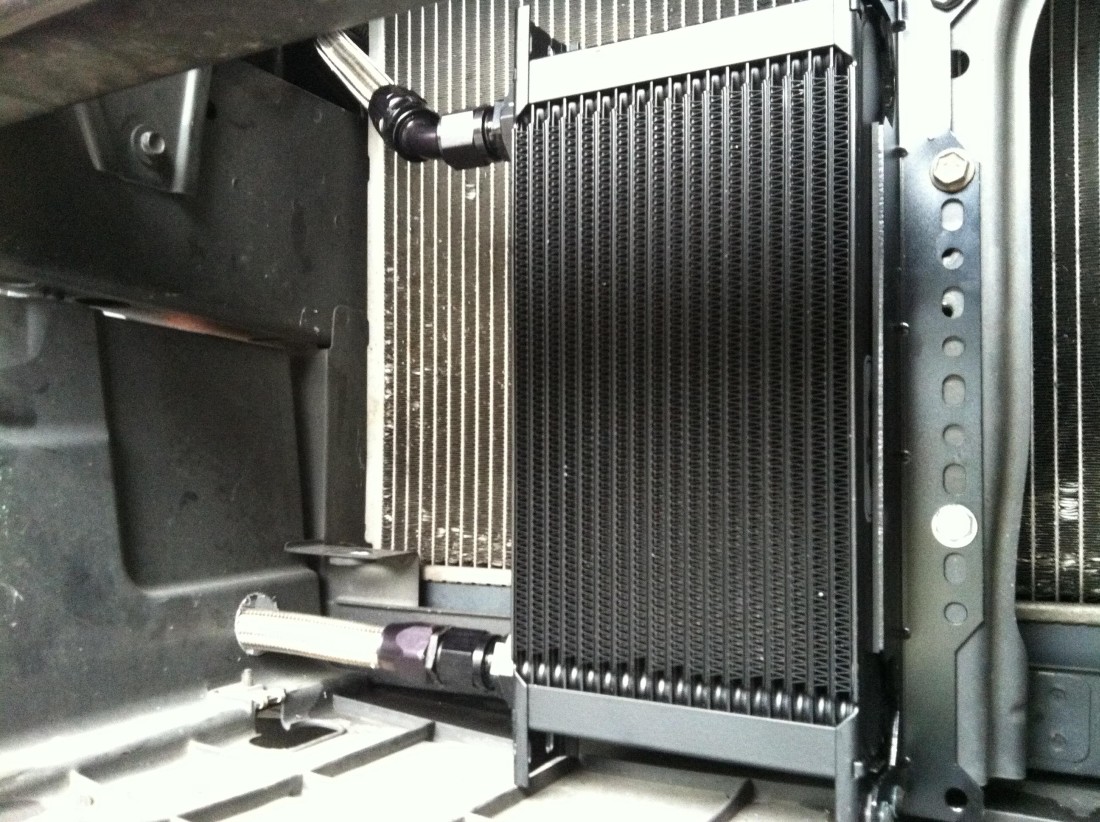
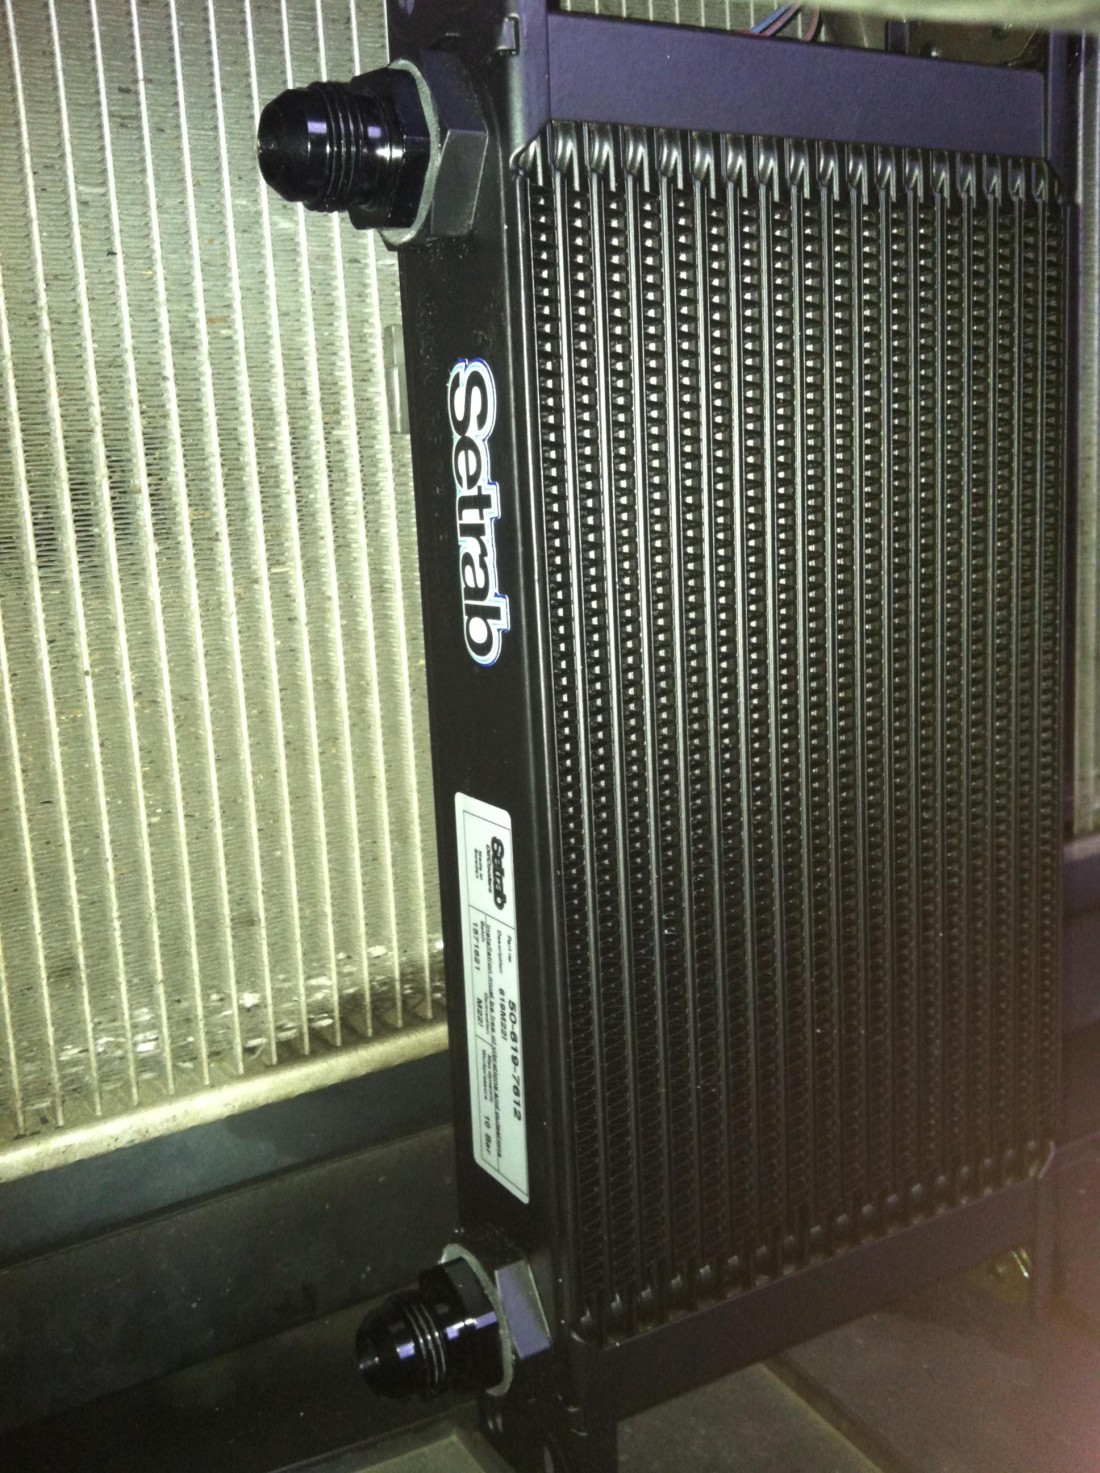
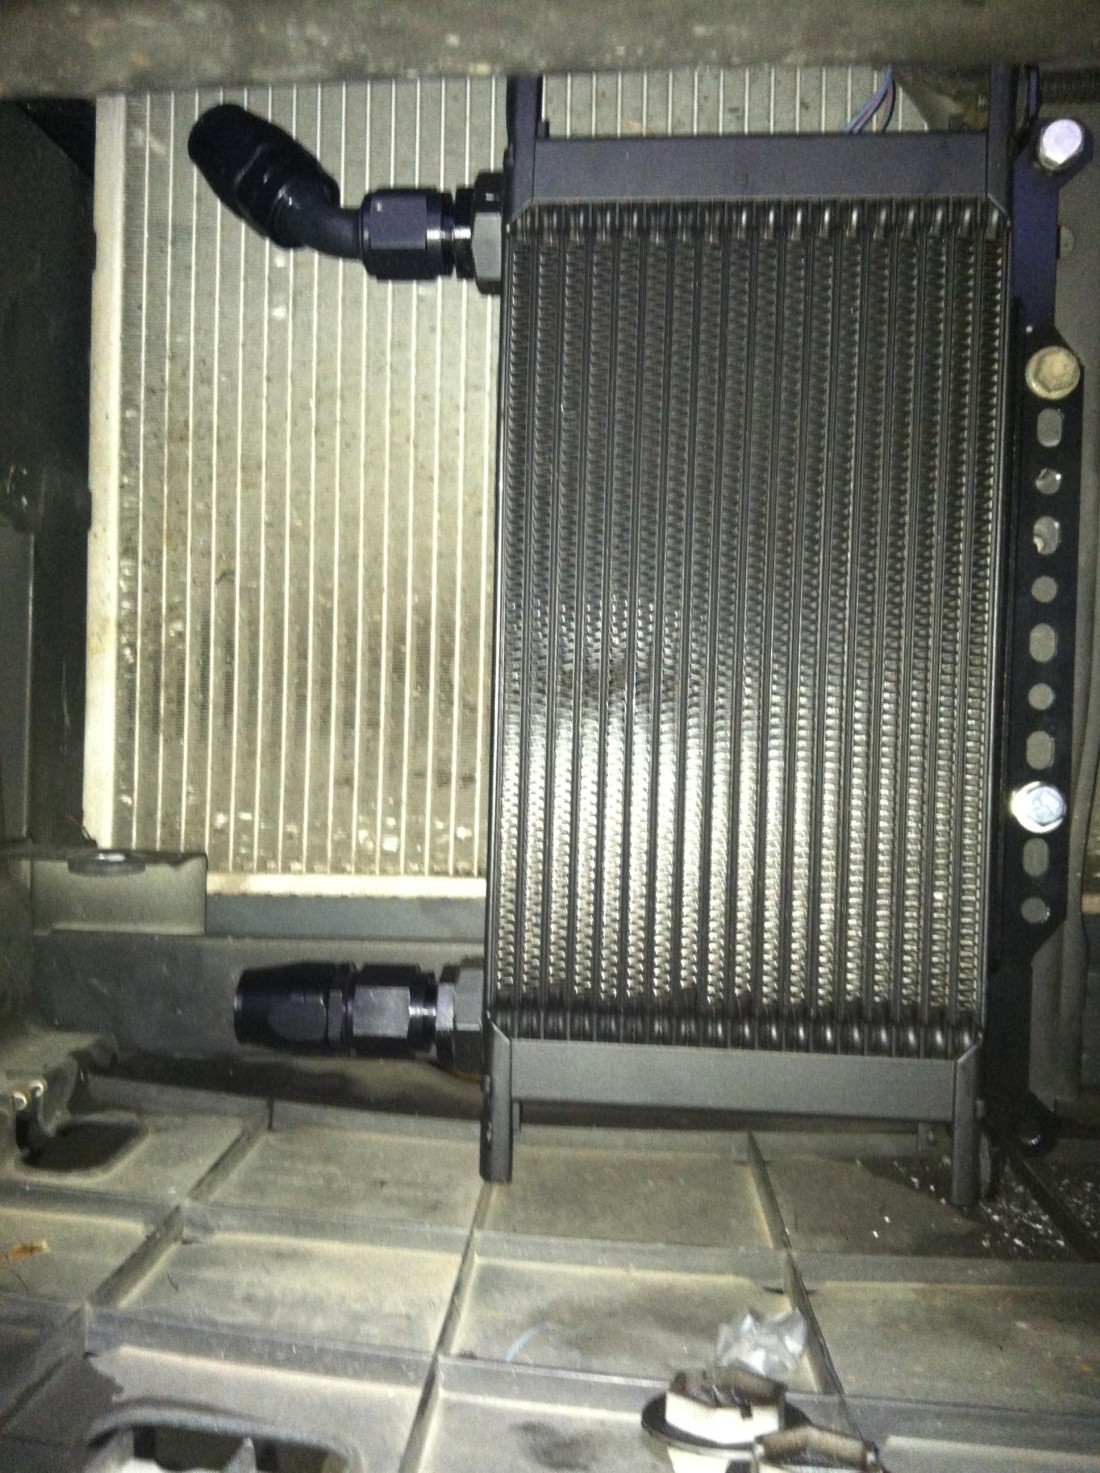
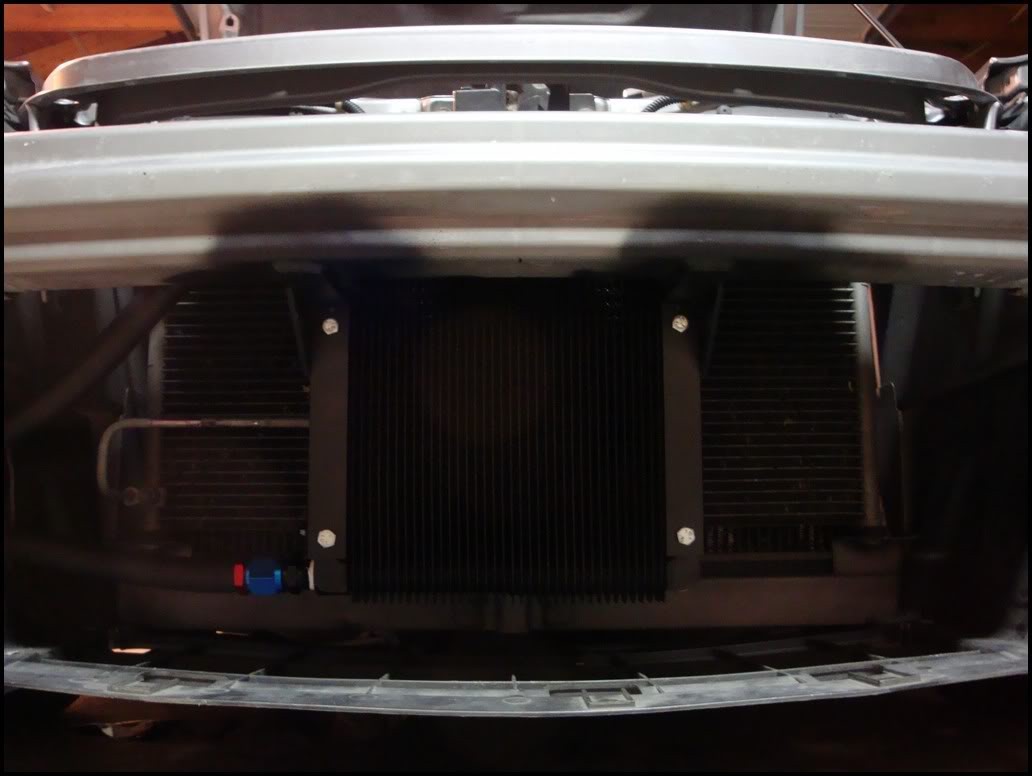
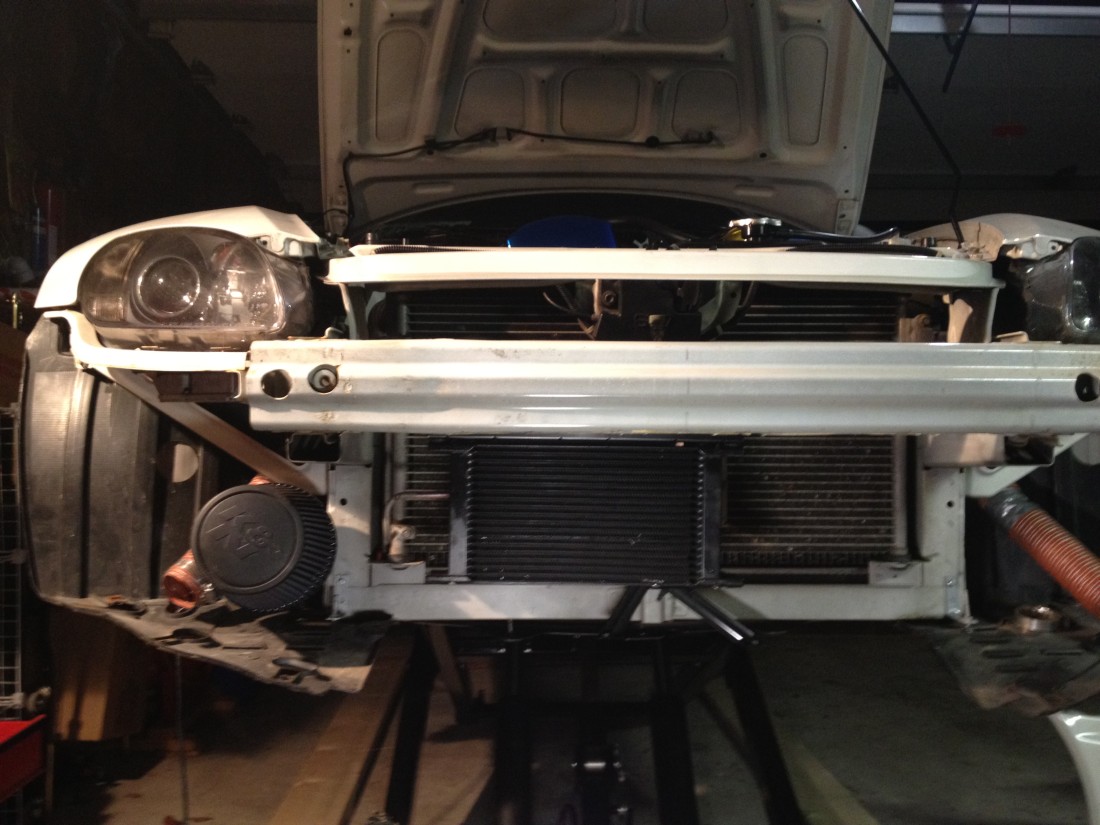
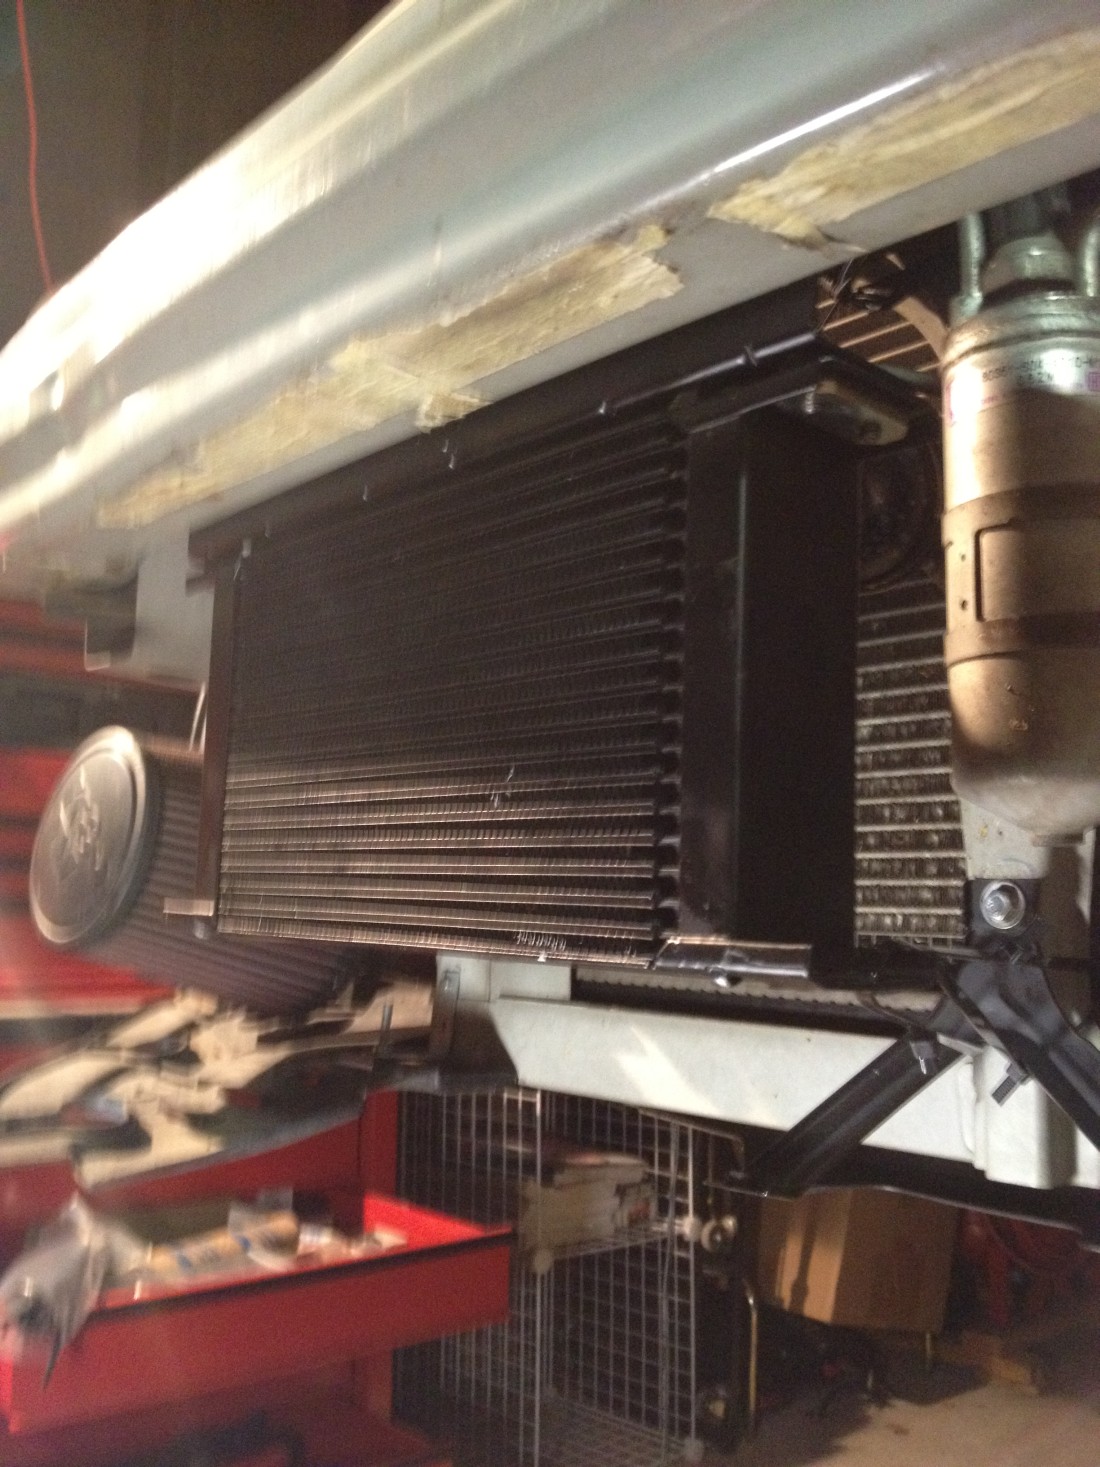
Setrab Oil Cooler Mounted in Front of Radiator (A/C removed)
[Rob: Warning: Don't take this lightly. A poor installation can lead to a broken oil line, oil dump on the track, engine loss and a crash by you and your fellow track mates.]
Parts needed:
From
racerpartswholesale.com
Quantity Two MOC-2BM810A Mocal 1/2" BSP x -10 fittings $15.99
each
Quantity One MOC-ABKT-235 Mocal 235 Matrix oil cooler Bracket $24.95
Quantity One MOC-SP1FT Mocal Sandwich Plate- 20mm Thread $86.95 with built in 180º thermostat (special order the 200º thermostat model for street driven car)
Quantity One
SET-A19F22-10 Setrab 19 Row oil
cooler with Fittings- Series 6 - Setrab 19 row oil cooler with -10 fittings
$197.90
From summitracing.com
Quantity Two AER-FBM4414 Fitting, Hose End, AQP/StartLite Hose, Straight,
-10 AN Hose to Female -10 AN, Aluminum, Black, Each $13.50 each
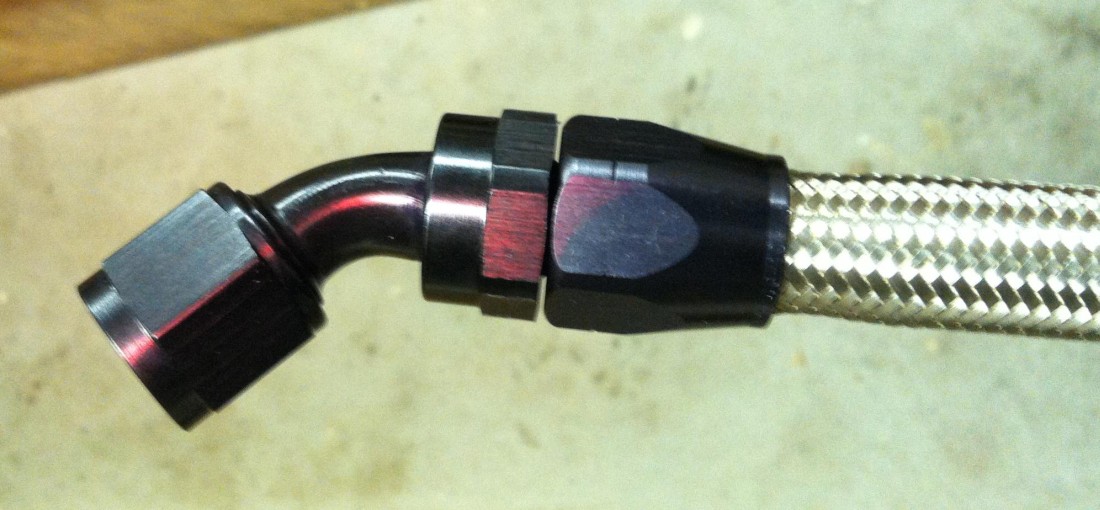
Quantity Two AER-FBM4424 Fitting, Hose End, AQP Hose, 45 Degree, -10 AN Hose to Female -10 AN, Aluminum, Black, Each $25.25 each
Quantity One AER-FCA1010 Hose, AQP, Braided Stainless Steel, -10 AN, 10 ft. Length, Each $79.49 (hose must be rated to 300º F)
How to assemble Aeroquip lines
[Rob comment: Assembling these lines is a pain so I recommend using Aeroquip's socketless hose and fittings in -10 AN size. The lines are easy to cut and the hose ends simply slip on. More info can be found on this near the end of this how-to.]
Total Cost $518.77
You will also need some nuts and bolts to mount
the cooler to the car, a drill bit to drill a hole in the mount, a hole bit to
drill through plastic (1.5-2 inches is plenty large)
Summit has a much better return policy than racerpartswholesale.com but doesn't sell
Mocal or Setrab parts. You can go cheaper if you are ok with the typical blue
and red AN fitting colors, but i wanted black.
I spent a ton of time looking at whether to get -10 or -12AN fittings. I
cannot recall exactly what swayed me to -10AN, but i am really glad I did as
they are quite large. -12AN fittings must be huge. The area around the sandwich
plate is pretty tight and the fittings in the sandwich plate are 1/2 inch. -8AN
is 1/2 inch inside diameter, -10AN is slightly larger at 5/8 inch and -12AN is
3/4 inch.
Earl's Hose Installation Tips
1. Make sure that there is adequate clearance between the hose ends and anything that they might be able to contact. While the hose is flexible, the hose ends are not!
2. Do not allow the hose to contact a sharp corner, nut, bolt, rivet stem or anything else that might cause damage. At any point where a hose passes through a panel, install a grommet for chafe protection.
3. Do not allow the hose to rub against anything-even if the surface on which it rubs is flat. The stainless steel braid is a very efficient low speed file and will abrade through anything that it moves against. In order to prevent chafing and to keep your hoses where you meant for them too be support the hoses every 18" or so with either a cushion clamp or a ti-wrap. Also see Tuff- Stuff hose for chafe protection.
4. Do not force the hose into too tight a bend. Follow the minimum bend radius chart. Do not kink the hose, either by too tight a bend, by misalignment between the hose end and the part or adapter on short assemblies or by getting the whole assembly into a helix on long assemblies. Align the hose end with the adapters so that the hose is not placing strain on the hose end or on the adapter. The Swivel-Seal design reduces these problems, but only care in installation will eliminate them. We manufacture enough hose end and adapter configurations to allow a sanitary and sound solution to just about any installation problem.
5. Keep the hoses as far away from extreme heat sources (like turbochargers and exhaust systems) as possible. If you must run close to such things, use an air gap insulating panel and/or fire resistant sheathing. Do not run fuel lines in proximity to hot fluid lines (or hot anything else) or you will end up with either hot fuel and low power or vapor lock. Do not run hot fluid lines near cool fluid lines or near to the driver.
6. Do not over-tighten the hose ends onto the
adapter fittings or parts. The seal is achieved by the design of the mating
surfaces not by muscle. It helps a lot to use the wrenches made for the job.
I went with a slightly more expensive Setrab vs Mocal oil cooler because I like
black. The Setrab is black the Mocal is silver. Also, all the cool kids use
Setrab (NASCAR, Grand Am, F1) and for what its worth (very little) I read about
Mocal coolers splitting apart online. If you do not use the Setrab mounting
plate, which has rubber in it, make sure to put some rubber in the mounting as
the vibrations apparently kill oil coolers.
The sandwich plate that I bought has the integrated 180º F thermostat. After
buying it I read that its better to get a 200º one, which can be special
ordered from Mocal (integrated into sandwich plate) or bought as an external remote
(plumbed in) thermostat. I'm just keeping what I got as this car is only driven
on track. The oil should get hot enough.
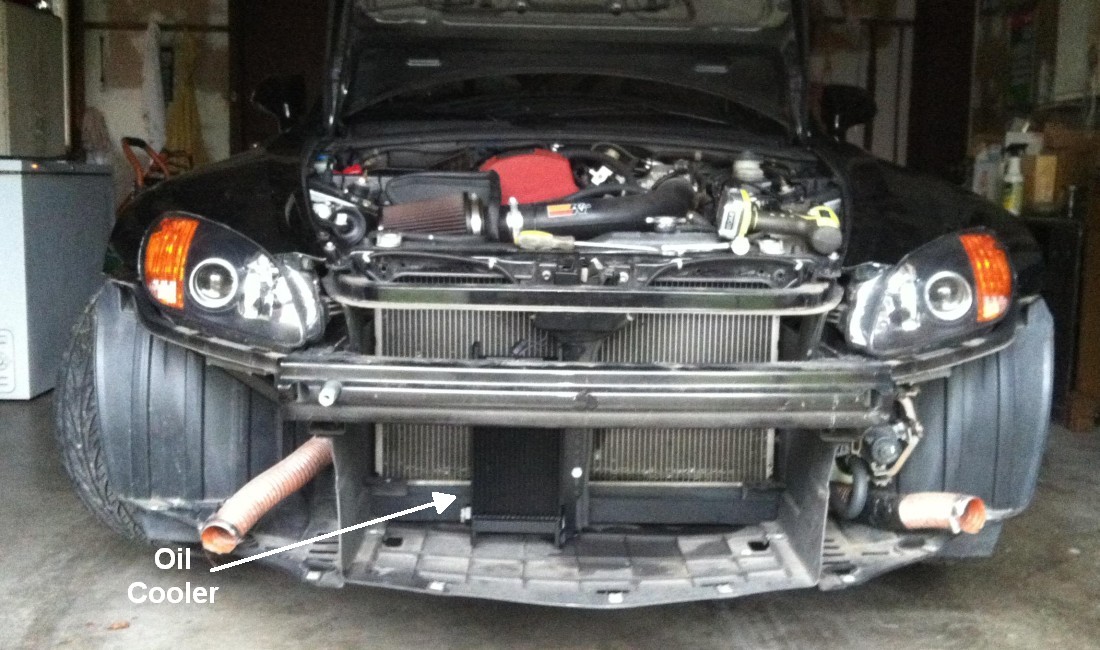
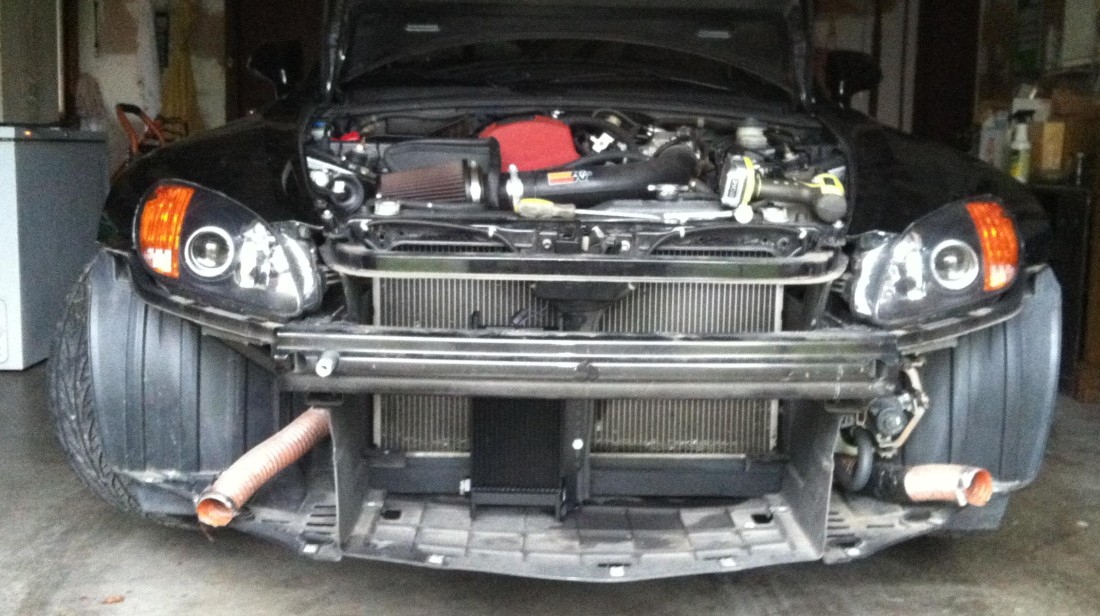
IMPORTANT NOTE: I had previously removed the air conditioning from my car. There is a canister in the middle of the radiator, which would be in the way if you attempt to follow this how to without remove the canister first. If you need to keep the AC, I suggest that you install the oil cooler on the side of the radiator opposite from the AC condenser. You will probably have to custom fabricate a mount and possibly purchase more than 10 feet of oil line.
Step 1 – Remove the bumper cover.
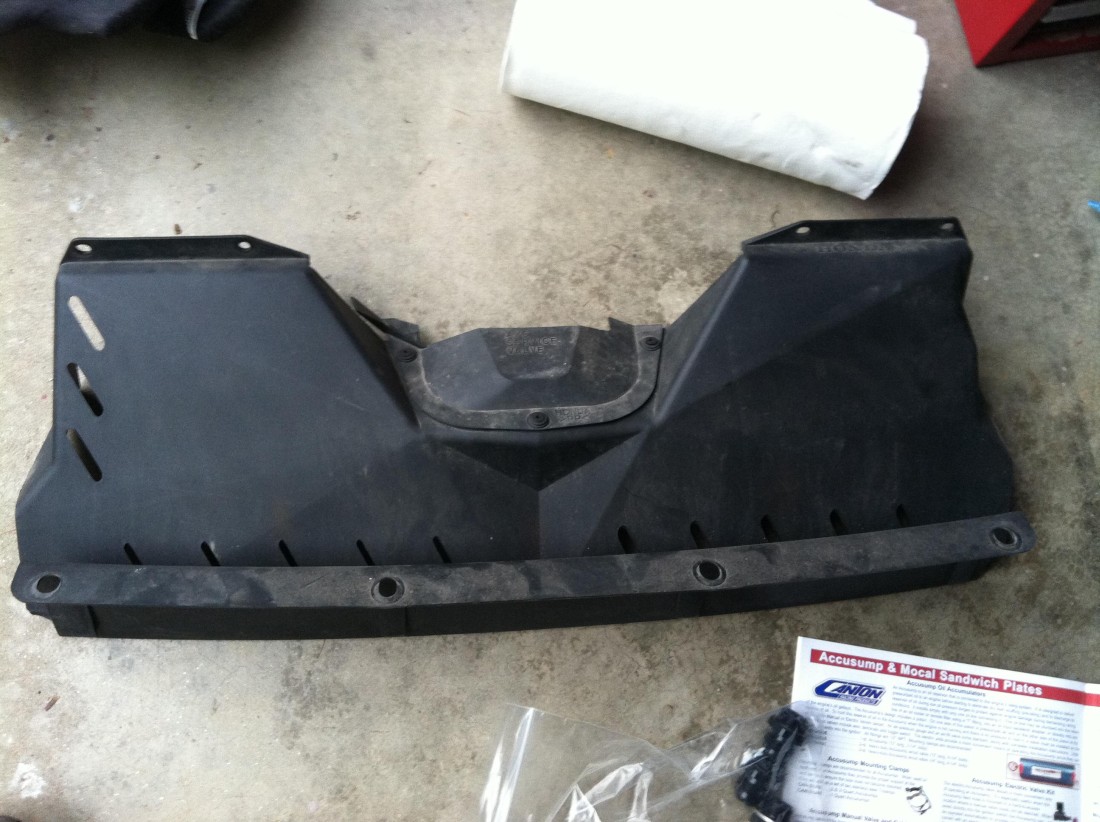
Step 2 – Remove this cooling shroud above the radiator.
Step 3 – Mount the cooler to the Setrab bracket. There is no photo of this. Just do it. Follow the Setrab instructions so as not to over torque the mounts. The cooler is aluminum and fragile.
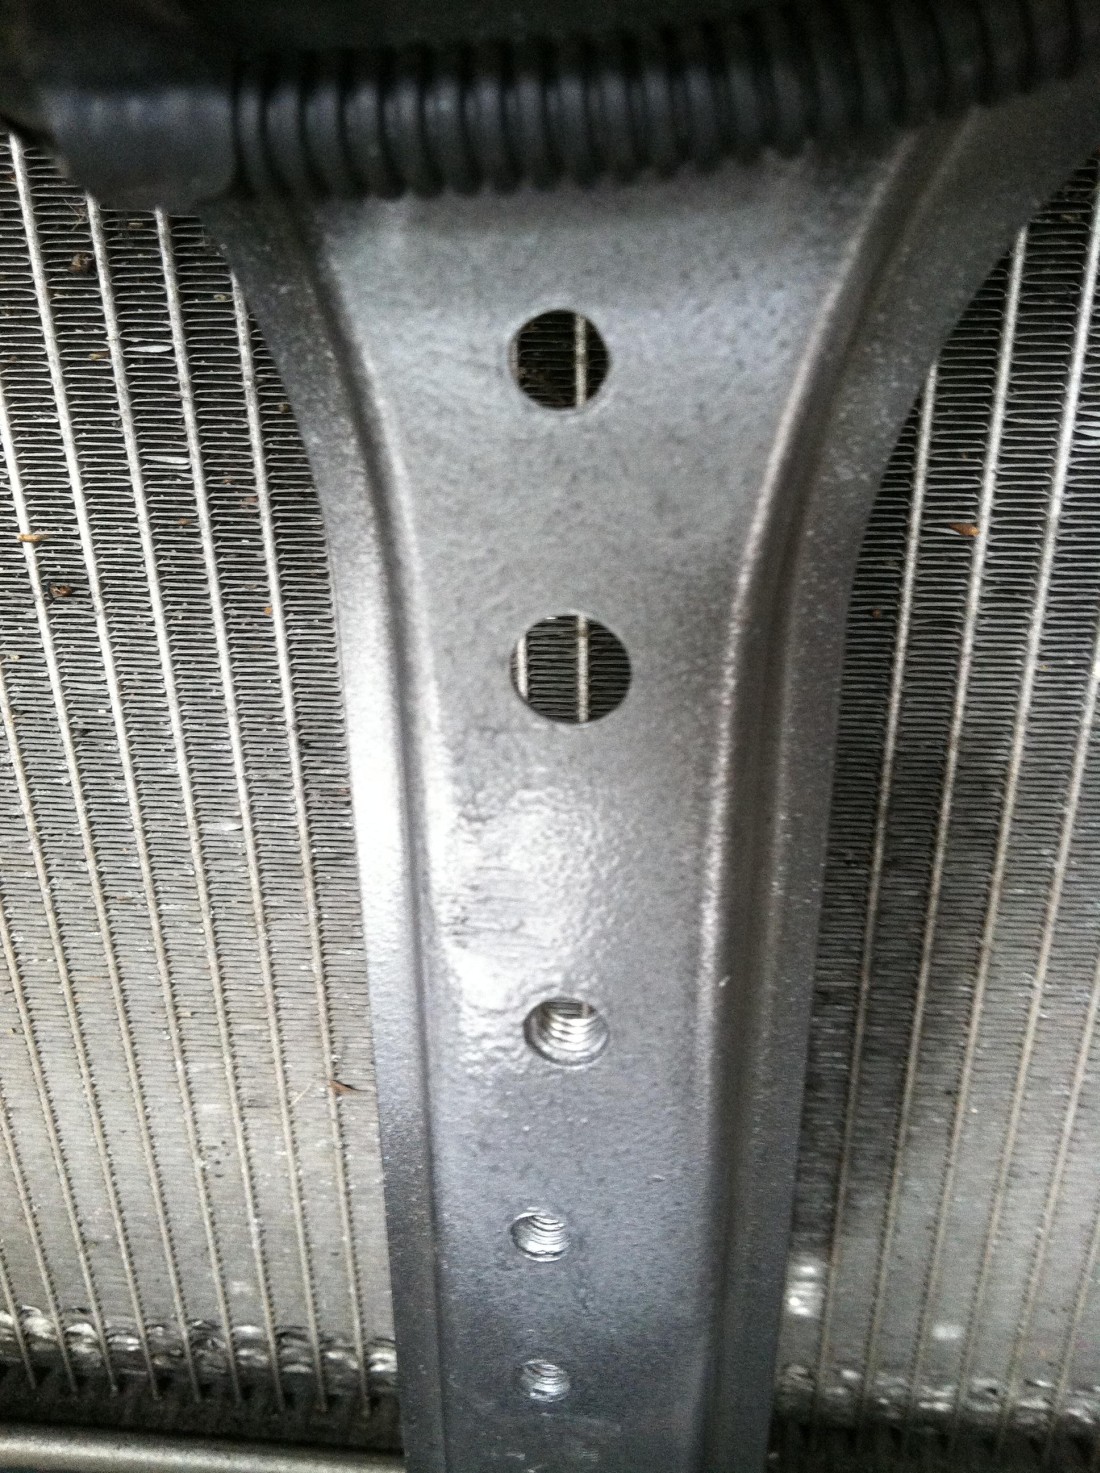
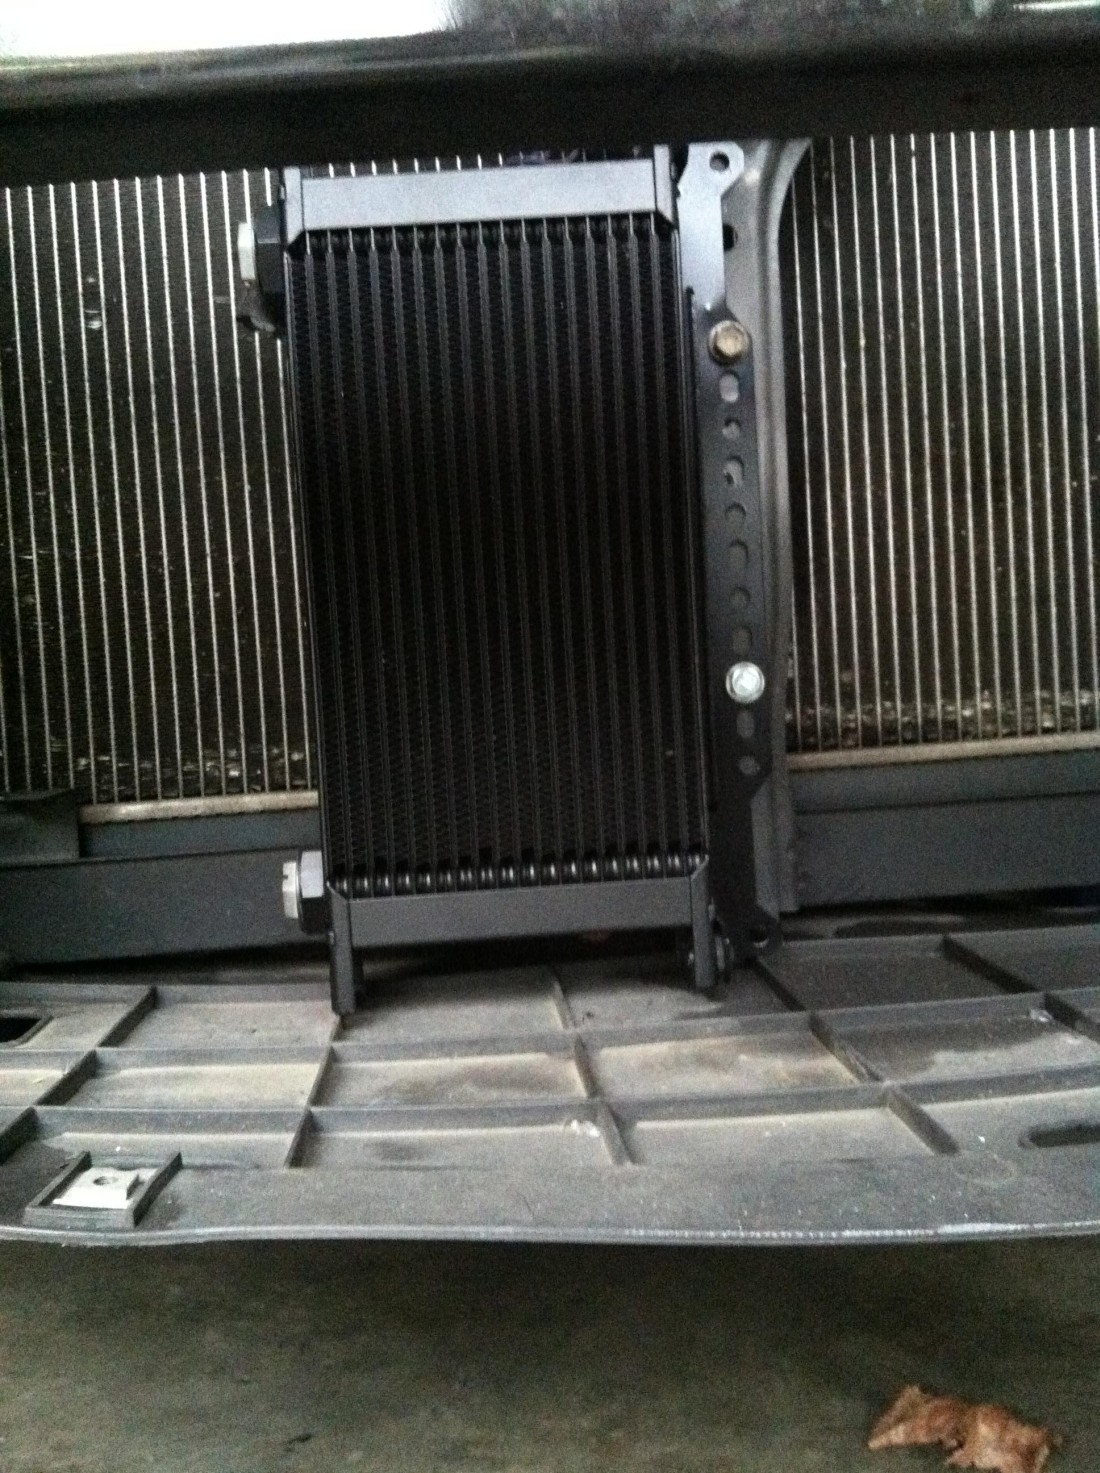
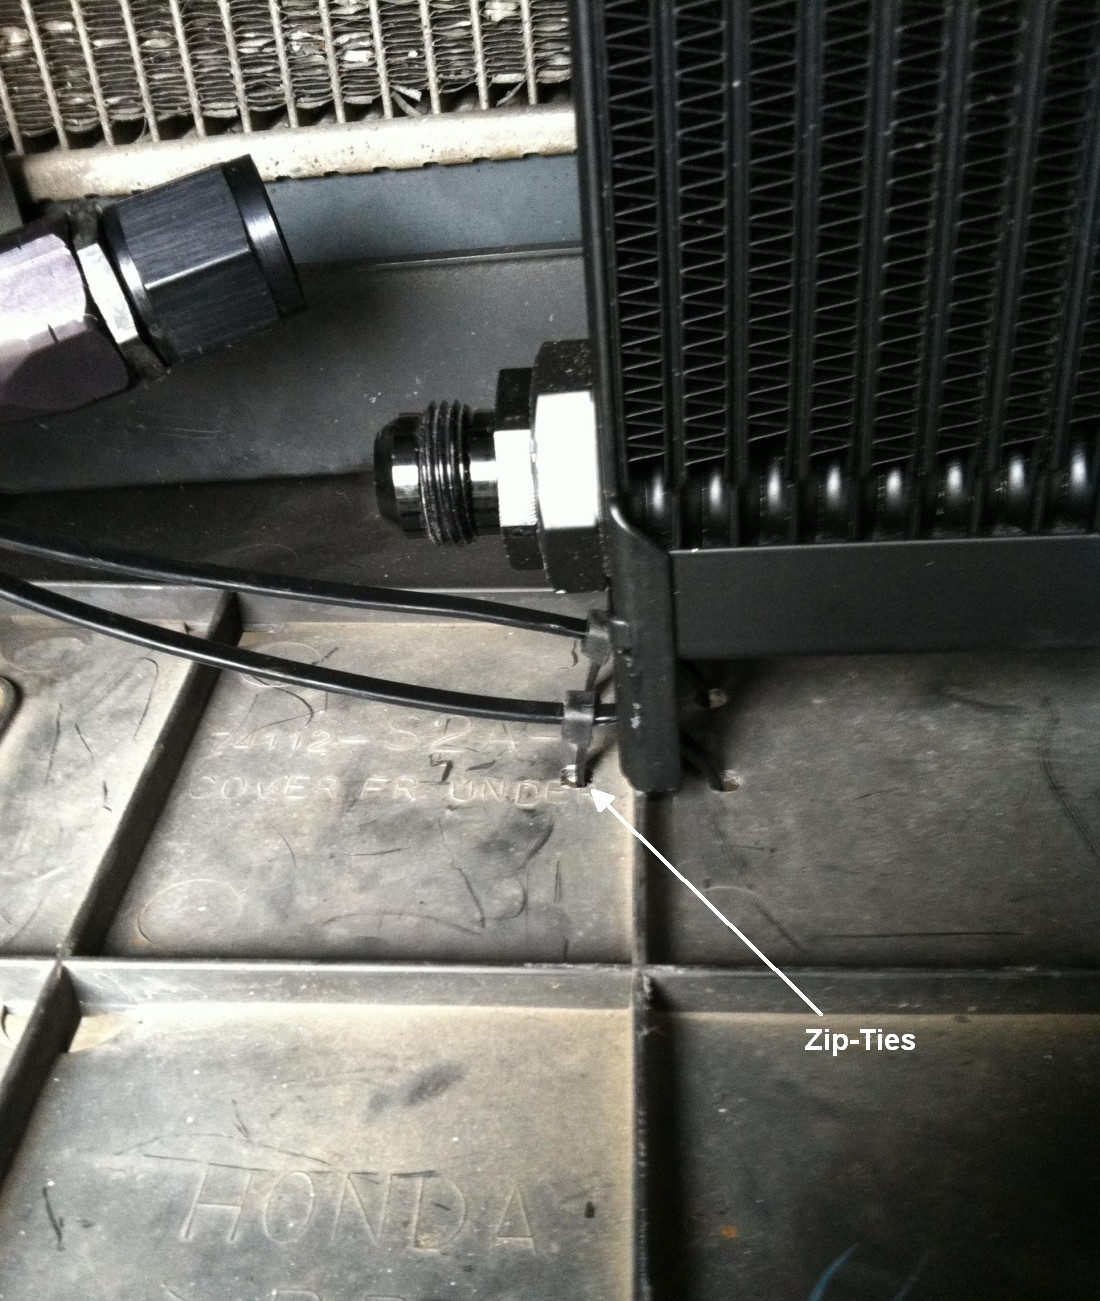
Step 4 – Mount the cooler to the center support bracket in front of the radiator. Note that you can reuse one existing hole, but need to drill out a second hole. Bolt the oil cooler to the mount. I bolted it using 3 bolts, which is probably overkill. You will have to grind off a little so that the mounting plate will bolt flush to the bracket. I suggest painting the bar metal before mounting the cooler. I zip tied the bottom of the cooler thru the plastic underneath it. This is to minimize vibrations.
Remove This Nub On Center Support Bracket
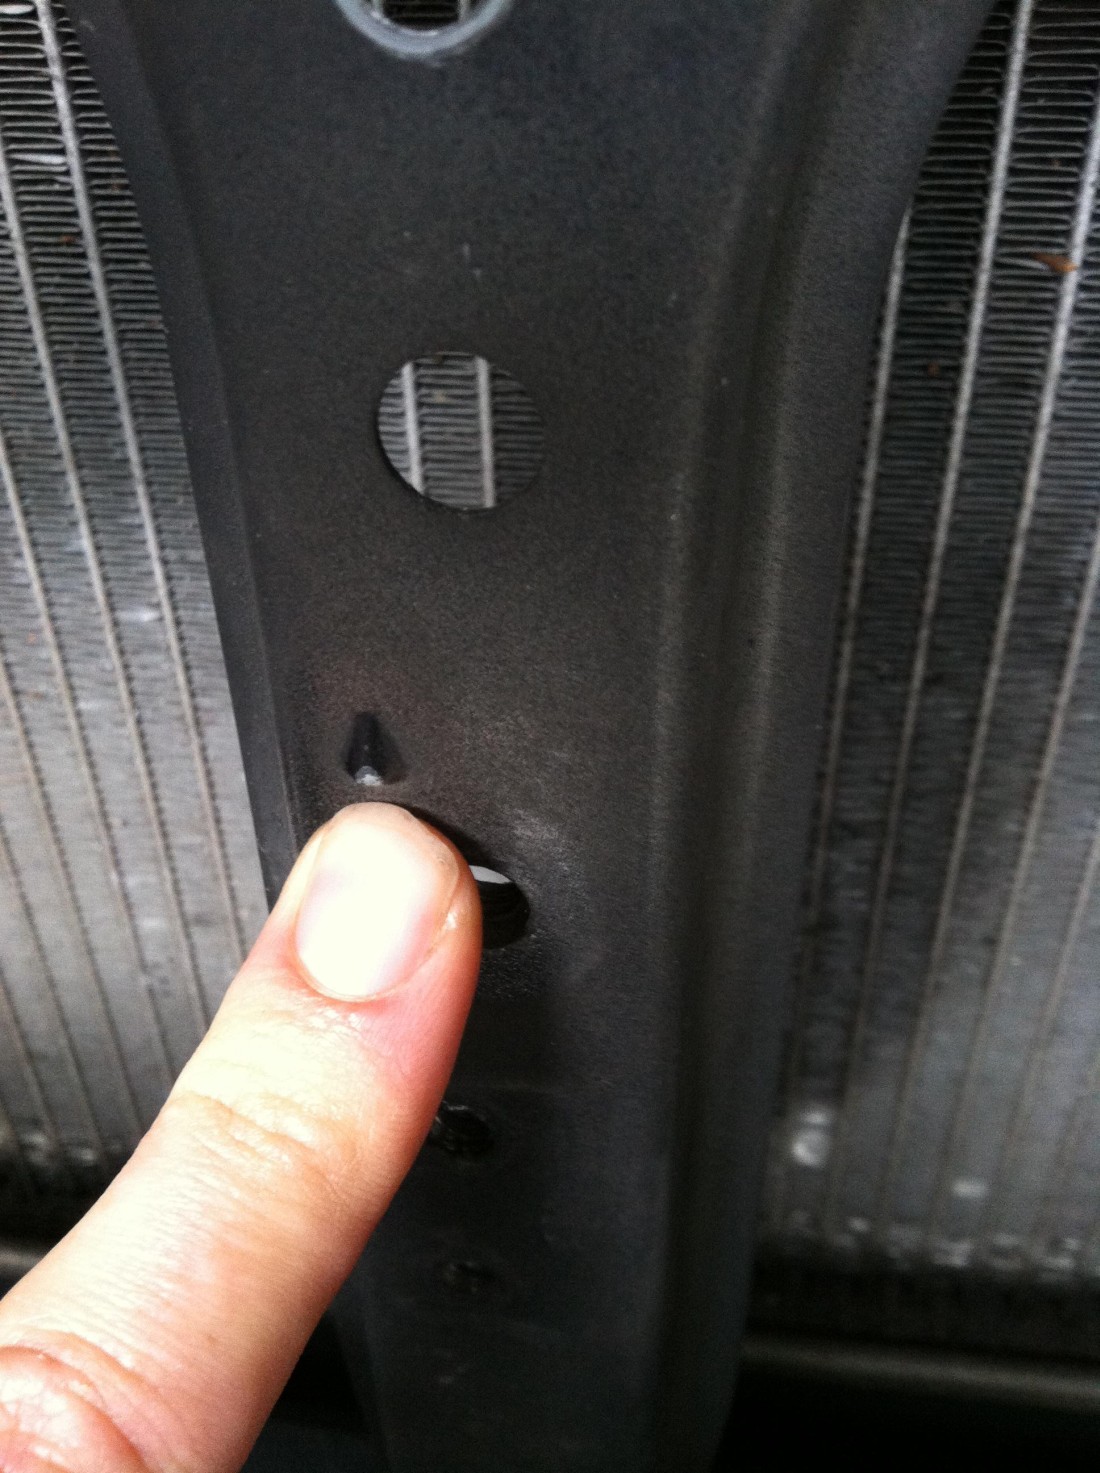
Nub Ground Off
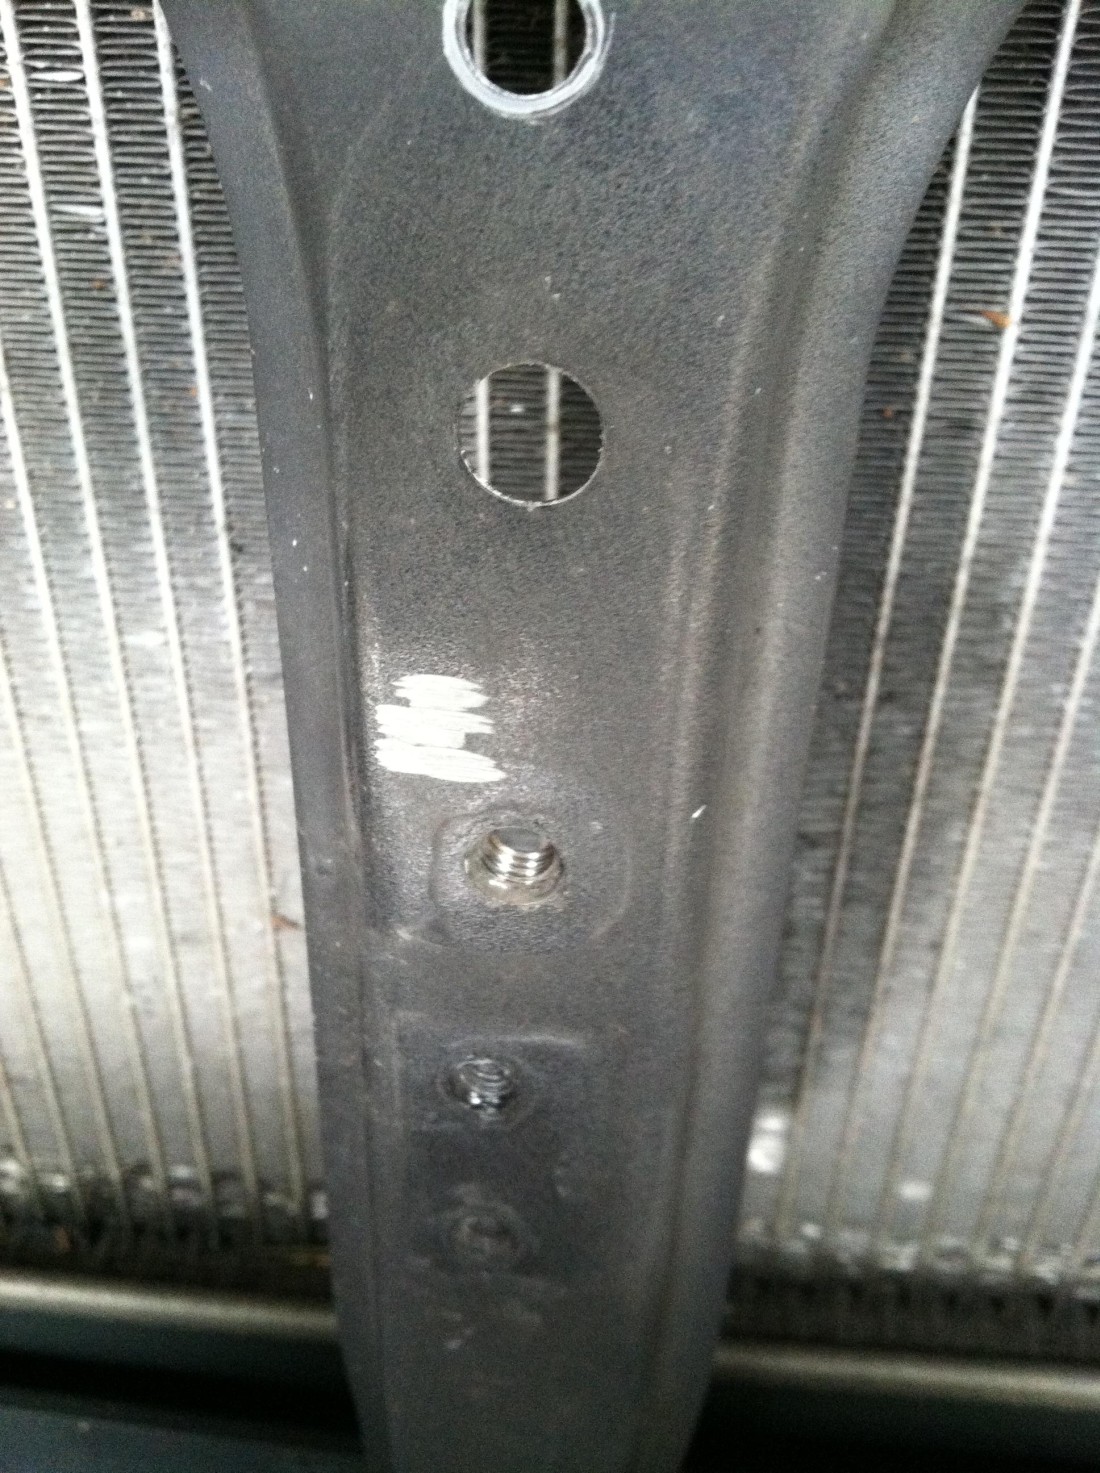
Ground Area Painted
Oil Cooler Mounted to Center Support Bracket

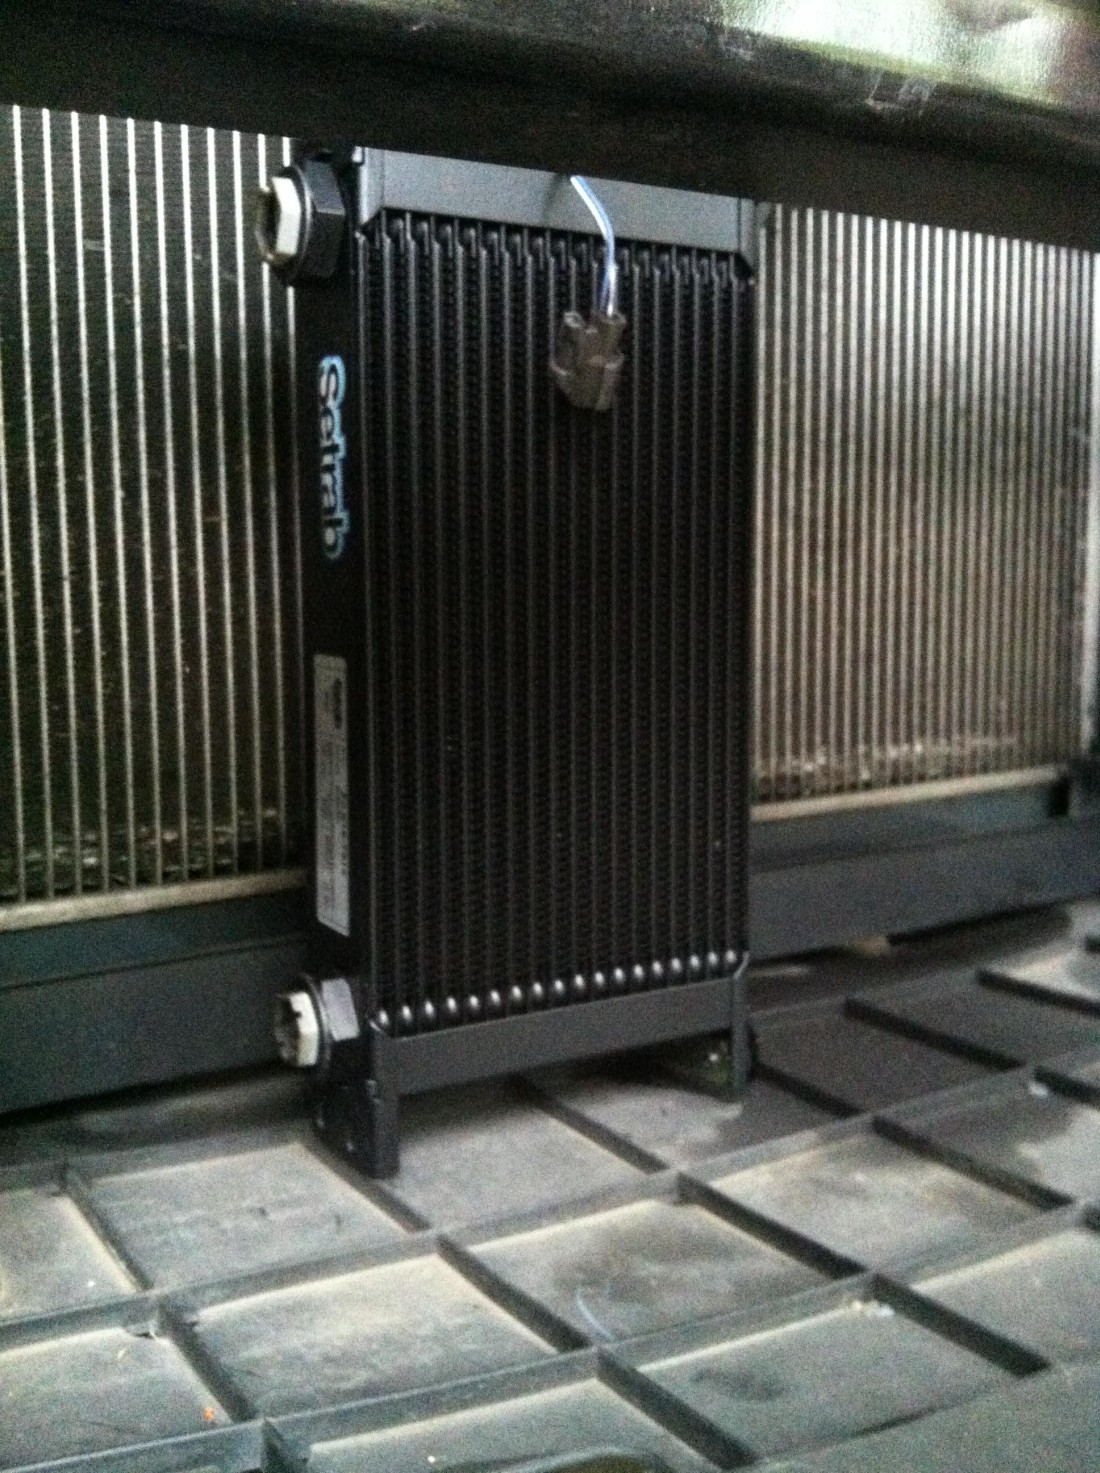
Bottom of Oil Cooler Zip-tied to Floor Pan
Step 5 – Install the fittings into the cooler. Follow Setrab recommendations for lubrication with anti-seize. Do not over torque.
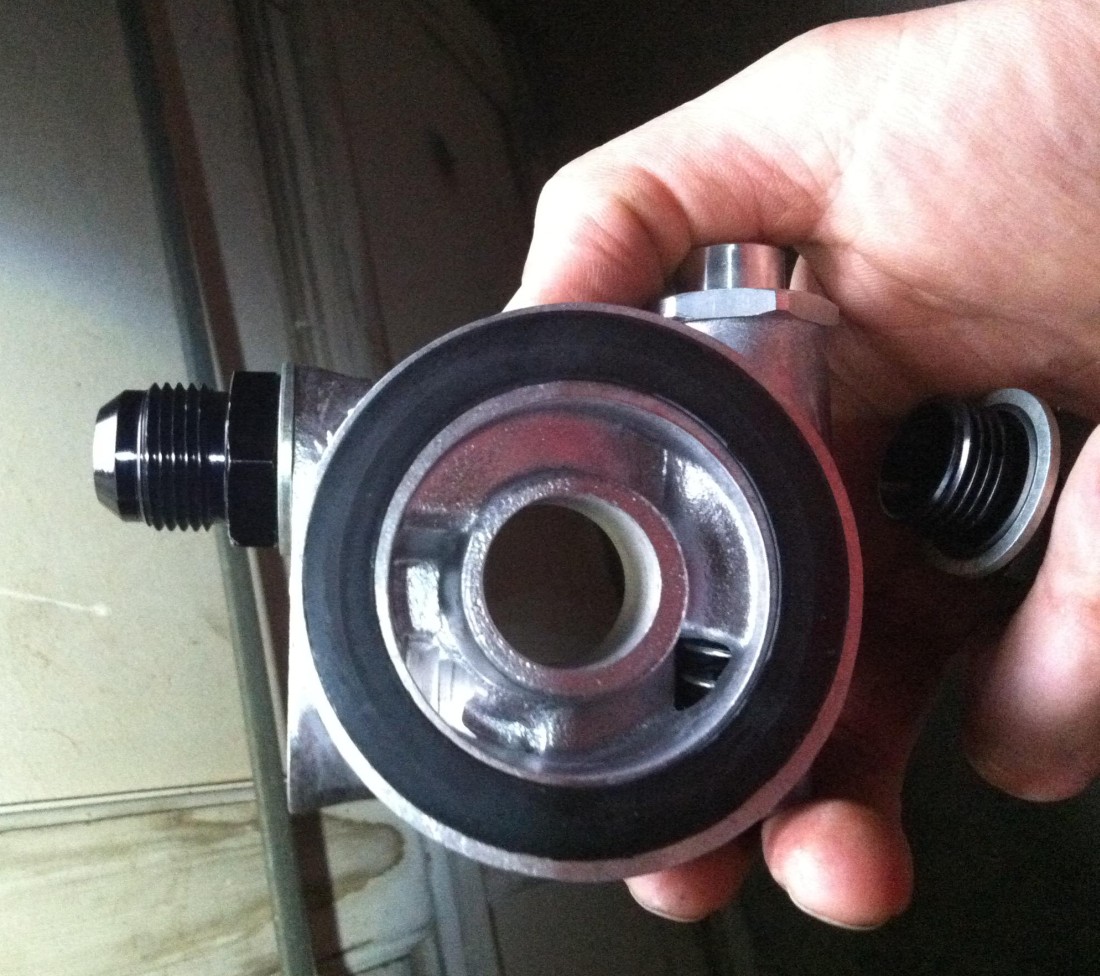
AN Fittings on Oil Cooler
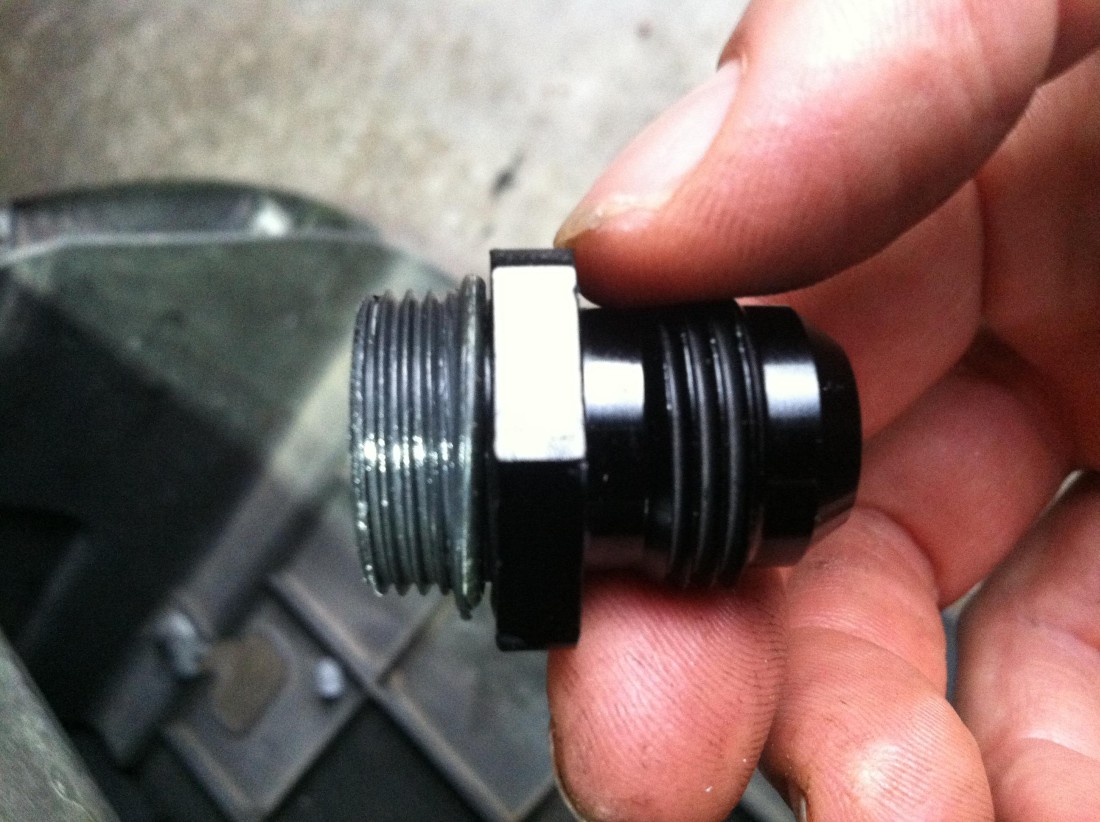
Step 6 - Install the BSP fittings into the Mocal sandwich plate. Use the supplied washers and follow the manufacturer’s instructions.

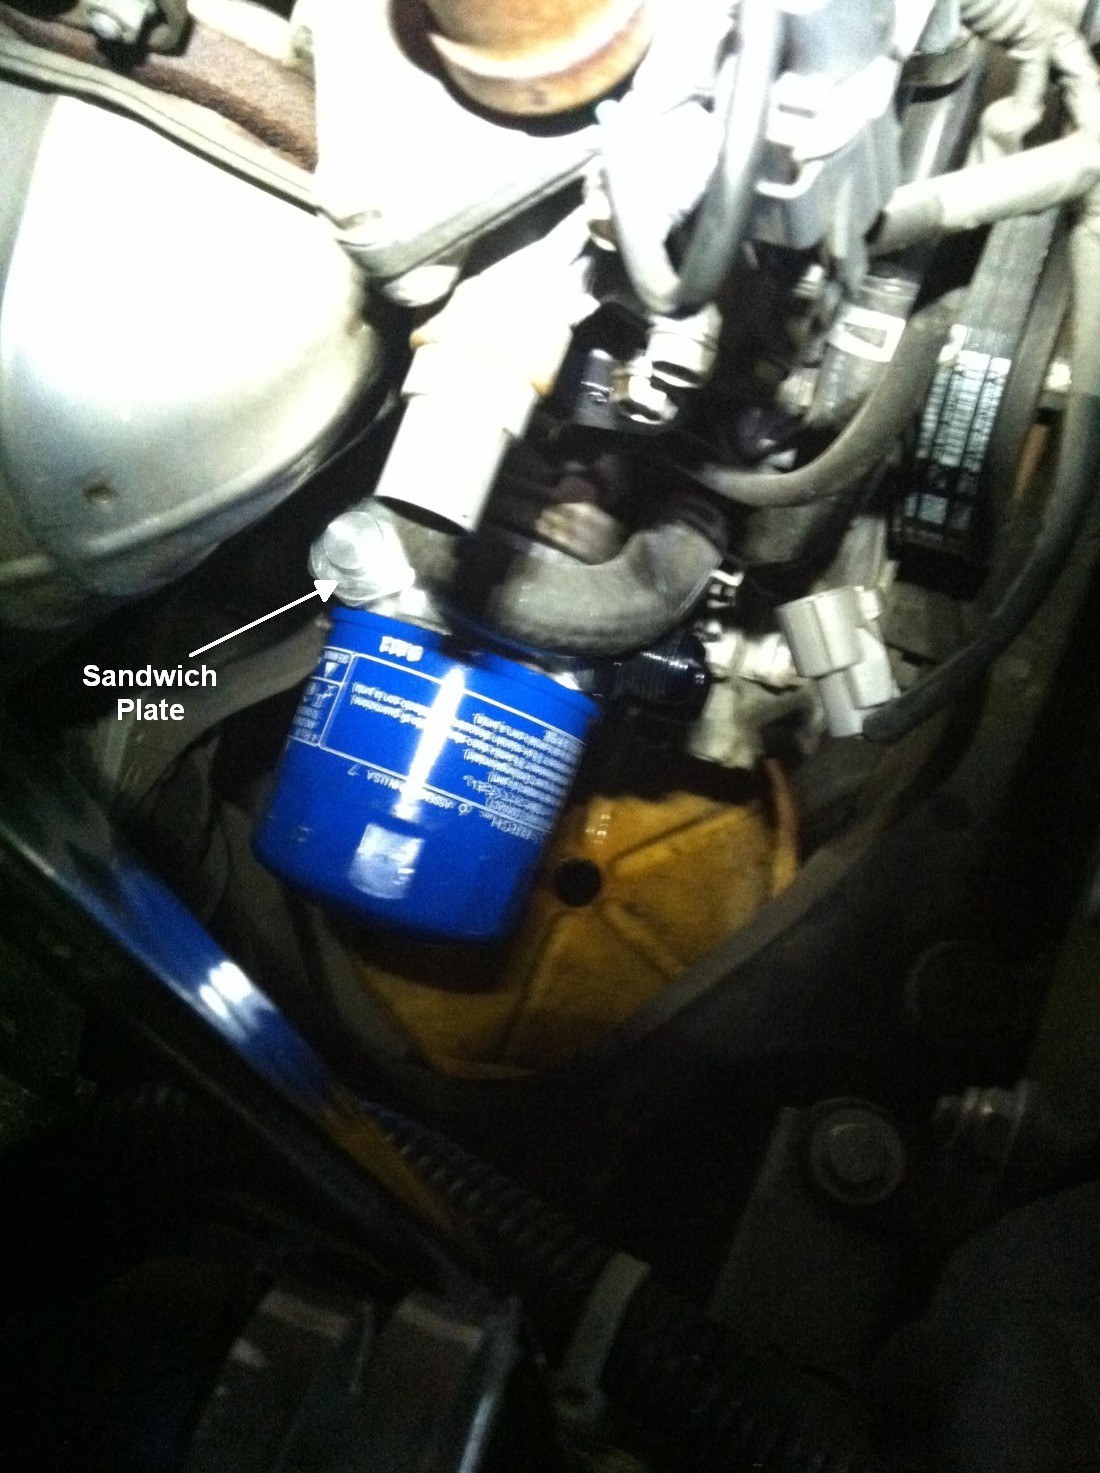
Step 7 – Install the sandwich plate to the block. Drain the oil, remove the oil filter, clean the sealing surface well. Put a coating of oil on the sandwich plate rubber fitting. Install the sandwich plate to the engine block. Tighten. Note that I followed the Mocal recommendations on how much to tighten it, and it started leaking after 2 track days. Upon removing the oil filter, the plate was only finger tight. I cranked it down pretty tight, not using a torque wrench so I don’t know how much, but its pretty tight and doesn’t leak.
Step 8 –Reinstall the oil filter.
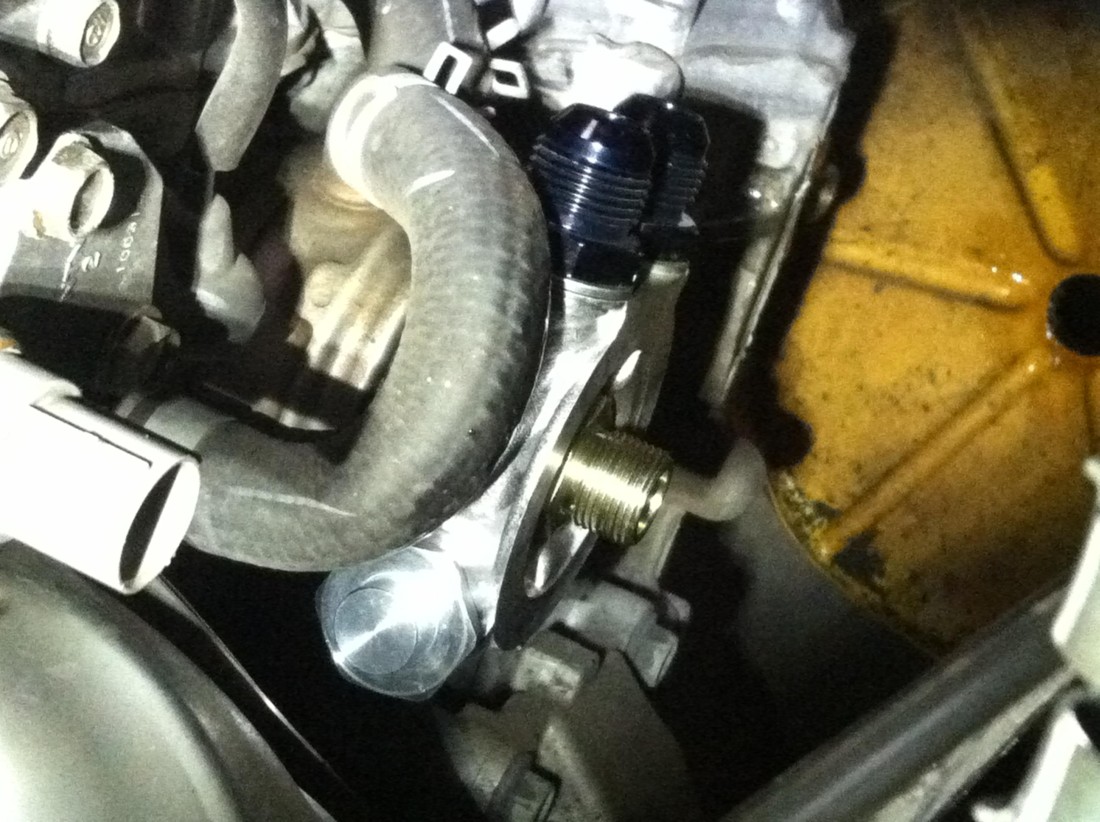
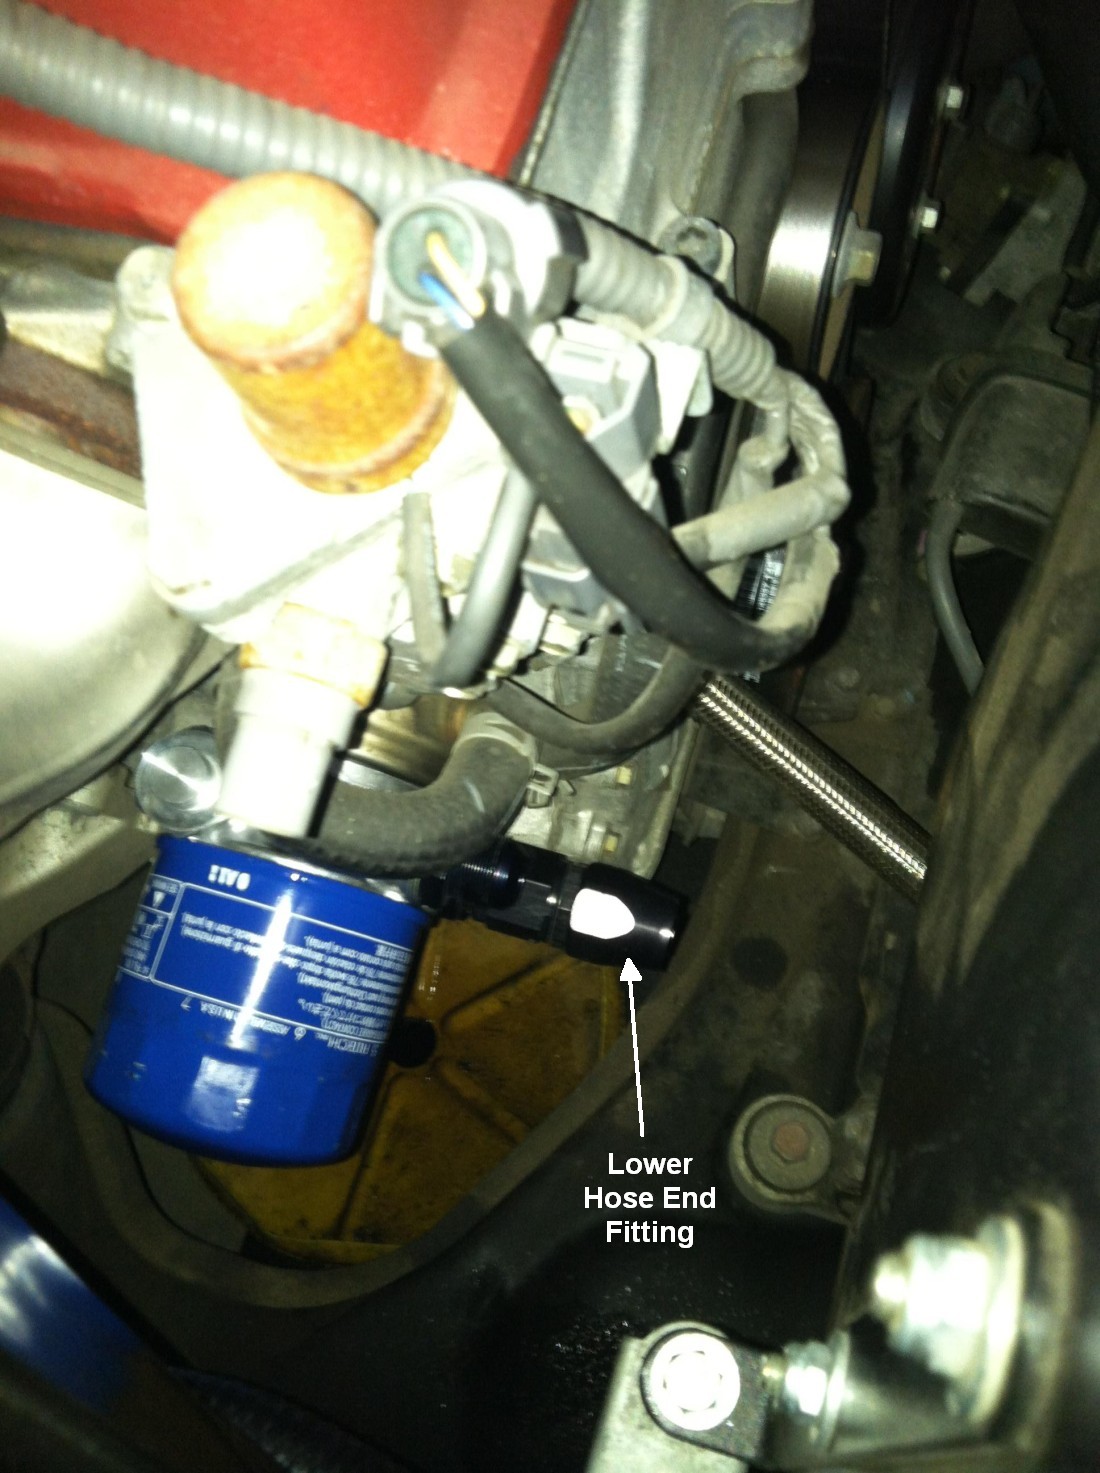
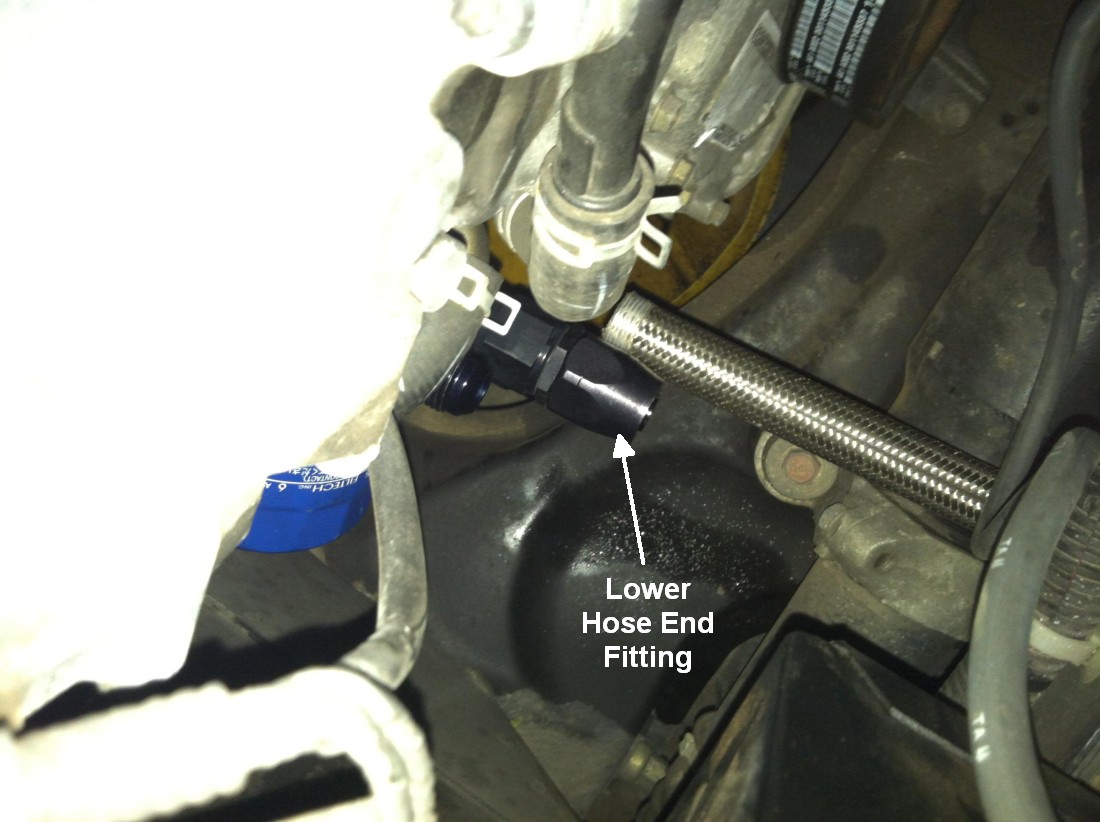
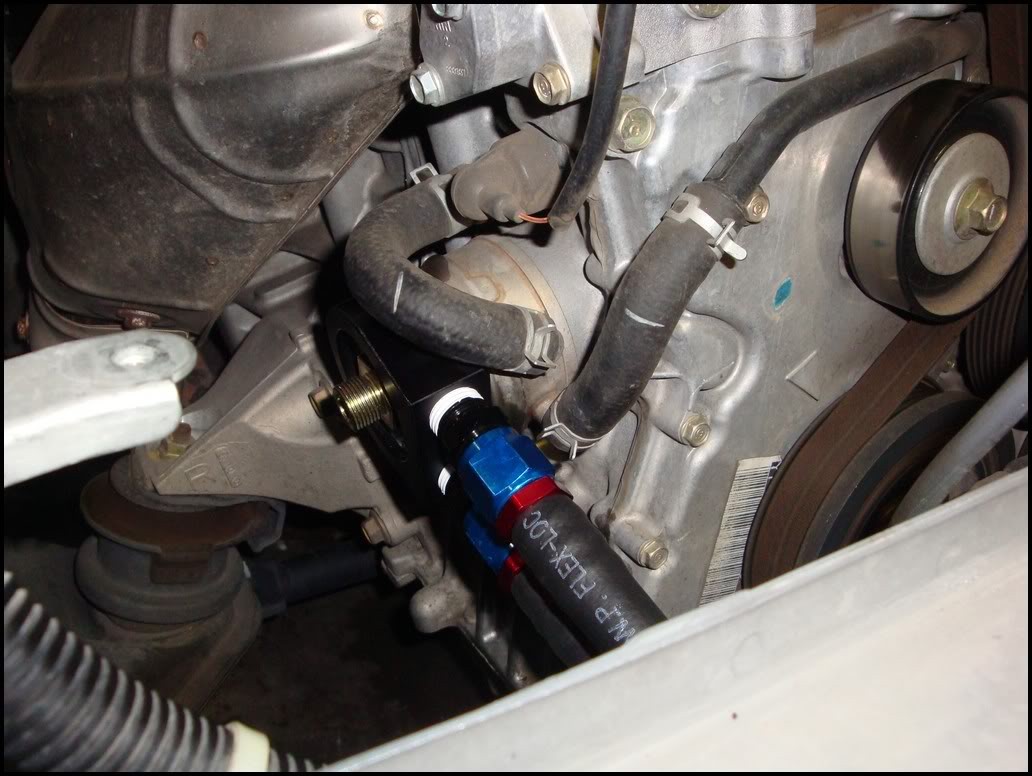
Step 9 – Test fit the AN fittings on the sandwich plate. I used a 45 degree fitting on the top of the sandwich plate and a straight fitting on the bottom of the plate. Do not tighten down the fittings at this time.
Lower Hose AN Test Fit
Step 10 – Test fit the AN fittings on the oil cooler. I used a 45 degree fitting on the top of the cooler and a straight fitting on the bottom of the cooler. Do not tighten the AN fittings.
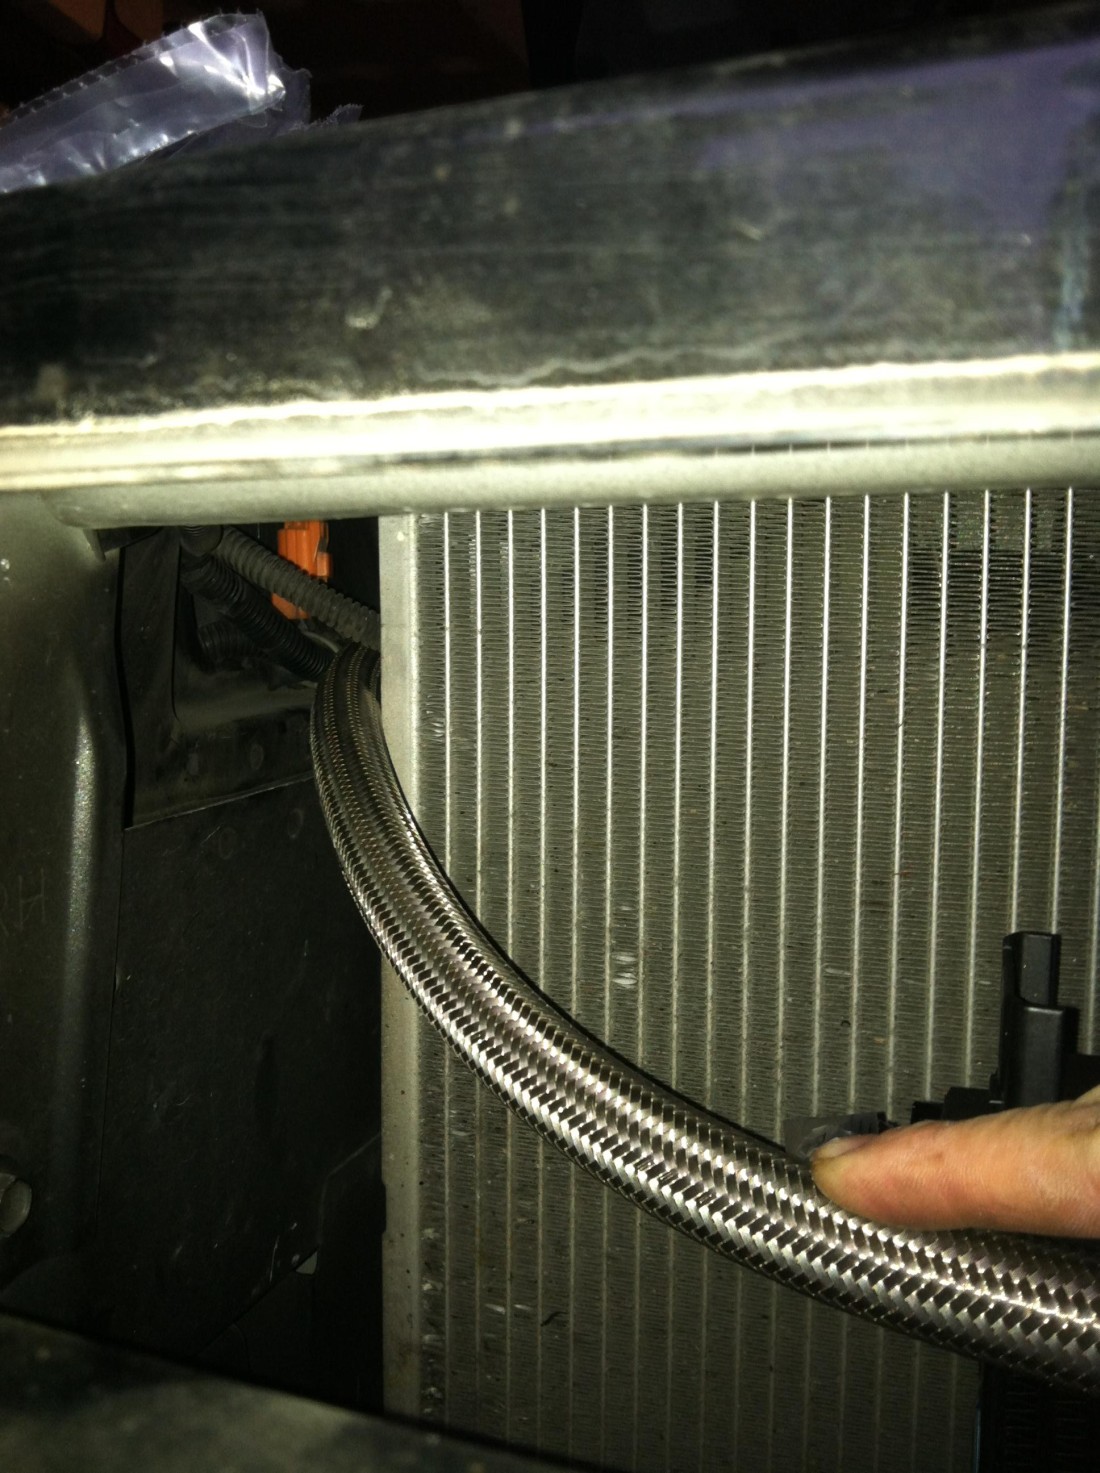
Step 11 – Test fit the AN lines before assembling. This is a really important step. You want to run the lines to minimize their length and to minimize bends, both of which can lead to a drop in oil pressure. You also want to avoid sharp edges which can cut into the line leading to a leak and possibly a fire.
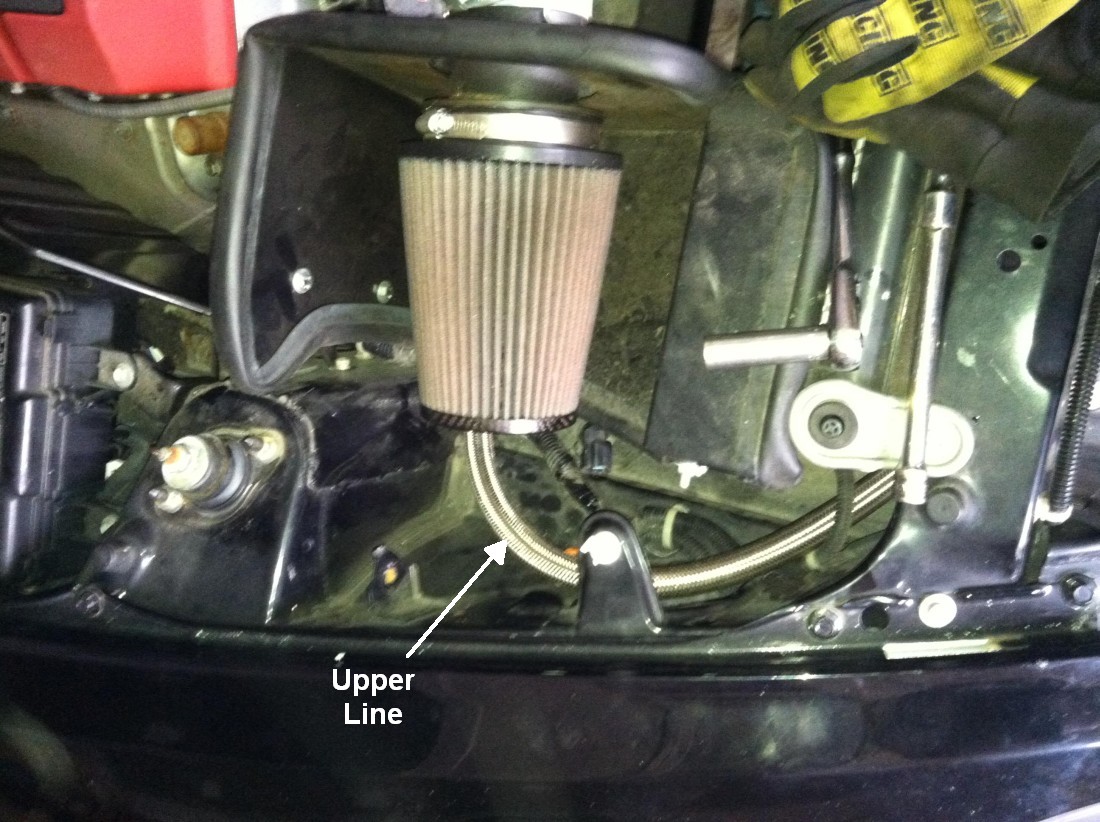
I ran the lower line under the frame crossmember in front of the engine and the upper line over the cross member. It worked for me, but this is a race car with no AC and an aftermarket air intake. The key is measure about 20 times before cutting the lines.
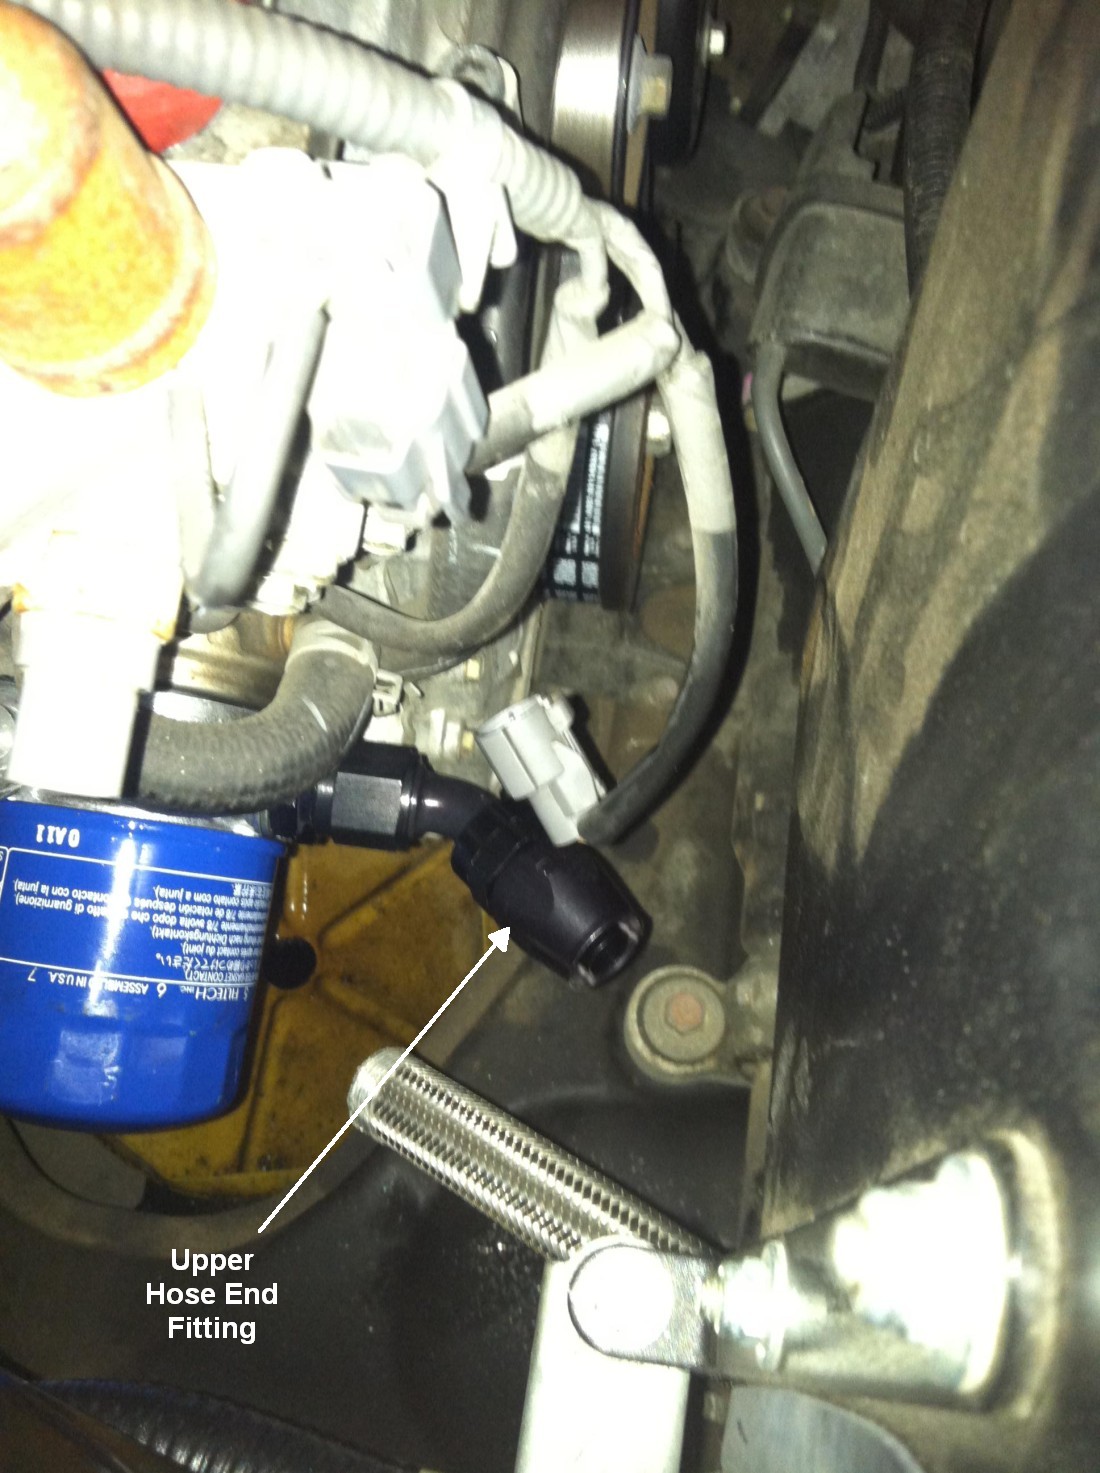
Step 11a – Test fit the upper line and mark the hose for cutting. Remember the hose goes into the AN fitting about ¾ inch or so.
Upper AN Hose Test Fit to Sandwich Adapter
Upper Hose to Upper Oil Cooler AN Fitting

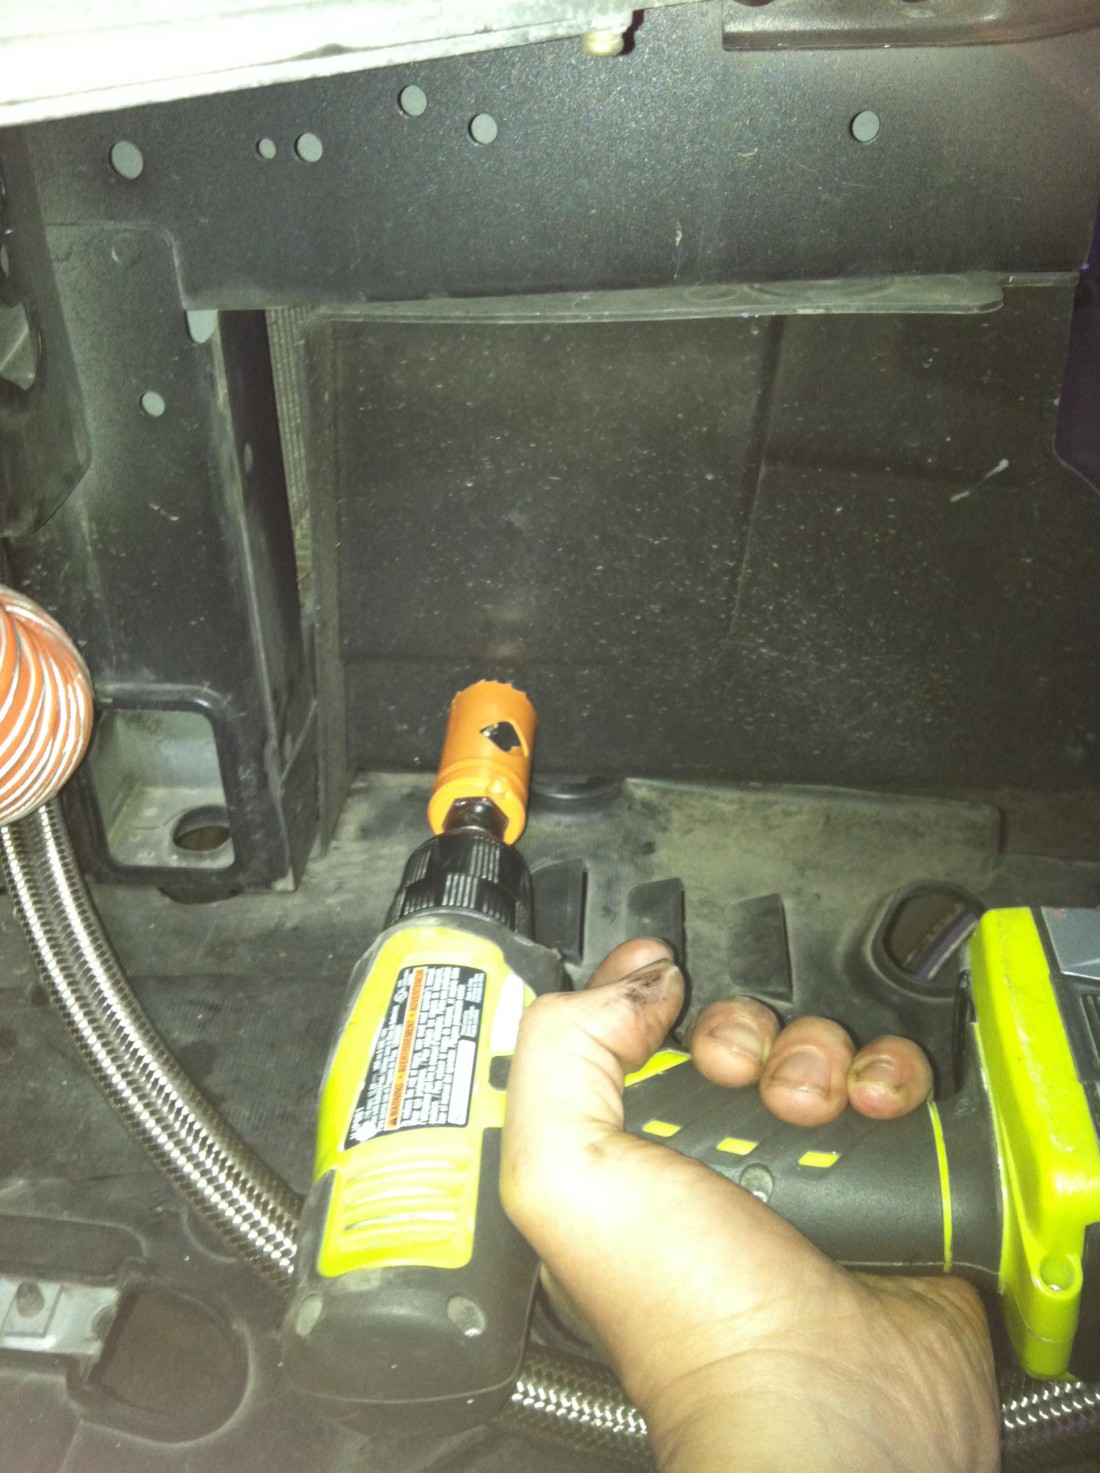
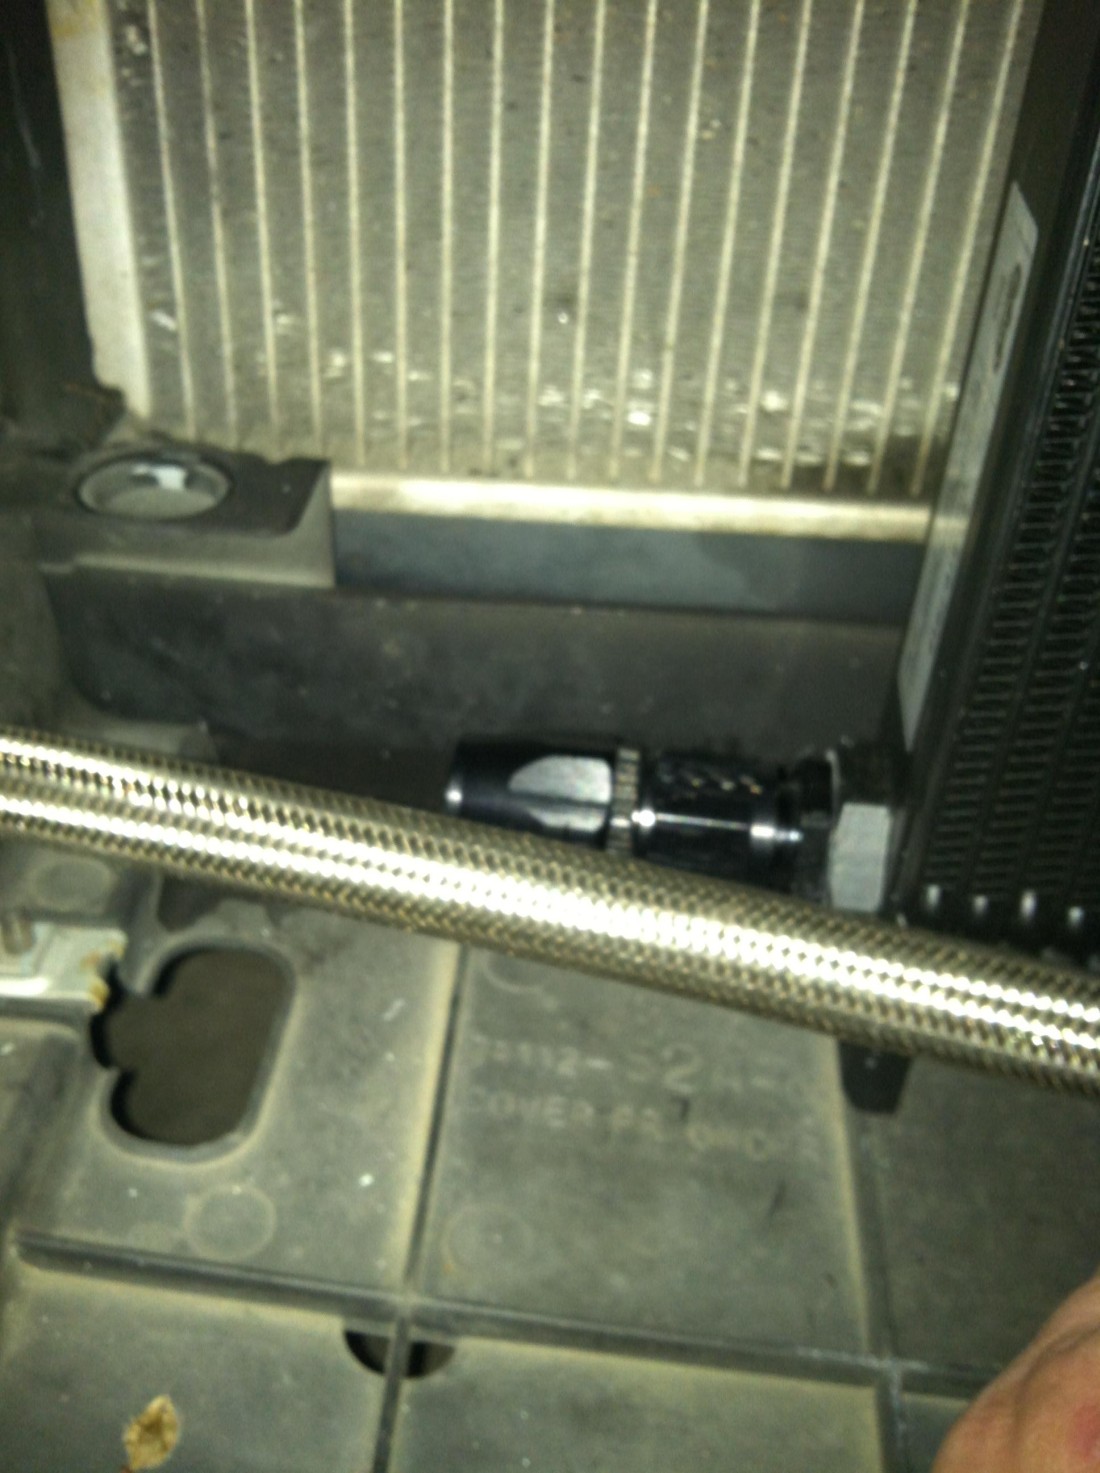
Step 11b - Test fit the lower line and mark the hose for cutting. Remember the hose goes into the AN fitting about ¾ inch or so. Drill a hole in the plastic about where you see the drill placed. I had to drill 2 holes as the first one created too tight of a bend in the hose. Install your hose support clamps. The clamps will support the weight of the lines and prevent the hose cover from eating through anything it touches. Test fit your hoses through your support clamps to make sure they're cut to the right length. The orange hose in the photos below is brake ducting.
Drilling Hole for Lower Line Through Passenger Side Radiator Shroud
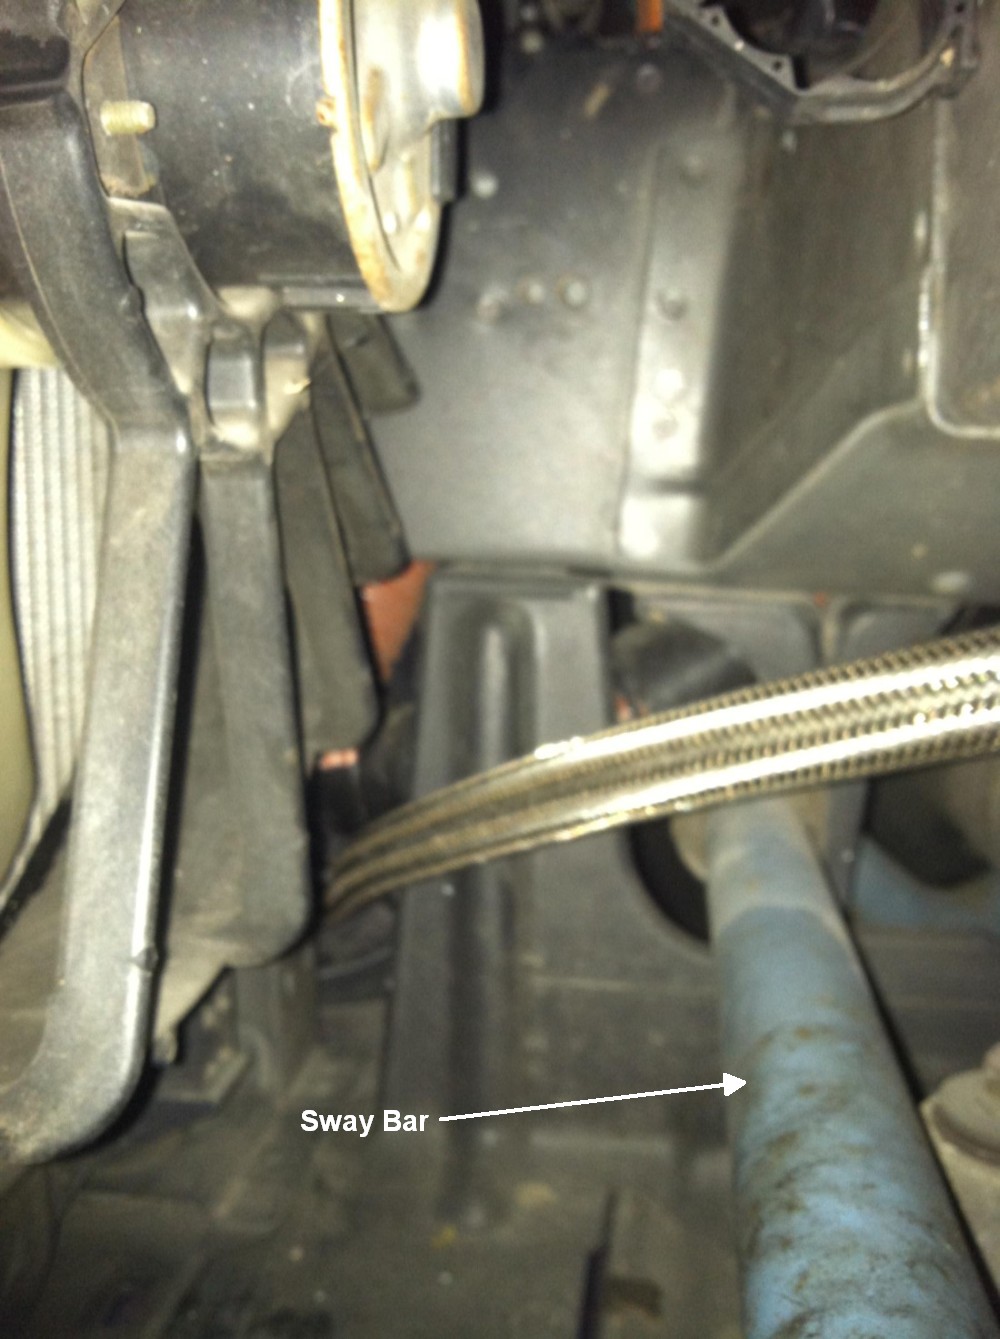
Lower Hose
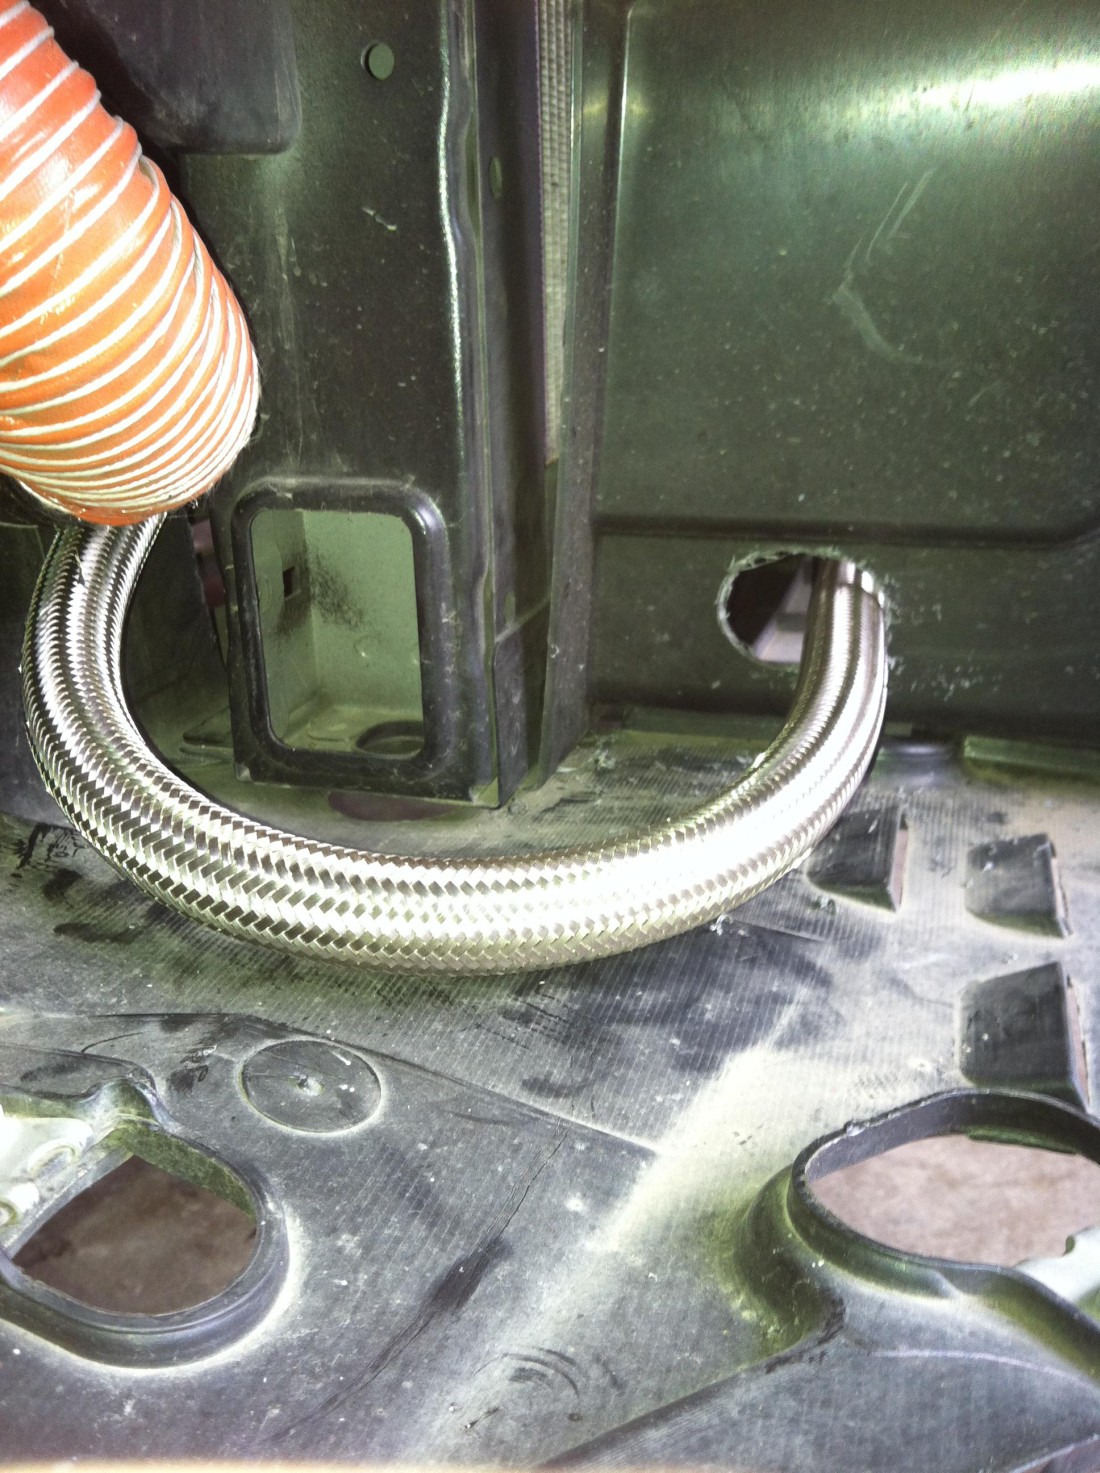
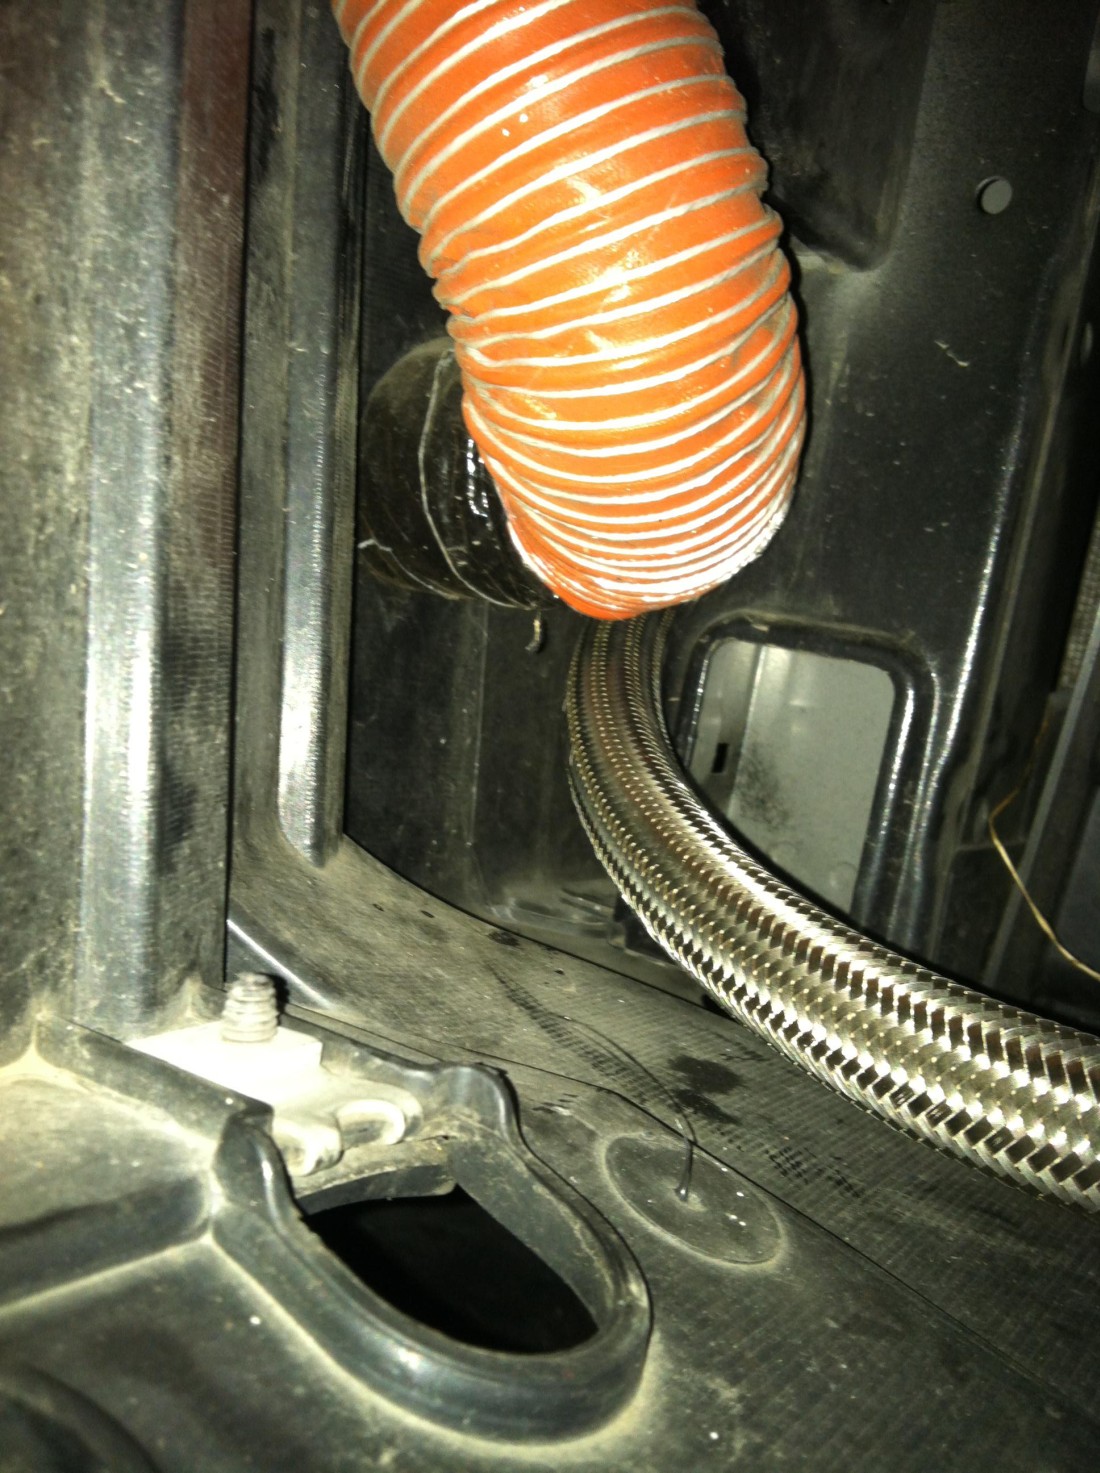
Lower Hose Over Sway Bar Around Passenger Side of Radiator
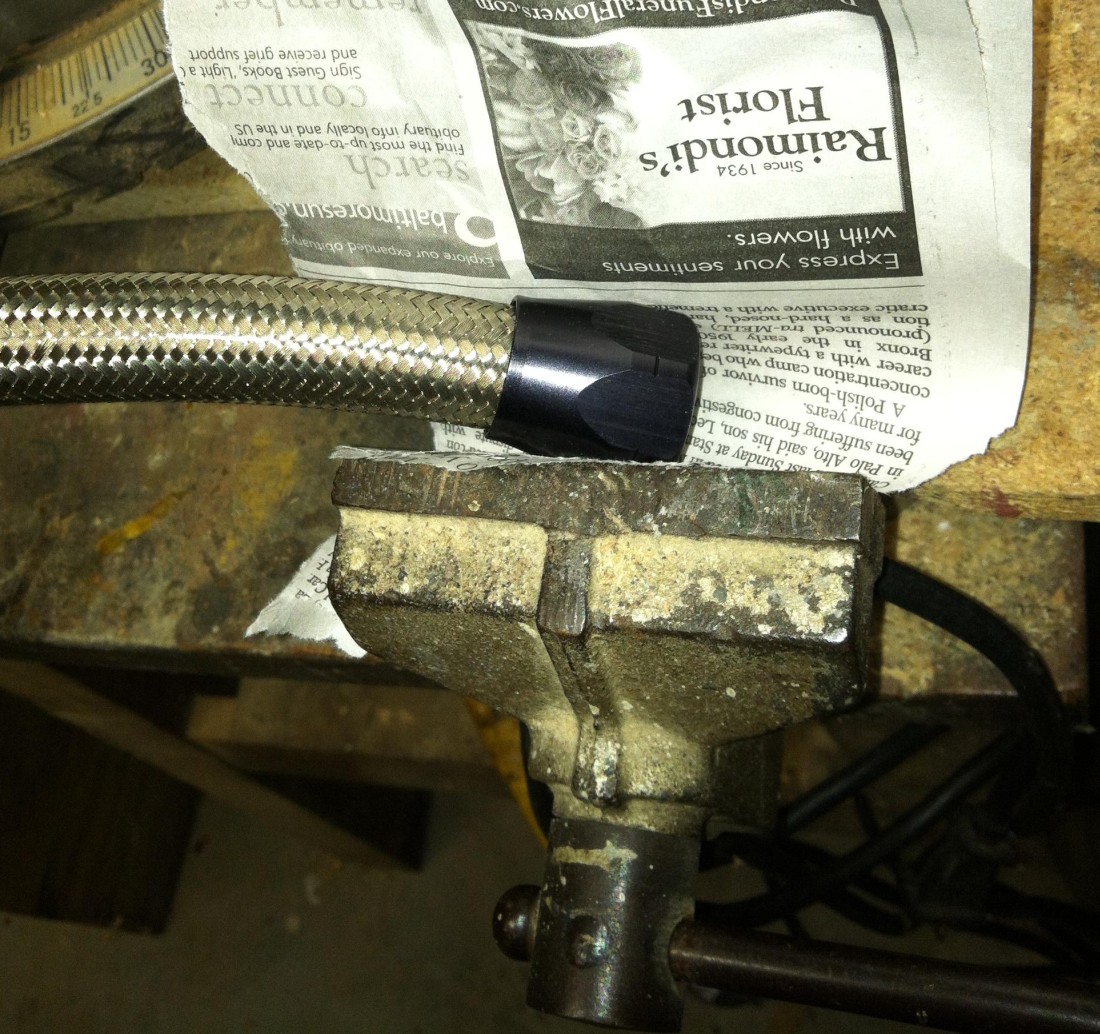
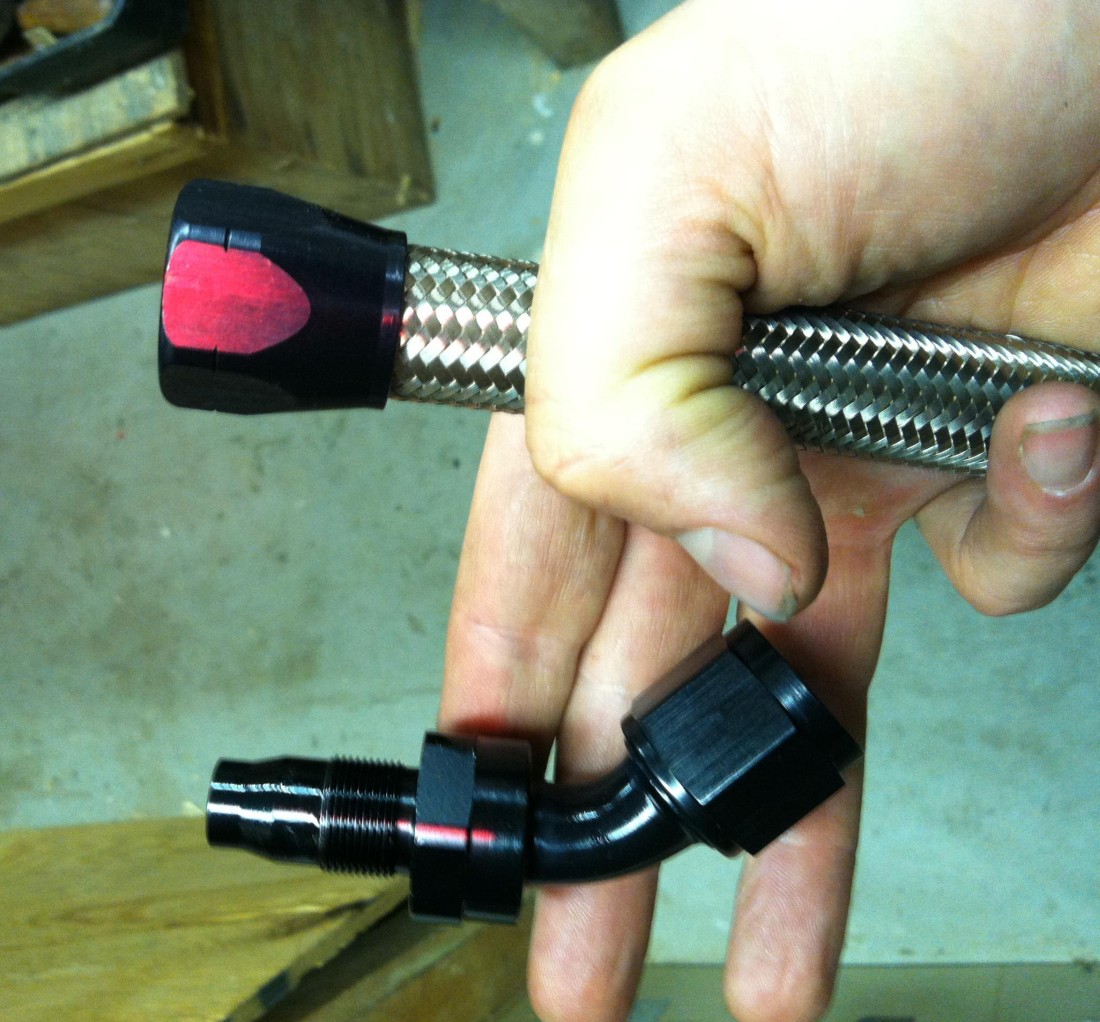
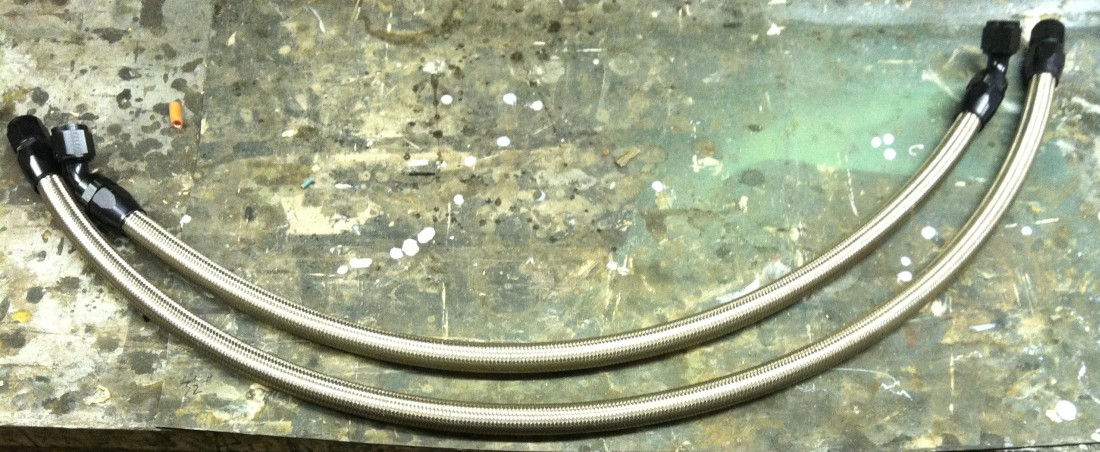
Step 12 – Cut the AN hose and install the AN fittings. I will not describe the process, but it's no fun. Here's Aeroquip's line assembly instructions. If you follow my routing, you will end up with one line with two 45 degree fittings on either side and one with 2 straight fittings on either side.
Step 13 – Route the AN lines and tighten to the oil cooler and sandwich plate. Make sure to follow the manufacturer’s recommendations on tightening. They are compression fittings, so they do not need to be really cranked on. Also, you want to put a wrench on the oil cooler housing to prevent it from breaking when tightening the fittings.
Step 14 – Put oil back in the car. You will probably use ½ to ¾ quart more than before.
Step 15 – Start car and check for leaks at idle. Stop it and add oil if needed. Drive the car and let the car run long enough for the oil to get hot and open the thermostat in the sandwich plate. You can tell when it opens by touching the oil cooler. If its HOT, the thermostat opened. Check for leaks.
Step 16 – Enjoy your prolonged engine life.
-Matt
Oil Cooler Additional Material
I recommend using Aeroquip socketless -10 AN hose and socketless hose ends. It's much easier to cut this hose to size and it's not stainless steel braid covered so it won't eat through anything it touches and the hose ends are simple to install, you just slip the hose onto the fittings:
Hose, AQP Socketless, Rubber, Blue, -10 AN, 10 ft. Length (rated to over 300ºF)
Fitting, Hose End, AQP Socketless, Straight, -10 AN Hose Barb to Female -10 AN, Aluminum, Red/Blue (need 2)
Fitting, Hose End, AQP Socketless, 45 Degree, -10 AN Hose Barb to Female -10 AN, Aluminum, Red/Blue (need 2)
Another Oil Cooler Installation
Standard Blue & Red AN Fittings
External Oil Thermostat
If you install an external oil thermostat like the one pictured immediately above you can get a sandwich adapter without a thermostat but with input and output ports for the oil cooler and a single probe port for oil temperature or pressure.
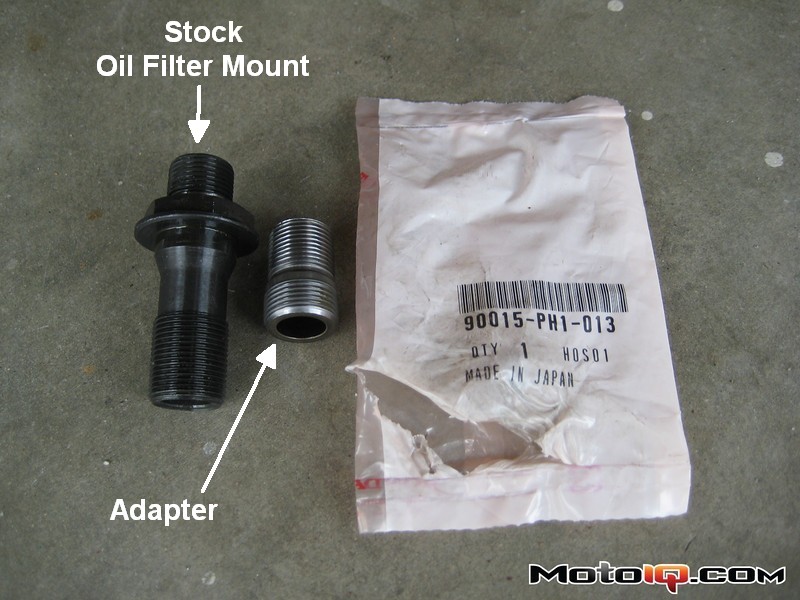
Some people choose to remove the stock oil/coolant heat exchanger. It's a sandwich adapter added by the factory to warm the oil when it's cold and cool the oil when the engine's hot. Honda sells an adapter (shown below) to eliminate the stock heat exchanger. This should be done if you plan to stack two sandwich plates like in the second picture below. This second adapter plate was used to add an oil pressure and temperature probe.
Adapter to Eliminate the Stock Oil/Coolant Heat Exchanger
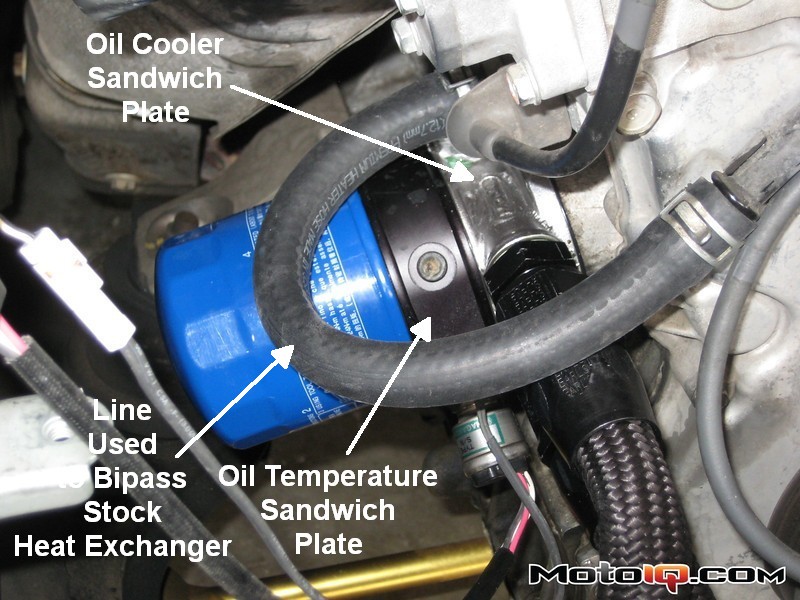
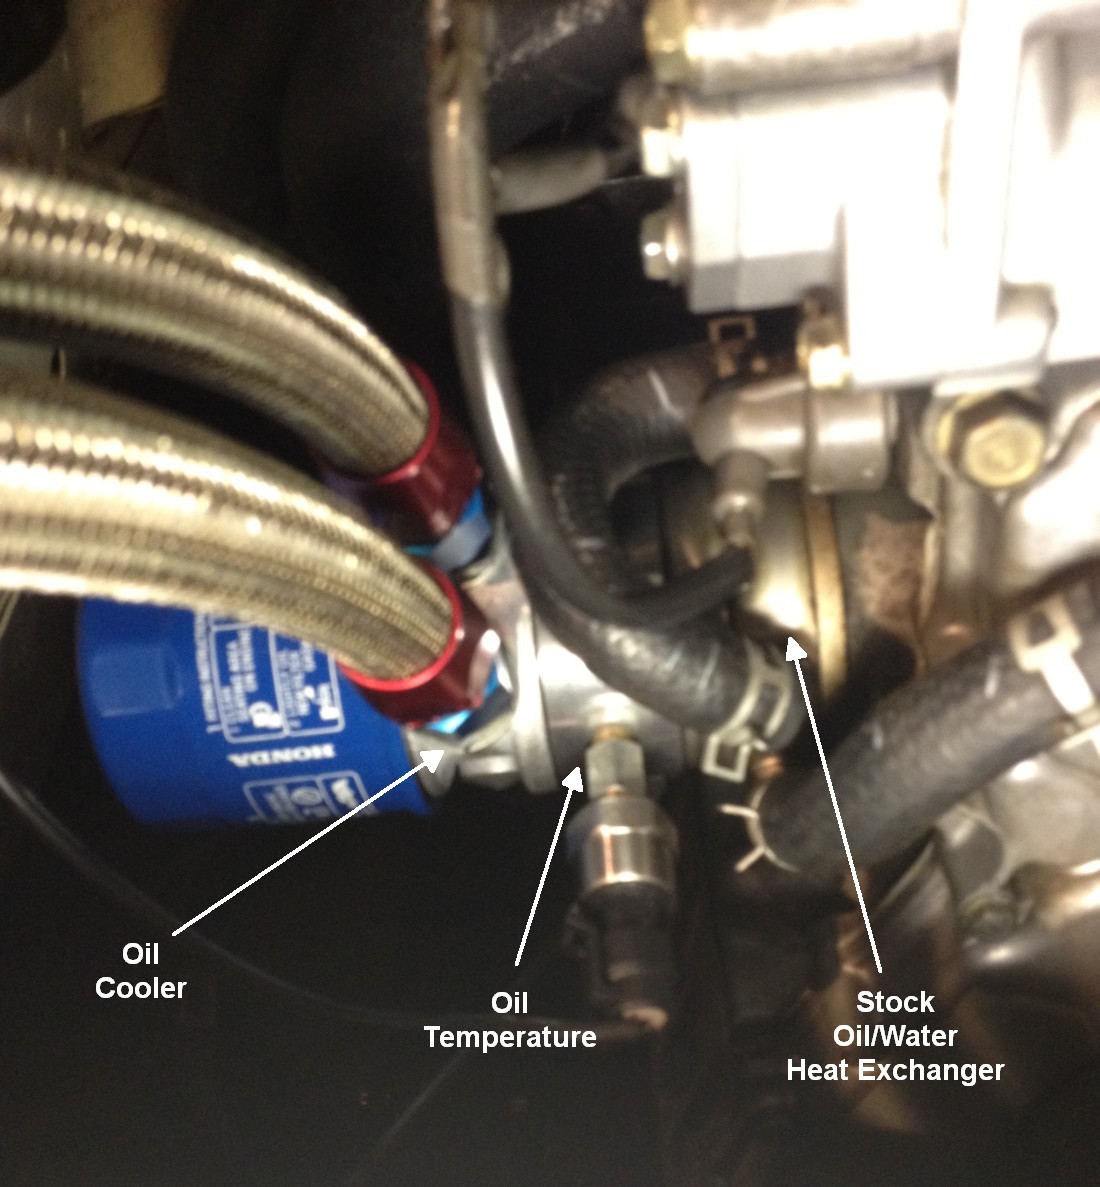
Stock Heat Exchanger Removed with Second Sandwich Adapter Added for Oil Temperature Sensor
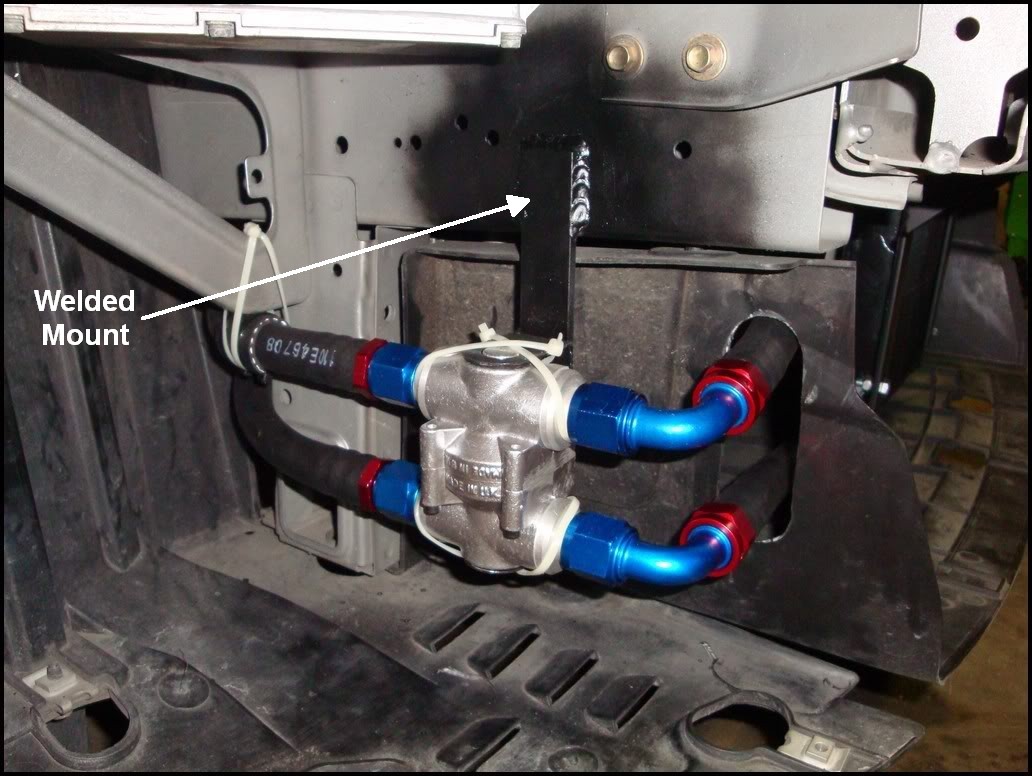
Triple Stack Sandwich Adapter Install Using AN-10 Lines
[Rob Comment: I don't really recommend a triple stack]
Cooler Mounted to Bumper Support
Additional Oil Cooler Install Info
I personally followed the tutorial this weekend and purchased all my parts according to the guide posted on your website. The install went well for the most part, but mounting the oil cooler with my AC on was tricky.
I wanted to use the bumper support, but drilling into it without using additional mounts besides the Setrab mount was going to prove a little tricky. I ended up mounting the oil cooler on the little strut bar immediately behind the bumper support. Unfortunately, during the re-install of the bumper, I realized the grill of the bumper was interfering with the location of the oil cooler, so I had to not only cut my radiator fan shroud, but also the back of the bumper grille. It was time consuming and still placed the oil cooler in a very risky place - a small front collision could severely damage my cooler.
The next morning, I started looking for solutions. I found that on eBay you can find full S2000 kits like this that include custom brackets:
The key word you have to include to find these kits is "bracket" - ie searching (without quotes) "S2000 oil cooler bracket kit".
However, I wanted a little more peace of mind with quick delivery, so I figured out after a few calls that, unlike the Chinese eBay sellers, Mishimoto will sell you their custom S2000 oil cooler mounting brackets for the 19 ROW 235mm coolers (Mishimoto uses the same core as the one in your guide, but just their brand) separately. They run $25 including shipping to California, which is a great deal for a custom mount solution. I did contact 3 Chinese eBay sellers and none of them would sell the brackets alone. :(
I will likely order the Mishimoto brackets, uninstall my strut bar solution and re-install with the custom mounts.
Anyways, thanks for all the guidance on your website. It looks like you host the S2000 stuff for Matt Briddell. Regardless, your site is a treasure trove of resources and I'm sure I speak for many of us when I say we're grateful for your work.
Cheers,
Mark